
We had 2 the inquisitor, 3 skill and 6 peaceful skills in the first half of the game, half a ton of materials for crafting in a whole variety of containers of all varieties and sizes, grenades, barrels of oil and poison, and also the non-emptying Nurrid mug, builds on secret documents and incessant circulation of merchants each level. Not that it was the necessary headroom to complete DOS EE in Valiant Mode., but if you start collecting trash for the sake of saving another fictional world, it becomes difficult to stop. The only thing, what caused me concern was telekinesis. Nothing in the world is more helpless, irresponsible and vicious, than killing enemies with telekinesis. But I knew, that sooner or later we will move on to this rubbish.
Introduction
If this is your first time launching the game in tactical mode, and even starting classes, then most likely not once (including, in the very first training battle). Valorous Mode proposes to complete the game according to the rules of the tactical mode, but with just one save.
Every skirmish in the early levels may be the last. And the dastardly game is automatically saved after the death of any character and ends with the death of the entire group, with the loss of many hours of progress.
The game also has numerous traps and non-obvious game mechanics., which are better to eat on your own.
I am, from my side, I will show you how to pump a number of peaceful skills almost to the cap and bring you by the handle to 8-11 level, which will allow you to be (average) on 2-3 levels above any encountered enemies, including the last boss.
Tactics, which we will stick to, sounds like visiting high-level locations ahead of time and completing simple tasks in them. Respectively, the higher the level of the characters, the more spoilers. I won't hide anything, after reaching the 8th level, read at your own peril and risk.
For clarity (but to some extent because of laziness), the passage will be on the example of double wolves-lone, but the tips are suitable for any group.
PART I. The wolf's feet are fed
Initial builds and general considerations
Depending on the class chosen, the starting weapon and armor will differ. In this regard, the knights look delicious., beating out of invisibility. But we choose inquisitors for the future, because they have wands (imba and not counter) as many as two elements - fire and air, but we don't really plan to fight at all. The bottom line is, what the wands have 100% (sic!) chance of hitting enemies of any level and type, good range and useful added skills. A plus, even starting wands are enough to create a real hell on the battlefield with the help of some items and skills.
As for the builds, we will essentially have one, with slight variations.
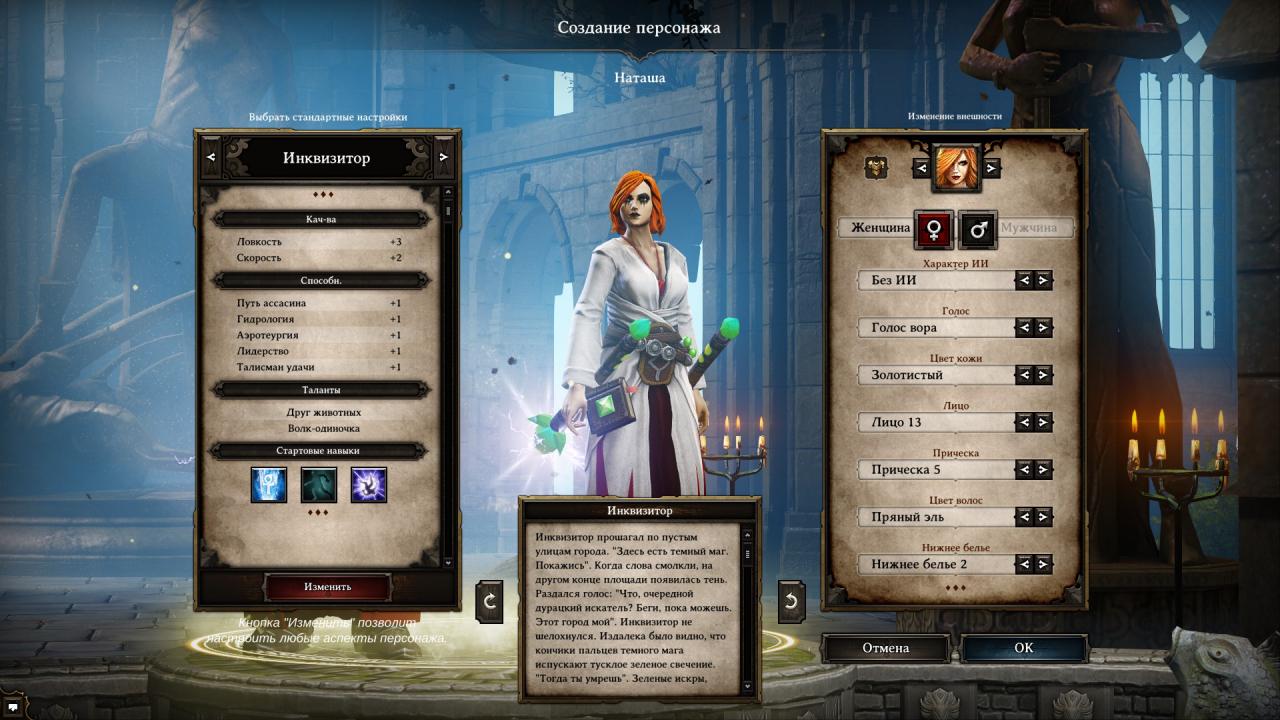
Natasha (1 skills.):
- Talents: Lone wolf, Animal friend;
- Characteristics: Agility +3, Speed +2;
- Skills: Aerotheurgy +1, Hydrology +1, The way of the assassin +1, Leadership +1, Talisman of good luck +1;
- Skills: Teleportation, Walk in the shadows, Regeneration.
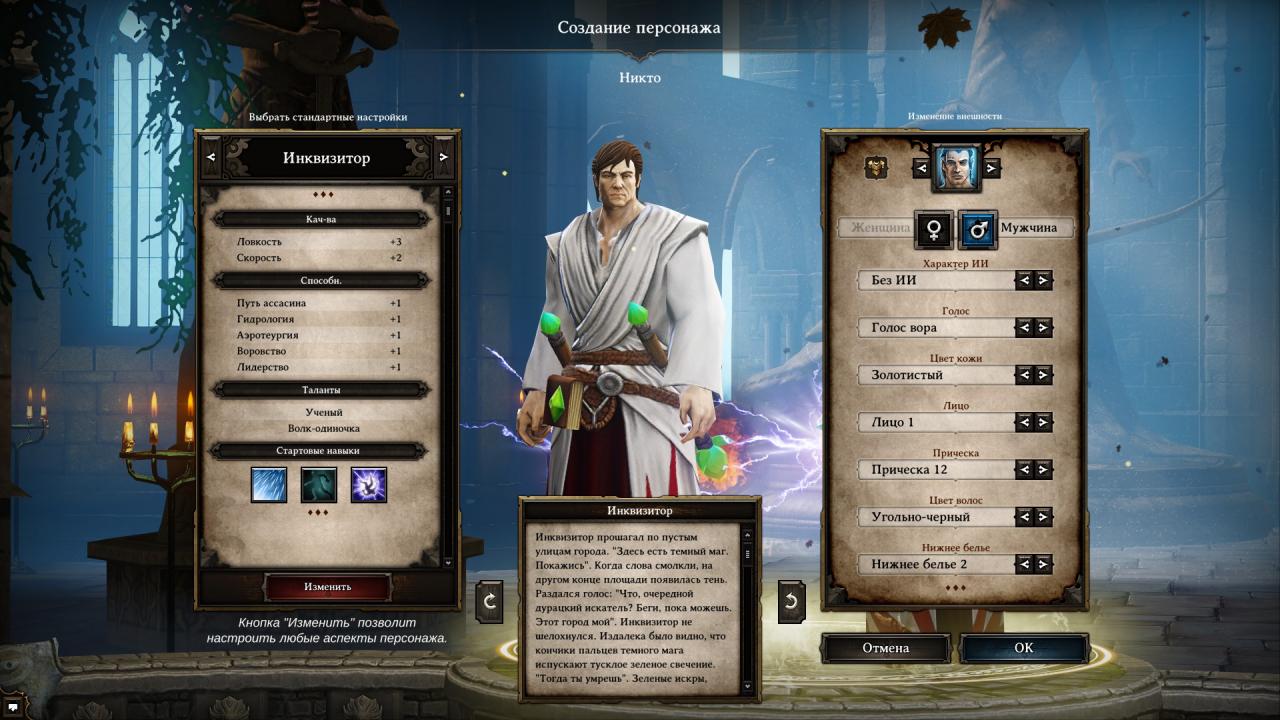
No one (1 skills.):
- Talents: Lone wolf, Scientist;
- Characteristics: Agility +3, Speed +2;
- Skills: Aerotheurgy +1, Hydrology +1, The way of the assassin +1, Leadership +1, Theft +1;
- Skills: Teleportation, Walk in the shadows, Rain.
Teleportation and Shadow Walking are skills, which completely break the game. The first skill allows you to move objects, enemies and loved ones (or by a small train one object for long distances); the second is to steal, sneak into a location without a fight, run away from battle and hide, if the battle is not in your favor.
Since we play as double lone wolves, we will have to share responsibilities. Natasha is a merchant, negotiator, scout, cracker and opener of all kinds of boxes. Nobody is a thief, second negotiator, blacksmith and handicraftsman.
After the fifth level, as belts and amulets appear on sale, we should ideally get the following picture on peaceful skills:
Natasha:
- Charm 5: One point per skill, 2 tooth rings, Smelly panties, amulet with a tooth or any charm amulet.
- Exchange 5: Two points per skill, Characteristic Selfishness, boots, amulet.
- Breaking into 5: One point per skill, 2 rings, place your order, belt.
- Knowledge of legends 4: One point per skill, 2 rings, fang amulet or any amulet for the knowledge of legends.
- Talisman of good luck 10: Two points per skill, Characteristic Romance, 2 rings and belt with hare paw, shield, dagger, jacket and boots.
No one:
- blacksmith craft 5: Two points per skill, Scientist talent, place your order, belt.
- Craft 5: One point per skill, Scientist talent, Characteristic Pragmatism, place your order, belt.
- Theft 5: Two points per skill, ring, belt, boots.
The dagger and jacket for the talisman of luck are randomly created by blacksmithing and crafting in 5 respectively. Therefore, we do not sell daggers and, at least every level, collect materials for crafting.
Rings and belt for the talisman of good luck; rings, belt and amulet for charm; amulet for the knowledge of legends - can be created somewhere on the third level of the craft, recipes will be given along the way. Anything that cannot be crafted will need to be bought from merchants.
… and until you reach the specified characteristics, you will have to bypass all merchants at least once per level (and materials for crafting are already desirable for you to constantly buy). Further, I will not specifically remind you of this.: yawned and did not buy the item on time - it means that you yourself are throwing sticks in your wheels and complicating the passage.
Important nuances before starting
2) What things for crafting are worth paying attention to? Plants Stardust, Catalyst; rubies, essences of the elements, tortured souls, skulls and bones, sheets of paper, pure elemental scrolls, nails, sticks, logs, veins, rags, scraps of leather, animal skins, wreckage of armor. By 5 threads / ropes for amulets / belts per character should be enough for the whole game. Inkwell with a feather and a thread with a needle - in a single copy. Steel, iron ingots and the corresponding ore - after finding the 3rd star stone.
3) What items should you pay attention to? Buy items, enhancing characteristics or skills, especially peaceful. At the first opportunity, buy rings for burglary and at least one ring for theft, of any quality and at any price. Both characters need helmets for leadership, and Natasha - objects for perception and exchange.
Also, worth buying items, giving immunity to effects, besides the charm, fear and damnation (Priority is fire resistance, stunning, knockdown and slowdown.) If you are not building certain builds, do not take low-level items to resist the elements - because. a little bonus won't help you in any way, and their prices, usually, horse. Damage recovery can also play a cruel joke, healing enemies immune to this damage. Items, applying some effect on impact is probably good - only I'm always too lazy to find out what kind of effect it is, but the description simply does not fit and nothing is clear. Skill-adding items can be useful early on in the game, which we plan to skip - and therefore, usually, it is better, instead of an additional skill, to have resistance or enhancement of the characteristic.
Generally, the items with the highest weight and the lowest cost should be disposed of, gold only equalizing the final value. Leave books and skill scrolls: scrolls find use throughout the game, and many of them can be turned into books, so as not to buy at exorbitant prices from merchants. Leave at least one rod of fire and air. Leave arrows and heads, even if you don't plan to play as archers in the end - bows in the middle of the game are very powerful.
Sell food, read lore books and recipe books, grenades (Besides, except that, charm / cure / smoke screen), equipment without modifiers and weapons (except knives, of wands and that, what can be turned back into ingots - this will be a note about crafting), paintings, gold dishes, gems (except for lunar and rubies). Quest items, usually, can not be sold, but there are exceptions: if you are not sure - do not sell.
4) Go to settings. Parameters -> Game. Disable autosave. In DOS EE, Iron Man is not as tough as in other games, and before someone from the group dies there is an opportunity to replay something. You may want to flog containers, you accidentally poked the wrong dialogue option or into some activated item - and then autosave. You can look into the Options -> Management. At the very bottom there are camera turns left / right - set to E / Q, respectively, since there is camera movement on WASD. And the distance of the camera by some T.
5) On R / F, implemented circular switching of panels where you can drag weapons, skills and some subjects, and then activate by 1, 2, …, 0. The process is creative, but the main thing is that you do not get confused and do not frantically search for skills in battle.
6) C - stealth (in battle - for 5 FROM), for stealthy movement and theft. On Alt, highlight some items, which can be picked up.
7) M - card, L - log, K - skills, I - inventory. There is a Craft button in the inventory, opening crafting window.
8) F1-F4 - Switch between characters. By pulling the character icon - you can break the chain and act separately. In the same way, you can change the order of the characters., next to there is a button for switching combat formations.
9) Tab - get / hide weapon, held CTRL - attack environment, items, NPCs and enchanted enemies.
1 level
Entertaining game mechanics #1:
1) The unhealthy mind of the developers shifted part of the character leveling to the so-called character traits, which are taken in certain dialogues between themselves and other NPCs. Everyone is taken to the 4th level. 9 character traits, and there are usually several dialogues for each trait. The problem is, that being good in words is almost always beneficial, even if in fact you are a total scum in the game, robbing and killing NPC. It completely kills the roleplaying, for the same immunity to charm looks much better, than +1 to the charm. What features to choose - decide for yourself. But I recommend to be positive except for the traits Pragmatism-Romanticism and Altruism-Selfishness - we choose negative traits for Natasha.
2) If you need different traits or you convince someone, you have to complete the rock-paper-scissors mini-game. Draws (stone-stone, scissors, paper-paper) - not. AND, in theory, if you choose an item that was not in the previous outcome - you will win, if you choose a counter of the opponent's previous outcome - lose. But this is not always the case.. Even having 10 points in Charm, you have every chance of losing to that, who has everything 2-3 points. it, actually, adds interest to the passage, but it doesn't suit us - so we save right in the mini-game and achieve the desired result.
3) If you lose a mini-game and feel, that you will now be kicked - do not end the dialogue, and download immediately, for there may not be time.
##
(300/2000, +Romance / + Pragmatism) We take and read a book from the corpse - the quest Talking statues begins.
We move left to two boxes, there is a unique backpack with a love grenade, helmet for the Talisman of good luck and junk - give it to Natasha.
Entertaining game mechanics #2:
1) A character with the Talisman of Fortune skill has a chance to draw an additional item from any container, depending on the level of the location - which helps a lot with money and equipment at the start. The probability of a skill triggering and the chance of dropping an item of a certain type depends on the skill level (Previously, the cap was in 6 levels, now it seems to be in 10, although I did not notice much difference). Generally, you should wait with containers until about level 9-10 in the Talisman of Fortune and at least level 5 characters (more on this below).
2) While one character speaks, the other can steal, attack and apply skills. In this way, eg, you can easily kill some rats at the start and rob characters only in stealth.
##
Romantic and selfish Natasha will offer the whole game, usually (but not always!), full game, disadvantageous, or even completely dangerous for the group and therefore she should lose to her partner in a mini-game (but not give in, it is important). Making persuasion gear will make things much easier., well, in the first mini-game you have to suffer.
(430/2000, +Selfishness / + Altruism) We don't go up the stairs, but we go back a little and throw ourselves teleports to the shell. We take and complete the first quest - Shell on the beach.
(460/2000, teleport Saysil: Quiet beach) We move on to the teleport, take a shovel.
(1540/2000, +Independence, +Compassion) We go to the right of the dog and talk to the legionnaire, buy a pomegranate with nails for a golden chalice, landscape and a handful of coins. Parallel, rob both. We refuse to be accompanied, after the end of the battle, we regret what we did. The fight itself is not difficult: teleport the archer across the bridge, swordsman left; then we go into invisibility and behind the archer; restoring OD we kill the archer, then the dog and the swordsman.
(190/6000, +Independence) Now we go back to the stairs, which we did not begin to climb earlier - fight again. You can go from behind or from the side - no difference. But if on the side - then closer to the upper stairs, so that the archer does not shoot the knee (did not spend an arrow on sale). Generally, teleport the lieutenant twice behind the back, we finish on the second move, we go into invisibility and behind the archers. We restore OD we take out archers, then swordsmen. We promise to look into the cave and run to Saisil.
2 level
No one (2 skills.): Speed +1; blacksmith craft +1, Craft +1.
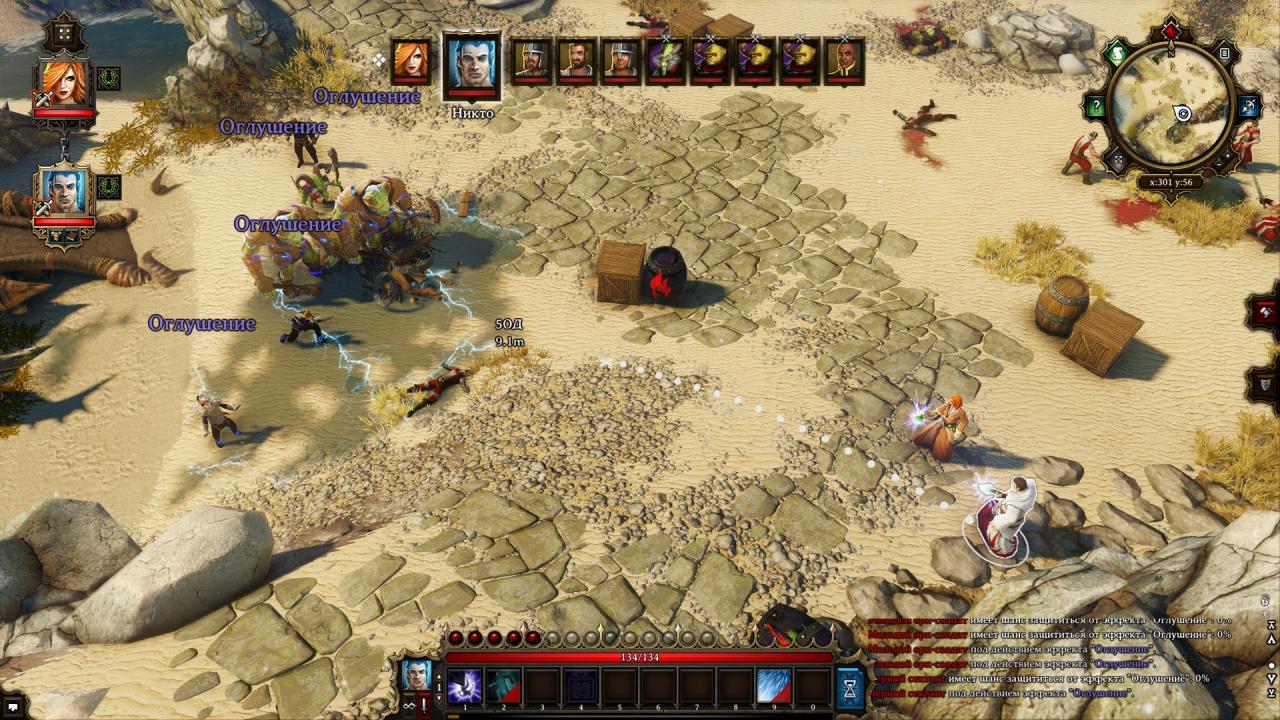
(1140/6000) We reach a barrel of water and see how 3 legionnaire beaten orc. If we go down, a crowd of enemies will drive up and a fight will start. There are several options for how to quickly deal with adversaries. You can teleport a barrel of oil and detonate. But I propose to change the fiery wands to the wands of air and in battle to rain in this way, so that the epicenter is in a crowd of enemies: a puddle forms under them, hitting which with a rod of air you can electrify water. Periodically shoot the wand at the water and keep the enemies in a permanent camp, first of all we take out the orc shaman. We don't get close to barrels of oil - enemies also like to blow up the environment.
(2130/6000, +Reputation) To the left of the gate, we pick up Stardust and make it rain on the ship..
(4120/6000, teleport Saysil: Harbor) We're talking to Arch, before exiting the dialogue, buy from him a repair hammer and a book of the Midnight Oil skill. Behind the gates we enter invisibility, picking up nails, craft 8 lock picks (a hammer + nails) and give them to Natasha. We activate the teleport in the harbor.
This is the end of the original prologue and the running around quests and locations begins..
The current task is to bypass all more or less significant Saisil merchants, collect loot for exchange, starting materials for crafting and completing a series of quests. Since. we are still level 2, even epic items will be relatively cheap. Try the coming 1-2 redeem the rings - then the exact same ones will cost every 4 more expensive.
In the near future, we need to get two sets from the merchants. “Ring”, two teeth; any one thing for: theft, breaking into, perception and knowledge of legends; two helmets for leadership.
Entertaining game mechanics #3:
1) The range of merchants changes every hour or after reaching a new level. therefore, if your level has not changed for a long time - run through the merchants, maybe they have something new.
2) By giving the merchant items for free, you can increase your reputation with this particular merchant. I recommend doing this somewhere on 8+ level, selling crafted items and all kinds of junk.
3) Each point of reputation is equivalent to 5 relationship with any NPC. High reputation, as well as the skill of exchange, improves prices. Reputation rises with completing certain tasks - and this is another reason to postpone improving relations with merchants., let's say, before clearing Saisil after level 8.
4) Rarity of items:
- Normal (grey) - An item of equipment that does not have any additional modifiers. Available from traders from the first levels.
- Unusual (green) - Equipment item, having at least 1 additional modifier. Available from traders from the first levels.
- Rare (blue) - Equipment item, having at least 2 additional modifier. Available from traders from the first levels.
- Epic (purple) - Equipment item, having at least 3 additional modifier. May have a built-in skill. Available from traders from the first levels.
- Legendary (pink) - Equipment item, having at least 4 additional modifier. May have a built-in skill. Available from traders from level 8.
- Divine (gold) - Equipment item, having at least 5 additional modifiers. May have a built-in skill. Available from traders from level 15.
- Unique (brown) - Unique piece of equipment, existing, usually, in a single copy and drop-down randomly. Modifiers and skills depend on the item.
At the start, try to buy items of the least rarity, mostly unusual - they are much cheaper than their rare and epic counterparts.
##
We run to the south of the harbor, past the extinguished ship, take the quest Sailors without a ship. Finding Conrad. We return to the portal - in the warehouse Sergeant Curtius.
(4420/6000, +Spirituality | The mourning orc) In the northwest of the harbor is the southwest gate. We leave through them and run along the beach to the Broggnar orc, we refuse to rob a grave.
We go east from the orc - we meet Karla, above it we select Stardust.
(4600/6000, +Righteousness) We run back to the city, climb the stairs to the market square (landmark on the map - Esmeralda's Shop). We convince the thief to return the fish.
In the market, under invisibility, we steal bows / arrows near the Arrow Merchant, paintings around a rooster and a mortar and pestle near Celia the Exorcist.
Now to Esmeralda's shop. We enclose the second floor: take away the key to Esmeralda's house, Pan and Smelly Panties (+1 charm) from the chest. We enclose the first floor without opening the doors. There are golden plates on the ground floor (7 PC.), which are not highlighted via Alt, be careful.
North of Esmeralda, another merchant - Selenia. We select an inkwell with a feather from her desk.
(+Compassion) Opposite Selenia, the chef's house - we release the chicken. Upstairs Quartermaster. We select weapons and a magnifying glass from the table.
East of the Quartermaster, Legion Headquarters, there is Aurey, get access to the crime scene. On the second floor we pick up the Magic Lockpick scroll and recipe books. We can trade with Arhu, but we do not speak.
(4790/6000, +Spirituality) In the southwest of Aurey we speak with a beggar, then we go into the building.
Back to the market square, and from there north: on the right we go around the tavern (crime scene on the map), go up the stairs and find the elf Eglander - start the quest Blood feud between elves and orcs.
(+Bravery, +Selfishness / + Altruism, +Independence, +Bravery) At the entrance of the tavern, we speak with Mendi, find out that there is work for seafarers.
In the tavern we speak with the cat Unsinkable Sam, loot pictures, we don't go to the crime scene yet. On the first floor of the tavern, trader Anna, on the second - Sheret. Doors on the second floor can be broken with wands, but it is better to open at the following levels.
(5960/6000, +Forgiveness, Star stone, teleport End Times) We speak with Eglander on the second floor of the tavern and go to the crime scene.
(50/12000, teleport Saysil: North gate) Now we have access to the portal from anywhere on the map - we will teleport to the northern gate. We buy from Arhu one more book Midnight Oil.
Craft
Weapons and armor created by you, will have much better parameters, than that, what can you find or buy. But also the requirements for the value of the characteristics, usually, above.
A whole bunch of recipes in the game, and they are obtained by reading the corresponding books in the game itself. Without knowing the recipe, you can experiment - the ingredients will not be lost in case of failure. If you want to delve into craft - visit the thematic wiki.
Here I will give you the most frequently used recipes and those, which you most likely need in the walkthrough (Just keep in mind, that armor and bows / crossbows, the rest of the weapon with modifiers is obtained by crafting 5 and blacksmithing 5 respectively), omitting the obvious (like how to get a needle with a thread having a thread and a needle):
- Big|Average [potion] = Catalyst + Average|Small [potion]
- Magic [Thing] = [Thing] + Pixie dust
- Pixie Dust = Bone Ash + Stardust = Moon Dust + star dust
- Stardust = Stardust (Plant) + mortar and pestle
- Bone dust = Skull + Mortar and Pestle = Bone + mortar and pestle
- Moon dust = Moonstone + mortar and pestle
- Large Iron Ingot = Iron Ingot + iron ingot
- Steel Ingot = Iron Ingot + Bake | Field kitchen
- Large Steel Ingot = Large Iron Ingot + Bake | Field kitchen
- [Ingot] = [Ore] + Bake | Field kitchen
—————————————————————————————————–
+ Charm:
- Tooth Amulet = Thread + Magic Tooth
- Tooth Ring = Set “Ring” + Magic Tooth
- Tooth Belt = Rope + Magic Tooth
+ Perception
- Amulet of the Third Eye = Thread + Magic eye
- Feather Ring = Set “Ring” + Magic feather
- Helm of the Third Eye = Leather Helmet + Magic eye
+ Talisman of good luck:
- Rabbit Foot Ring = Set “Ring” + Magic Rabbit Foot
- Rabbit Foot Belt = Rope + Magic Rabbit Foot
+ Speed: Rabbit Foot Amulet = Thread + Magic Rabbit Foot
+ Leadership: Starfish Helmet = Leather Helmet + Magic starfish
+ Knowledge of legends: Fang Amulet = Thread + Magic fang
+ Strength:
- Claw Amulet = Thread + Magic claw
- Claw Belt = Rope + Magic claw
+ Agility:
- Feather Amulet = Thread + Magic feather
- Feather Belt = Rope + Magic feather
+ Intelligence:
- Skull Amulet = Thread + Magic Skull
- Skull Belt = Rope + Magic Skull
—————————————————————————————————–
- Rod of Fire|Water|Air|Earth = [Inert wand] + Essence of Fire|Water|Air|Of the earth
- Blank Fire Skill Book|Water|Air|Of the earth|Sorcery = Pure Scroll of Fire|Water|Air|Of the earth|Sorcery + Pure Scroll of Fire|Water|Air|Of the earth|Sorcery
- Pure Scroll of Fire|Water|Air|Land = Sheet of paper|Parchment + Essence of Fire|Water|Air|Of the earth
- Blank Arcane Scroll = Sheet of Paper|Parchment|Deck of cards + Pixie dust
- Random Scroll of Fire|Water|Air|Of the earth|Sorcery = Pure Scroll of Fire|Water|Air|Of the earth|Sorcery + Magic feather inkwell
- Slip Resistant Boots = Nails + Boots
- Plates (+Health|+Talisman of good luck|+Armor) = Scrap metal + A hammer
- Leather armor (+Health|+Talisman of good luck|+Armor and + Initiative) = Pieces of leather + Magic thread with a needle
- Hoodie(+Intelligence|+Health|+Talisman of good luck|+Speed) = Rag + Magic thread with a needle
- Onion|Crossbow (+Damage) = Bow|Crossbow + Tendon
- Onion (+FROM|+Agility|+Speed) = Branch + Tendon
- Crossbow (+Damage|+Crete. hit|+Agility) = Crossbow without bowstring + Tendon
- Crossbow without bowstring = Branch + iron ingot
- Tendon = Vein + Lived
- Dagger (+Speed|+Agility|+Talisman of good luck|+FROM) = Knife + Anvil
- One-handed sword (+Damage|+Maximum OD) = Iron ingot + Anvil
- One-handed ax (+Damage|+Crete. hit|+FROM) = Steel Ingot + Anvil
- Two-handed sword (+Damage|+Strength) = Large iron ingot + Anvil
- Two-handed ax (+Damage|+Crete. hit) = Large steel ingot + Anvil
- A spear (+Damage|+Crete. hit) = Branch + Dagger
One-handed / two-handed ingot weapons can be converted back into ingots using a furnace or field kitchen.
—————————————————————————————————–
- [Armor with modifier + Stealth] = [Armor] + Essence of Shadow
- [Elemental Resistance Armor] = [Armor] + [Elemental Essence]
- [Armor with resistance to all elements] = [Armor] + ruby (So. one ruby is equivalent 4 essences of the elements, no rubies - sharpen consistently with essences of the elements)
- [Elemental Damage Weapon] = [Weapon] + [Elemental Essence]
- [Tenebrium Damage Weapon] = [Weapon] + shade bar
##
3 level
No one (3 skills.): blacksmith craft +1.
For what purpose did Natasha take the exchange - there is nowhere to do with the money, and in theory they are generally endless? So it goes so, but sometimes there are very tasty things on sale: stealing and creating items at low levels is not profitable, but there are not enough things for the talisman of luck. Moreover, in the long term it is still better to redistribute skills in the Hall of Darkness.
(1250/12000) We run from the teleport to the northwest, at the cemetery. Digging up Jarred's grave (we read the gravestones, grave north of the cross monument), teleport further.
(2150/12000) Cleaning the back rooms in Esmeralda's house, pick up the book Planning the perfect murder and the key to the chest in the tavern. We go down to the basement and press the button for a piece of meat; take the bloody dagger.
(2770/12000) In the tavern, from the chest at the scene of the murder we take a letter from the Duke of Ferolsky. We shoot pictures. We teleport to the harbor, open the warehouse with the Magic Lockpick, we clean everything that is bad, don't forget about the plates. We tell the sailors that a job has been found for them.
We start a new round of traders in approximately the following way: Conrad (equipment) - Portal to the harbor - Sergeant Curtius (equipment) - Karla (equipment, materials) - portal to the north gate - Selenia (equipment) - Quartermaster (equipment, materials) - Aurey (equipment) "Esmeralda." (equipment) - Celia the Sorcerer (equipment, materials) - Arrow Merchant (equipment) - Anna (equipment) - Sheret (equipment).
Now we need to create two charm rings.. Instead of a belt, we already have Smelly panties, and it's better to wait with the amulet - it may fall for charm and exchange up to level 6 - but you can create it as soon as extra stardust appears, not important.
It's time to complete all the available missions to persuade in Sisil and get a little screwed up.. Conversations talk turn Nobody.
(2990/12000) We go to the entrance to the city bath, which is between the town hall and the tavern. Separating Characters, giving back the pyramid Nobody, we put on rings with a tooth and smelly panties. We use the pyramid, going through persuasion. Now we have two pyramids - add them to the skill bar of each character.
(3770/12000) We clean the bathhouse and the town hall. On the first floor of the Town Hall, do not forget to talk to the cat Maxim. On the second floor of the town hall, we convince Victoria to give the amulet.
(5960/12000, +Reputation) Back to the tavern, talking to Unsinkable Sam. By this time, you should already have at least one item to steal. We steal the bloody amulet from Eglander and separate the characters. One character (with Victoria amulet), starts a dialogue with the elf, other (with a bloody amulet) at the same time hands over elf to Aureya. Do not forget to please Victoria with good news.
(6265/12000) We go to the morgue, what's north of the tavern. We read Roberts' magazine and convince the latter to give the money. Vacuuming nails for crafting.
(6835/12000, +Romance / + Pragmatism, Star stone) Now to Teliron's Asylum, what's in the market square, next to a merchant with arrows - to decide the fate of patients. We clean the premises by itself.
(8105/12000) Further - to the east from Teliron's sanatorium or southeast from Esmeralda's house, to artists. We find Cedric there (near the beggar), start the quest Warming up the crowd. I'm talking to Gallagher, then again with Cedric, persuade Gallagher. After the crowd leaves, talk to Reginald. After Reginald leaves, we take the head.
(8330/12000, +Romance / + Pragmatism) We teleport to the harbor, in the backyard of the warehouse we convince the legionnaires that it is necessary to kill the enchanted orc. We return things to persuade Natasha.
(9170/12000) Teleport to the north gate and exit Saisil through the north-east gate., which between Aurem and the Quartermaster. We run north to the water mill with two skeletons, I'm talking to Blossie. Find out about the church, we take the will.
(9710/12000, Star stone, teleport Saysil: Road to Silverglen, teleport Les Lukuly: Cecil's road) Now, using invisibility, stealth and pyramids, cross the bridge and run north. Behind the Fire Wanderer, another star stone, portal and new location - Luculla Forest, us there.
It was supposed, that you will enter the Forest of Luculla on 8-9 level, and not on the third. Respectively, killing enemies and completing quests here will raise the level of characters very quickly; and new merchants will allow you to quickly get the necessary resources, items and experience.
(11240/12000, teleport Les Lukuly: Silverglen) We're talking to Arch, which can now be found in the End Times. Moving northwest, collecting stardust along the way, we enter Silverglen, we leave through the western entrance, activate teleport. We apply a pan to the fire near the teleport, what was picked up in Esmeralda's house earlier - it turns out a field kitchen (It can be used to smelt ore into ingots., burn leather armor and cook food). If the field kitchen remains in your inventory, do not throw it away, now you are a full-fledged walking workshop. It will be advisable to later drag the anvil from the forge to this teleport, which is located in the settlement itself. Teleport to the End Times, we open a couple of rooms, collecting stardust. From now on, we can teleport any trash to our chests..
Silverglen has a new main trader chain: Nadia (equipment) - Loic (equipment, before passing the test - the test is not yet passed) - Myself (materials) "Elleri (equipment, materials) - Mikhail Solomatin (materials) - Beekeeper (equipment) "Windermere." (equipment) "Hassat." (equipment). In Nadia's shop we pick up a pickaxe, a bunch of wallets and junk for sale.
(2615/20000) After bypassing the merchants, we give Blossia's will to the waitress Marissa.
4 level
No one (4 skills.): +Handyman; Speed +1; Geomancy +1, Telekinesis +1, Theft +1.
Learning Midnight Oil for Each Character.
In principle, we do not need more than one theft, but here is the same topic as with exchange skills, telekinesis and talents Jack of all trades, Resourceful - speed up pumping at an early stage.
Why do we need telekinesis? To place barrels of oil in yourself without equipment bonuses, poison and water, and collect all kinds of goods a little faster. Moreover, some enemies can be killed with blunt damage from telekinesis-movable crate / barrel / chest, in which, eg, a bunch of barrels. It is very effective, and therefore an absolutely uninteresting strategy on the verge of cheating, we will not use it. But I could not help but mention this possibility in the manual..
(4545/20000, +Bravery, +Reputation) Before the next round of traders in honor of the new level, we go up to the second floor of the tavern “Pickaxe”, I'm talking to Bikki. Without leaving the dialogue as a free character, we teleport Bikki to the corridor.
(+Bravery) In the overseer's office, we take the quest for tenebria from Brandon, the issued box is immediately sent to the monastery. We take the quest for goblins from Laurence, so as not to forget later, and arrows from the table (they will be useful to us after the 8th level).
(12420/20000) Teleport to Silverglen and run north to a small camp of the immaculate, convince ourselves to skip.
(19650/20000, +Straightforwardness) Cross the bridges and meet the goblin Kadrakaz (is the new top gear and some materials trader in Silverglen) with the beast of burden Ralphie. Goblin convinced to reveal the secret about the queen of spiders, Ralphie is talking, that we will not kill the goblin and thereby determine the last character trait. Now accompany the sweet couple to Silverglen, for they themselves will go there until the second coming.
(1000/30000) We kill a rat in Nadia's basement: one character says, the other does damage.
5 level
No one (5 skills.): Leadership +1.
From the fifth level, merchants massively acquire belts and amulets. After buying a belt for craft, we create a magic thread with a needle and a pair of leather armor from scraps of leather.
Leadership of each of the characters should now be in 4, and the initiative is not less 19, it is important. If you yawn helmets for leadership, you will have to create the missing ones according to the recipe.
Entertaining game mechanics #5:
1) If the enemy walks before you, then you get extra damage and control. If the enemy is higher than you 2-3 level, then the whole group can easily drive away immediately or simply not get out of control.
2) Make the difference on initiative between characters with items and stats, so that one of them always goes first. Even with mirrored builds, you shouldn't leave the order of the move to chance.
3) If you enter invisibility or a cloud of smoke, then the rest of the characters will no longer receive the leadership bonus and will lose initiative. But at the same time, skills can be applied to an invisible allied character. What is the logic here - I don't know. Generally, if your ally was taken out of invisibility with some area damage, maybe it makes sense to get out of invisibility too, in order to distribute the damage and so that the ally does not lose the initiative and does not move away on the next turn.
##
(10000/30000, +Independence, +Altruism, +Righteousness, teleport Les Lukully: goblin village) Returning to the Forest of Luculla, to the place where we met the goblin, we go into invisibility. Keep to the right, until we hit the goblin village. We convince the guard at the entrance to let us through, talking to the totem.
Significant traders in the goblin village: Sadakandras (materials) - Mikus (equipment, materials).
(13600/30000, +Forgiveness) There is a hidden trapdoor in the eastern part of the goblin village. (Perception 6), we go down, talking with the shaman Kromkromkis, refuse to fight. We leave the village to the south, activate teleport (well, or vice versa, if you have not yet bought or created an item for perception).
(+Bloodstone) We return to the village of goblins and burn their totem. There are bonfires around the totem. We throw one midnight oil on the totem, the other - to the fire in this way, so that the oil stains come into contact, but the fire did not hit the goblins. I repeat, take the bloodstone. Fully heal burnt goblins and put out bonfires!
(21480/30000) East of the teleport to the goblin village there are two orcs of the 14th level - we kill them. We squander the swordsman for health with midnight oil, like a goblin totem before (just don't forget to give the final jabs with wands on about 6th midnight oil, otherwise you will not get experience). And with a shooter, there are several options. But it's best to sacrifice it to the goblins through teleportation. (goblins and orcs are at war with each other - keep in touch). Our scepters have a radius of 16m, we need to keep a distance of about 20m (3-4 OD for radius rod), so as not to get an arrow in the knee. Another important point: goblins, received damage from us, enemy or ourselves can become hostile (periodically check the color of the icons and don't get close). Therefore, we do not use midnight oil and air wands - as separately (they can electrify the blood), so along with the rain. Generally, we enter the battle with the orc, retreat once, retreat two, and then with two teleports we move it to the entrance to the village and hope for the best (stunning, Charm, orc misses, etc.). I don't think, what can you do the first time, because. Sadakandras, it is a stuffed animal with feathers, often uses cone petrification for its own. If the goblins get angry, replay the fight: everything is more fun than, eg, poke an orc with starting wands through stealth.
(6780/42000, +Bravery) From the place where the orcs were we go to the northwest, sneaking past the trolls Archibald and Amadeus, meet Roy and his menagerie. We're talking to Roy, tell the cows that they will be killed, convincing Roy to let the animals go, tell animals to follow their dreams.
6 level
We bring Natasha's charm to 5 - we create an amulet from a tooth, if necessary. Moreover, making a couple of knives (or one knife, if you have already bought a shield) on +1 to the Talisman of good luck, so that you can always wear them with dexterity 8. To the next level we will need 2050 gold and, including equipment, by 5 theft and burglary. Blacksmithing and crafting should already be fully leveled at 5th level, and by the 6-7th level, belts and bracers are bought with both modifiers in one thing.
Entertaining game mechanics #6:
One-handed melee weapons with modifiers on characteristics can be used together with wands - the main thing, so that the wand is the first. Such a bundle does not count as a long-range dual wield., and therefore, has no corresponding penalties for AP and damage without pumping the corresponding skill.
##
By the 7th level, two more portals will be available in the End Times, but it is better to postpone their opening until 8+ level, when will you decide on the builds. It makes no sense to force access to the Hall of Secrets now: better to raise your reputation on quests in Saisil, yes gold at the expense of high-level crafting - and already buy anything without any problems.
(14655/42000) We leave the village of goblins through the northern entrance and move to the northwest - into a storm, until we see the spider queen. Checking, that Natasha has a charm in 5 and flatter the queen, no stupid mini-games this time. Important, so that Natasha goes first, because. she has a talent for being a friend of animals.
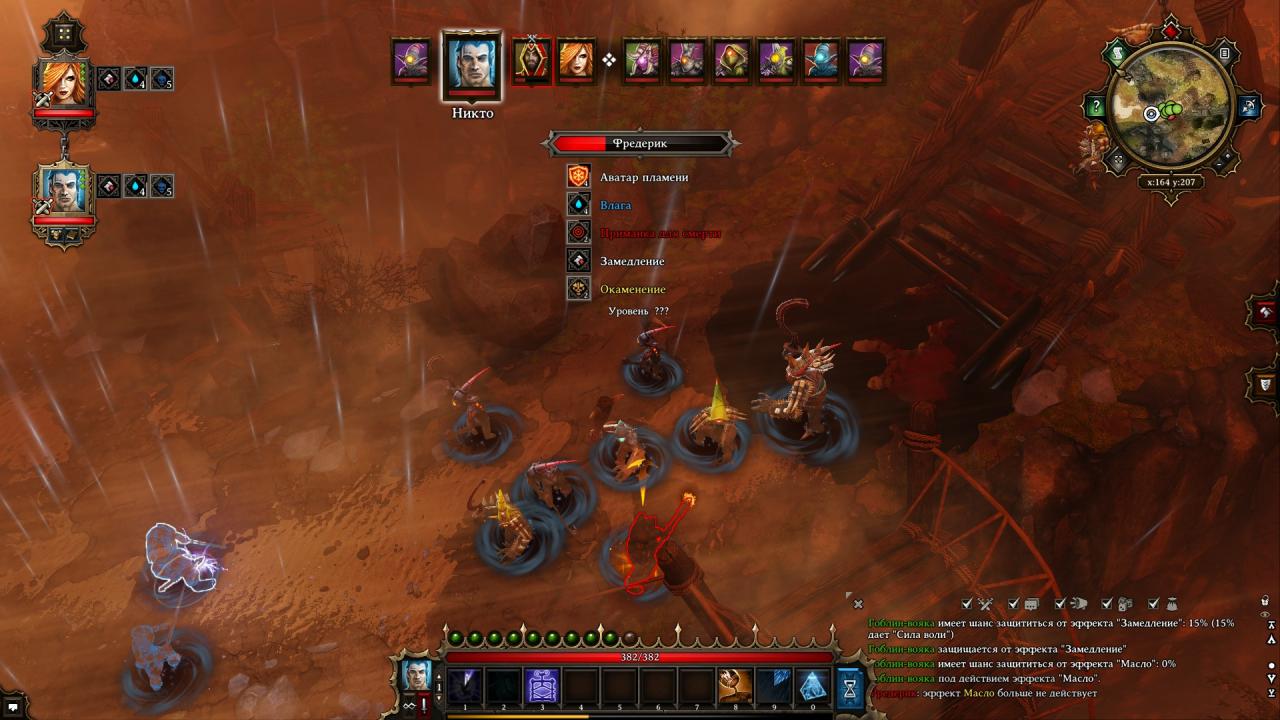
(30585/42000, +Forgiveness) From the spider queen we move to the western entrance of the goblin village, through the gorge. We find along the way the dying Frederick. I'm talking, we give back the blood, we convince not to take revenge on the imp and… immediately run up the hill towards the goblins, because. in gratitude they will want to fry us. We are saved and while Frederic is ranting - we teleport him closer to ourselves, how the fight starts - we go into invisibility. We need to ferry this violent body to the goblin village, like an orc a little earlier, but there are a number of nuances: we just spent teleportation; we are under deceleration; Frederick, unlike the orc, loves to shoot fireballs at invisible characters. Level 6 wolves should not die from one fireball, but don't tempt fate: we will not survive a good swing with the maximum OD. Therefore, we go beyond the radius of defeat (we check with our wands) on 3-4 OD and skip turns in stealth until teleportation and invisibility skills roll back (if weakness has arrived, then we are too close - we move away for a couple more OD). Then, getting out of stealth, we throw midnight oil on the way of Frederick, spend more 4 OD towards the goblins. The next step is to make it rain and as soon as Frederick approaches - we move him to the western entrance to the goblin village with two teleports, we go into invisibility, if possible, and we wait until it's over (The rain is needed to extinguish the goblins, because. they burn from Frederick's fire shield, and then they can attack us. If the goblins become hostile, replay the battle.: sooner or later Frederick will be stunned, turn to stone, charm, etc.. or the fight will just go right).
(41735/42000, +Independence, +Bloodstone) On the hill, with which Frederick was thrown off, there is an entrance to the Maradino cave (Perception 6). How we approach - the stone will turn into a trapdoor. We run to the northeastern part of the cave, past the office, locked in a magic castle, to the fork with the torch. Left - imp Joks (we are not going to him yet), and right, under invisibility, we need to dig out the key to the office. In the office we collect all the books and parchments, click on the protruding book in the closet, to the left of the entrance (the cursor will become gears). We go into the back room and separate the characters: we take one to the stairs, others then collect bloodstains, Maradino's documents and teleport to the pyramid (Maradino's office from now on is essentially an endless source of experience. Not that this extra experience was badly needed., but this is about the same topic as murder by telekinesis: there is, efficiently, not used.). From the latest research by Maradino, we learn the recipe for a potion of courage - the ingredients are in the same place where the key was dug (do not forget about invisibility). We create a potion and only then talk to Jox. We return to Frederick's corpse and close the Slaves and Gentlemen quest.
(2075/56000, +Selfishness / + Altruism x2) We transfer all things to charm from Natasha to Nobody. We move to the point of the Forest of Luculla: Cecil's road, we run east along the bloody trail to Bjorn, Mary and Alfie. We promise to bring them to Silverglen someday and treat Alfie with blood.
7 level
(12365/56000, +Bloodstone x2, teleport Les Lukully: Sacred stone, Heart Seeker Bow) Teleport to Silverglen. With a break 5, under invisibility, we open the hatch behind Loic (mark Priest of the Immaculate southeast of Nadia). We take two bloodstains, go to the teleport. Who knows - the Heart Seeker immediately takes the bow (we will need it later), the rest descend from the mountain and, moving clockwise, a corpse with a diary is found behind the cave. Further, moving to the Sacred Stone label, activate the corresponding teleport, we enter the settlement.
(25865/56000) We dress Natasha with objects for charm and go to the north of the settlement to the geomancer Attenbere, we pass three beliefs: at the entrance to the shop, when trying to bargain and when trying to leave.
(29465/56000, +Tenebriy) On a shelf above blue stones, next to a barrel of poison we steal and read the book Guide to handling tenebria. Vacuuming the entire tenebria at Attebera and the tenebria master. We leave one ore to Natasha, the rest is melted into ingots (33 pieces).
(39065/56000, +Spirituality) Return to Silverglen and give the shade ore to Brandon.
(40995/56000, +Independence, +Straightforwardness) We leave through the northeastern entrance of Silverglen, talk to a troll named Fumble. Back to the tavern, I pay Ruby 2050 gold (if there is not enough money - create several copies of leather armor or hoods from rags). We approve of the act. Back to the troll, we take our gold.
(43060/56000, +Bravery) There is another troll to the southeast.. We run the goblins under invisibility and after the cooldown of skills we speak with Grumble: learn about the troll king, we promise to kick Grumble's ass and run away from the battle under invisibility to the east, and then north, beyond the orc.
(52000/56000, teleport Les Lukully: troll king cave) We run through the orc Garkulda Nightbringer and past the goblin to the north to teleport to the cave of the troll king. In a circle of hepenia, under invisibility or secrecy, we read Maradino's documents, we enter the cave. Convincing the donor troll, we dig 20 units of shadewood ore in the northern part of the cave.
(2730/72000) We leave Saisil again through the northeastern gate and run east, to the tag Abandoned Church. There is a well to the east of the entrance to the courtyard and the fiery skeletons.. I'm talking, transported to Hiberheim, we promise to help.
8 level
Let's remember those, who did not heed the warnings nevertheless dug a grave in the backyard of the Teliron hospital and summarize some results:
We have 8th level characters with optimal placement of traits; 50+ shadewood ingots; accessible Hall of Secrets in the End Times and two bloodstains on top (ie. you can immediately open the Hall of Darkness and pump as much as you like). Only two dozen completed, mostly secondary, assignments and really untouched plot - like the icing on the cake. AND, minus three initial battles, this pleasure cost us one rat, one mad magician and a couple of orcs. Nice.
In this situation, most of the players are already creating shadowy weapons and are going to do good and do justice to enemies, unresisting to tenebria. And for beginners, so as not to spoil the impression of the game, it is already worth doing this - you already have all the resources for a comfortable passage.
Still here? Well don't talk later, that I didn't warn you. The extended edition gave us a bunch of free experience, than we, actually, and use.
No one (8 skills.): Tenebriy +2.
Entertaining game mechanics #7:
Despite, that tenebrium deals essentially pure damage to those enemies, which do not have immunity from him - sometimes it makes sense to re-sharpen weapons with the essence of the elements against enemies, vulnerable to a certain type of damage, what, in turn, supplemented by the skills of the School of Witchcraft and some subjects.
##
Sharpen the Heart Finder with a bowstring, and then a tenebrium bar. How to create an amulet and a belt for agility, we dress all goodness on Nobody. Also, we need 4000 gold (craft and sell multiple jackets or swords if not enough) and arrows, taken in Lawrence's office earlier. Moreover, you need to duplicate rain and regeneration on characters, and explore at least one frost avatar.
(3810/72000, teleporter Haunted Forest: waterfall) Teleport to the goblin village and run northeast to the trolls. Under invisibility, we go to a new location - the Haunted Forest, I speak with imp.
(31010/72000, +Spirituality) We run to the southeast and see how the Rumble troll does not let the squad of slavers through. We pay for everyone 4000 gold, run back, attack the blameless, we go into invisibility / stealth. Our task here is to help the losing side with freezing arrows and stunning through rain and a rod of air, and then finish off the rest. The troll is here, usually, raking from the innocent by mutilation. Don't get too close: earthquake, as well as area damage, removes from invisibility.
Crossing the bridge we see the scales for offerings. At the eighth level, enough 630 gold, but any trash will do - empty potion bottles, arrow shafts, etc.. The reward will be a chest with at least two legendary items. If you don't like the contents of the chest, you can reroll it, eg, on the next level.
We run further to the southeast, turn right from the fire, across the stone bridge (if you are afraid - you can teleport across the bridge, but mines don't seem to kill). Meet the new top trader - Hortuna, and next to it you can talk to Arhu.
(45325/72000, teleporter Haunted Forest: hunter's wasteland) We convince the guard at the entrance to let us through, we pass through the gate and in the center of the settlement we activate the teleport.
New Merchants in the Hunter Wastes: North (tenebrium) - Guyzon (equipment) - Stabigg (equipment).
(53485/72000, +Romance / Pragmatism) Not far from the teleport, by the fountain, tell the skeleton Michaelis that the soul is immortal.
(59315/72000, +Compassion) Climbing the stairs to Glen's house, we see a sweet couple - Ulora and Olfrig, we swear not to tell their secret. In the house itself, another couple - Gural and Fredar - lost the key to the armory, learn about this fact.
(68495/72000) Where we find the key to the armory from the bartender Herschel in the orc tavern. We collect all the gold dishes and paintings from 1-2 tavern floor and exit the Hunter's Wasteland through the eastern gate.
(1595/90000) We run east to the Brühl Orc, urge us to skip.
9 level
No one (9 skills.): Long hands.
After getting into the Haunted Forest at the End of Time, Ad opens and meteorites begin to fall - we will correct this disgrace. We need to smash the huge bloodstone with shaderail weapons (and this is our Heart Seeker, which we sharpened earlier) in the north of the location of the Forest of Luculla - there we go straight from the village of goblins.
(11545/90000) We run to the mark of the Black Gate. To the left of the entrance there will be a detachment of the innocent. We convince them of our love for the goddess, robbing everyone except magicians, and then …
(45835/90000)… kill.
(85270/90000) we do the same with the next squad.
And how to kill with the ninth levels without weapons, armor and normal pumping two squads of immaculate level 15? We have telekinesis, invisibility, stealth and good initiative from leadership - and that's all we need, for the blameless had the imprudence to set up their camp in the midst of the lava flows. I think, no need to explain further. The only thing, initiative of the immaculate, whom you attack, most likely there will be more than ours: shoot him with a rod until he gets angry, and then, as a free character, we send it to the lava and immediately exit the dialogue. And try to kill the priest as quickly as possible, so that he does not scorch secrecy with resurrections.
(6415/110000) We go into the mirror and, without going further, attack two more blameless (The assassin can be dragged into battle through midnight oil and a wand of fire). We send both of them to take lava baths.
10 level
(101215/110000) Need to damage bloodstain, to be one hit, and then return to the entrance to the location. Going down through the main entrance to the stone gazebo, you need to draw 3 demons into battle (you need to run under an active aura of leadership, so the demons go after), and then two more on the sides (through invisibility, stealth and teleportation of demons). Then, draw four demons into battle at a huge portal, immaculate shepherd with the dogs and destroy the bloodstain. The shepherd 100% basic fire resistance and high initiative: stun and avatar of frost will help the immaculate to take a lava bath, and pre-set racks with coals - do not receive a fireball in response on the first turn (if you attack the shepherd in a separate battle, after the demons died).
(4760/132000) After bypassing the merchants, we return to Saisil., to the entrance to the courtyard of the Abandoned Church from the side of the well. We take the wands of fire in our hands, make it rain and enter the yard keeping to the maximum right side. Licking the right wall of the church we get to the cemetery madman (It is better to take the barrel of poison nearest to it in the inventory.). I'm talking, and under the beautiful broads we get the 11th level. Easy!
(6740/132000, teleport Saysil: Old church) After running a little to the east, you can also activate the teleport, so as not to run to this location on foot later.
PART II. Release the demons
If you change the order and number of open containers, then you can roll the trigger of the talisman of luck and the contents of the containers, which you “haven't opened yet”.
##
Now the speed of passage depends on, what will you get from the containers under the talisman of good luck in the locations of the Haunted Forest and the Forest of Luculla, but in fact - from the contents of the armory of Grotilda and a couple of other chests. Great Legendary may drop, or even a divine weapon for a build and armor with modifiers for characteristics and immunity - or some kind of trash is not at all for your characters.
Further, I will not describe in detail where to take what and where to run.: quests and before that you could shuffle in almost any order, and now builds are superimposed on it, items found and composition of the party.
Whatever weapon falls to you, bows / crossbows sharpened with a bowstring and tenebria would be a good option. For any group, this is the easiest way to pump up a little.: lick fire skeletons next to an abandoned church, clear the beach from the orcs behind Karla and the abandoned farms from the undead, finally take Alfie and the company to Silverglen - and eventually get more +3 to reputation and level 12.
But more than one treatise has been written about archers, and they do not pull something for the role of inquisitors. It seems that it's easy to play for them, and skills are self-sufficient and lethal, and there are no special requirements for equipment - but in the end some fairy elves come out, Ugh. For wolves, the soul asks for something different, something simpler, but at the same time ominous; I want to participate in the battle, and not observe from the side and be afraid of any sidelong glance, yes passing fireball.
The idea of a build for further easy passage is, so that with the help of a pumpkin helmet (pumpkin + knife), talent Demon, rings or armor with immunity to Burn and several items enchanted by the essence of fire, already at level 12, it is guaranteed to maximize resistance to fire, taking into account the effects of Heat and Combustion and without taking into account skills and potions. what, in turn, will disable most of the fatal traps in the game and significantly speed up movement across the map: you can walk on fire, I pass, lava, and even to be treated. The fight at this stage looks like: Clockwork toy + Teleportation, Abduction of will + Charm, Summon the Armored Executioner, Rain + Air rod.
At level 15, take a meteor shower in pyrokinetics, which allows you to annihilate enemies in conjunction with the oath of desecration and depletion of the soul, and at the same time heal under self-immolation. Willpower is slowly being pumped, body strength, leadership and two-handed weapons - but you can take the 5th level of sorcery early for invulnerability (the main thing, so that 13 intelligence gained).
Armor, helmet, sarong, the belt and bracers are sharpened with essences of the elements or rubies and over time the need for a pumpkin helmet disappears. For the build, it is desirable to get certain items: helmet leadership + perception / physique, belt two-handed + body strength and, the most important thing, fire resistance ring / armor. Dexterity for invisibility and armor is recruited with a bracer, sharpening weapons with a tortured soul and, possibly, saronga. All three books (Keeper of Secrets + reward for the quest Advent of the Watchers) go to maximize the perception of one character. The choice of the type of weapon with this approach is not very fundamental - but I personally like to watch the crits in 1.5-2k and hear the bursting laughter. Respectively, weapons - craft two-handed axes for crit, sharpened on a grinding wheel, tortured souls and some kind of fire / air essence.
At 12th level, it looks like this:

Later 10 levels:
Basic skill set:
… this does not mean that other skills have no place to be, but, usually, there is simply no need for them. Including the opening of portals in the End Times and traders in Silverglen and Saisil, there should be no problem getting skill books, and for the branch of sorcery, they are generally near-free due to crafting. The only thing, The Scroll of Avatar of Poison will probably have to be crafted, but one always has the eastern guard of Silverglen, and a whole book of Avatar of Poison is lying on the lighthouse in Saisil.
It is unlikely that there is something to write about the bosses., since the difficulty of the game rapidly diminishes at the 5th level and is finally lost at the 12th. Permanent level dominance, the quick opening of most traders and the proposed build only exacerbate the situation. The same final boss driving off on 1-2 go it, sure, strong…
Sorry, what am I mixing in, but could you give a little more information.
Of course. All of the above said truth. davaite obsudim this question.