
In this tutorial I will show you how to make a 2nd Viewport in this cool Source Filmmaker program.. And so for this, follow the instructions. ( yes i can't take screenshots due to windows problems , so you only have to take pictures from your phone in terrible quality , my apologies )
Launching Source FilmMaker
Here it starts , and how to make this rectangle from the bottom left?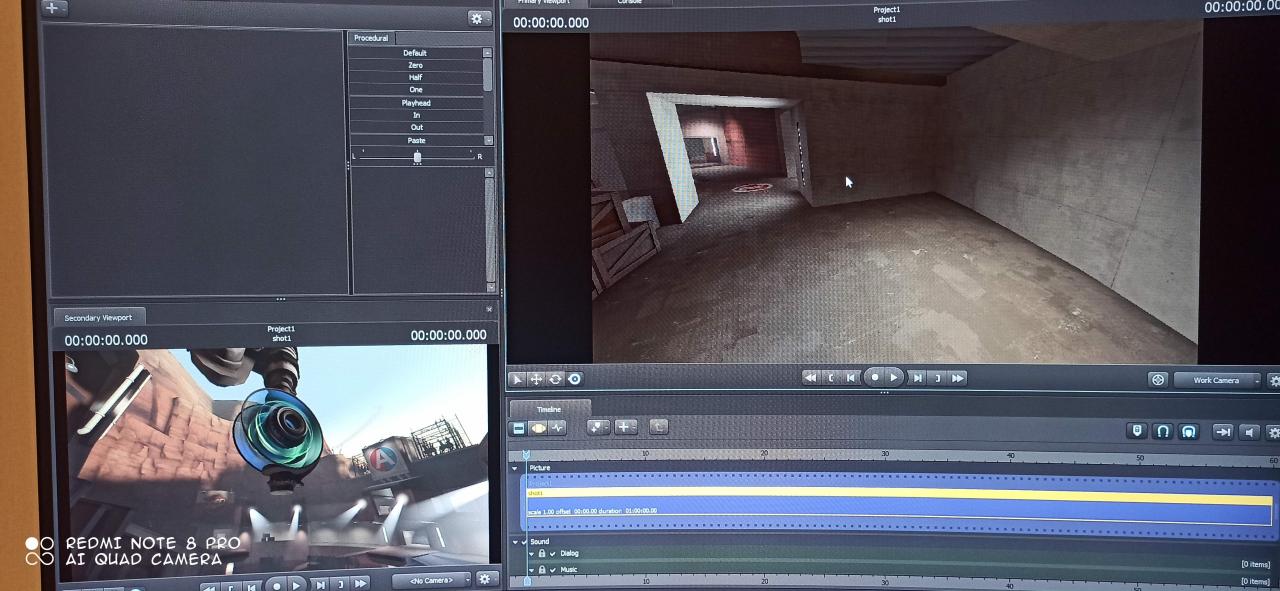
1 stage
find the Windows tab on the top left and put it on it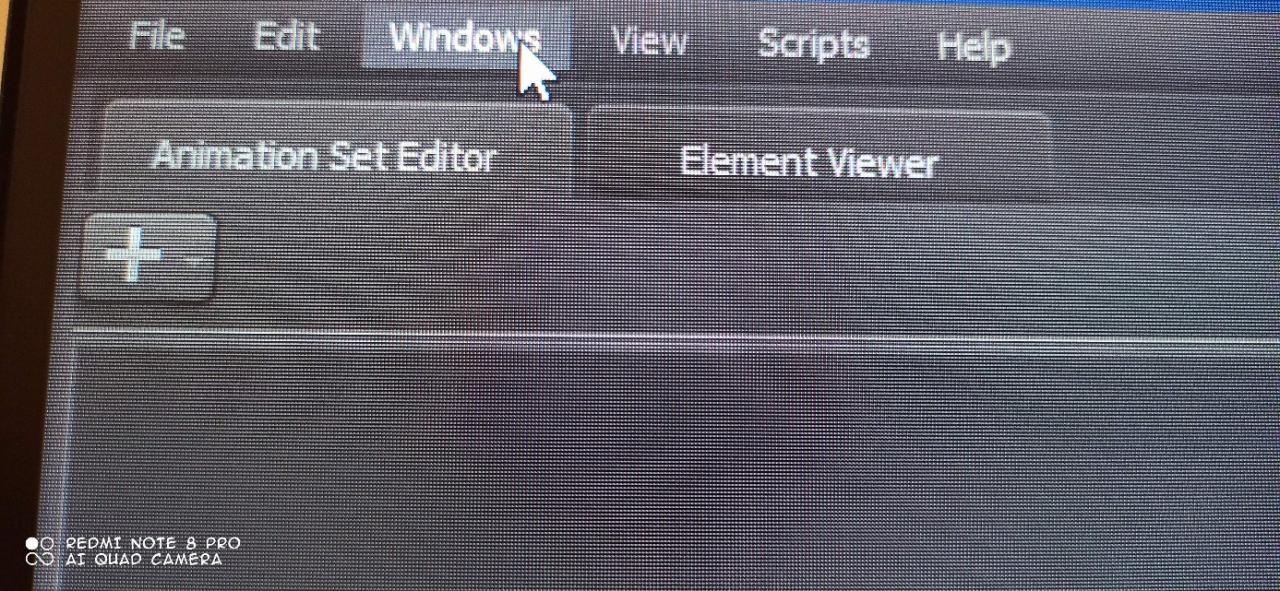
2 stage
after we find the section there “Secondary Viewport” push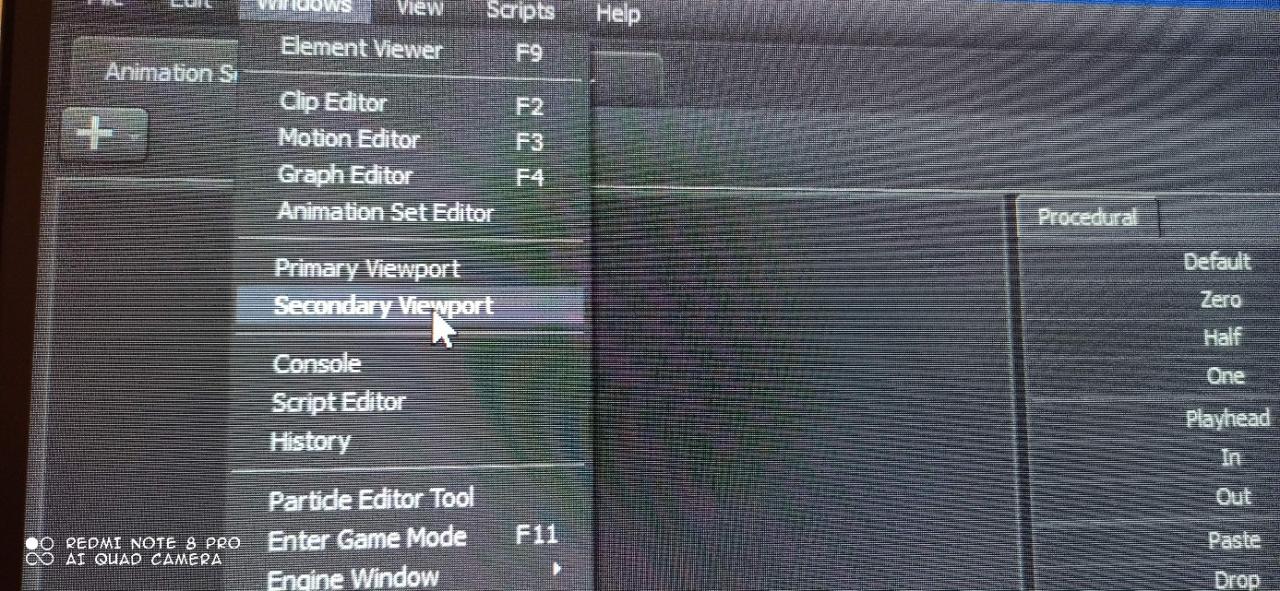
3 stage
after clicking , such a window appears 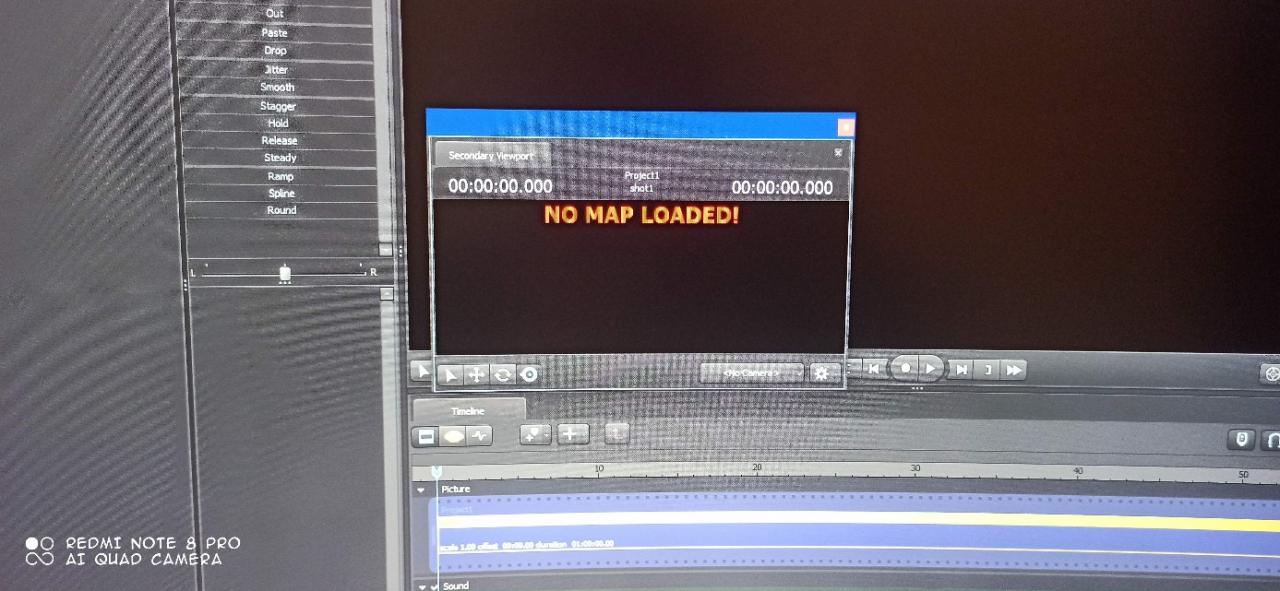
4 stage
Clamp the tab above this window “Secondary Viewport” and drag it wherever convenient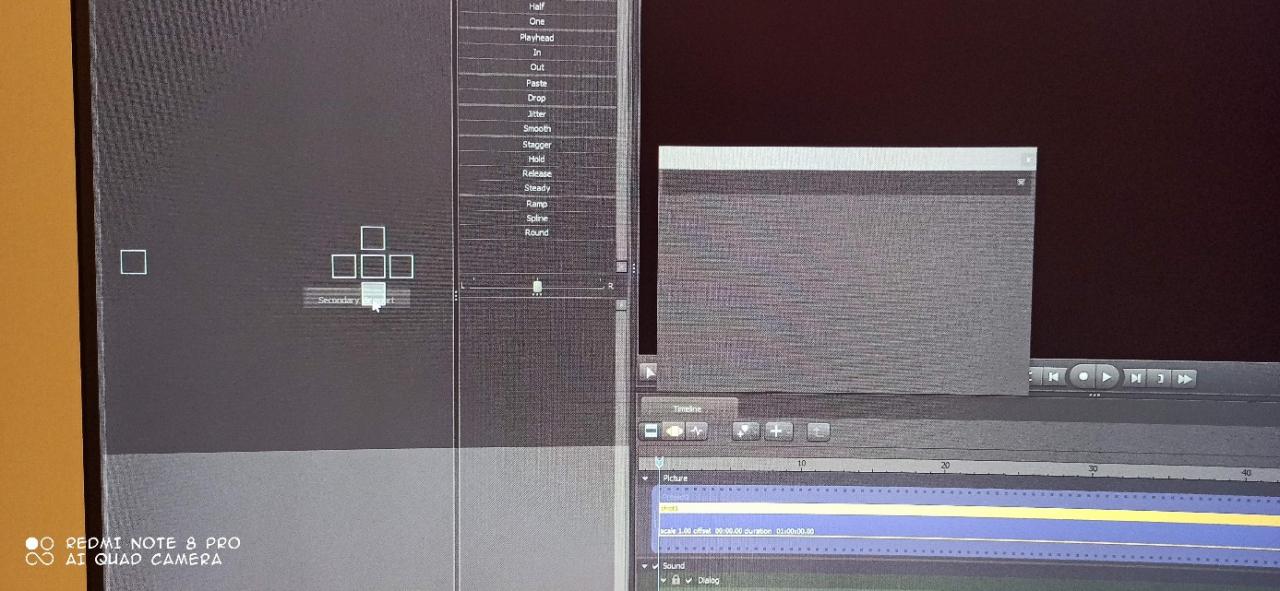
Leave a Reply