")
Little guide, which will help you figure out, how does everything work. I have seen several posts asking questions about, how what works, so i took some notes and screenshots, to help you understand, what's happening. In fact, this is not an analysis of the very essence, it's more like that, how to fix problems, that seem to disrupt the game. In fact, the game has all the necessary tools.
Removing unnecessary items from inventory
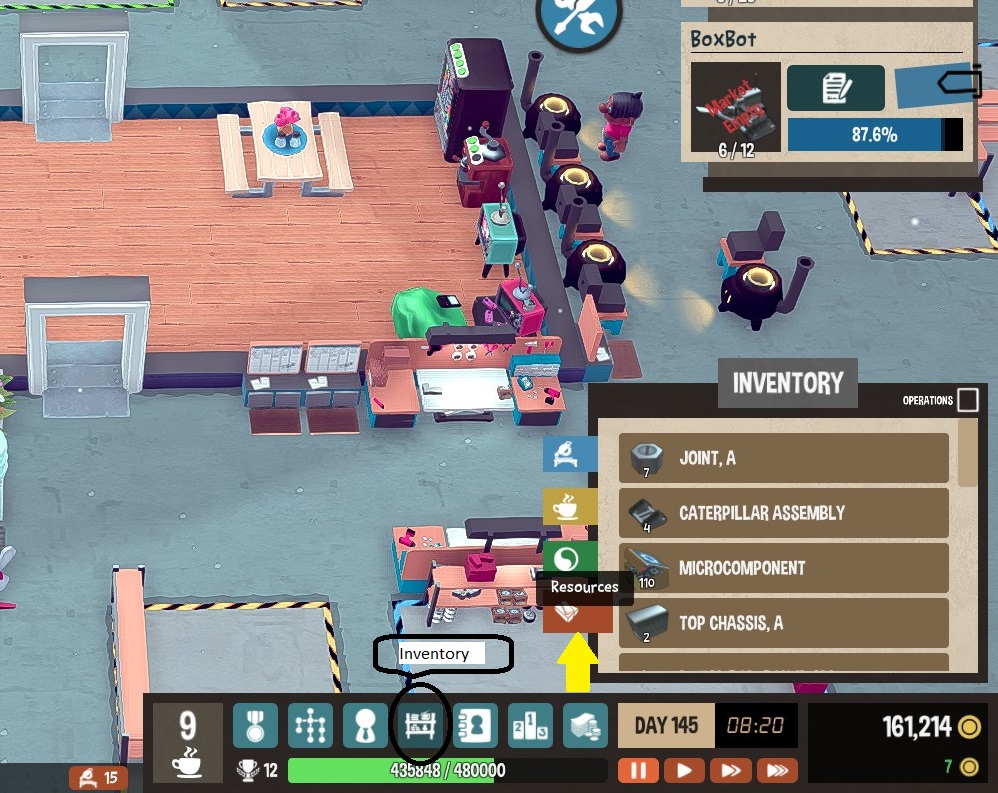
To get rid of items, for which there are no more offers to sell, you need to familiarize yourself with the inventory system. Let's take a look at the inventory button. It's a simple system, not requiring a lot of mind. There are four tabs on the left side of the inventory popup . Details – the last.
Let's take a look at this screenshot. Please note that, that I have a product, whose market has closed orders before, how i was able to complete it. I was able to finish 6 of 12, so now I have a bunch of parts floating around. If you know, that you will not be able to fulfill the time limit, slow down the game speed to 1 and wait, until the contract remains 1 time, then open the market window for that order and select "Deliver". At least, you will get some of your money back.
You have 2 option, how to deal with it.
1-and – The hard way
If this is a problem, you can skip this step, otherwise read on.
You can keep items forever, until a new offer appears. Keep in mind, what now i have played about 4 games, and I've only seen a few things, who returned. These are statistics for you to understand. If it is a high quality item, leave him, as it may be applicable in other orders with lower specifications. If he has a low stat, just throw it away. The longer the game lasts, the higher the order rates.
2-and – easy way
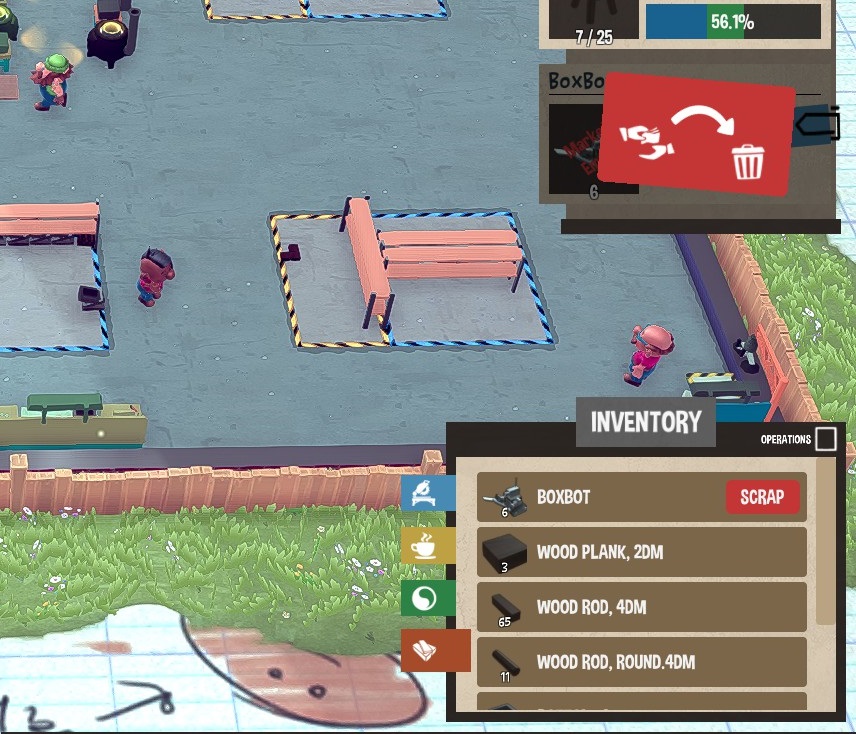
Let the workers continue to work and finish the products, and after that, how will they be ready, a red icon appears. You can sell it on this screen or go to the inventory yourself and find the finished item, after which the line will offer the button to discard, to be clicked. Look at the statistics again for comparison with other products on offer. In all my games I sometimes have 3 different buyers, looking for the same item with different characteristics.
If you wait, until they finish making all the items, which you have selected earlier for this order, only then will the "Discard" button appear. If you look for this button before, how the order will be executed, you won't find her.
Fixing queues on boards
I have an order at the top of the list, I find, what is my priority, but in fact the task system fills the tasks, which can now be done with these machines. It means, that your employees can work on 2 or 3 projects.
In my experience, the system works like this.
The top project is at some stage in its build queue. Depending on whether, how many jobs versus the number of machines, AI will perform all current work tasks of the first project until then, until there are no workers left, no cars. When there are no cars left, but you still have workers, AI looks at the project 2 and assigns tasks, as stated above, until you run out of workers or machines, who can work on the project 2. If there are still workers , then the AI looks at the project 3 and repeats this process until, until workers stop idling around.
I'm pretty sure, what AI does not think about the future, therefore the execution of tasks is rather chaotic. One worker runs through the factory, to place the item on the table, then returns to the other end, to complete the task, which some other worker has just placed on the table. Very ineffective. It would be much more convenient, when the worker picks up the item, locates and executes the operation, and then puts it in storage, before going on a break or another operation.
so, in this chaos, you decide to move the task to the first slot, eg, job assignment from one of 5 clients, sometimes the order of execution of the order is violated. It happens, when order, which depends on the earlier step, must be done first, but somehow this step was skipped, now production is stopped. All your workers are sitting in the break room, devouring goodies, while your bank account plummets. OH!!!
Relax now and take a deep breath – pause the game, it's pretty simple. No panic.
so, let's find out, where chaos ruined our plans.
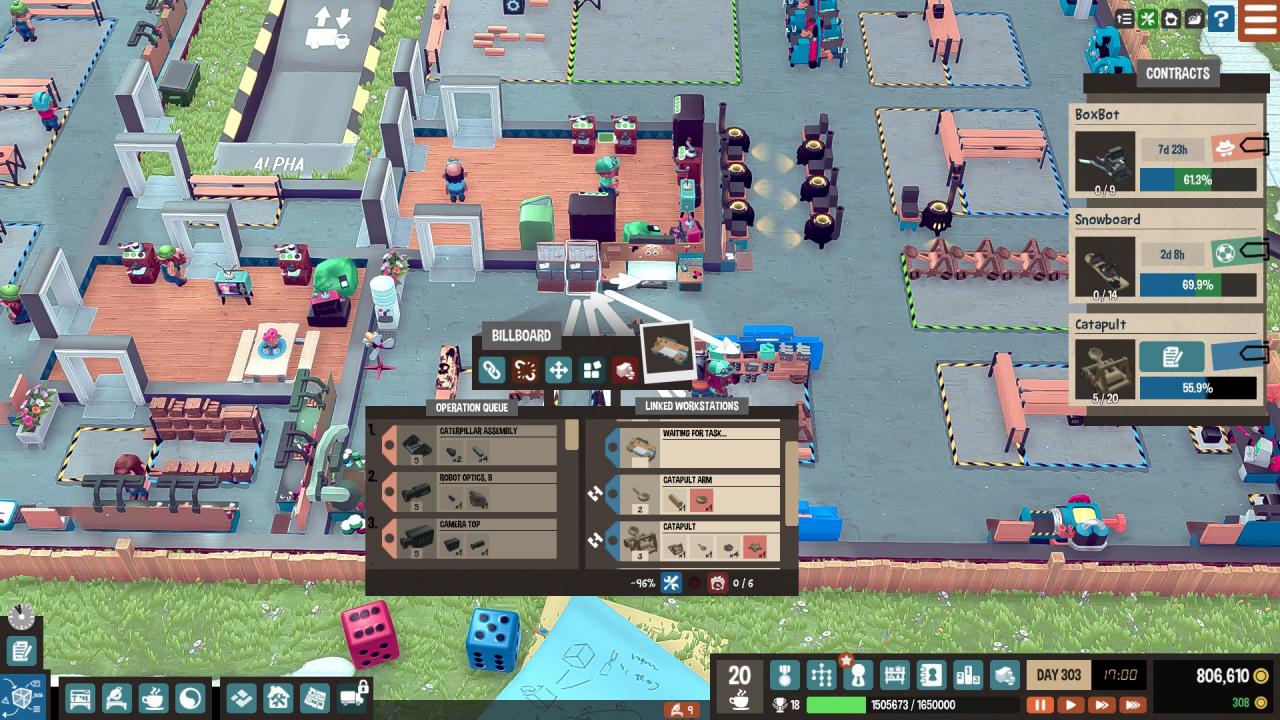
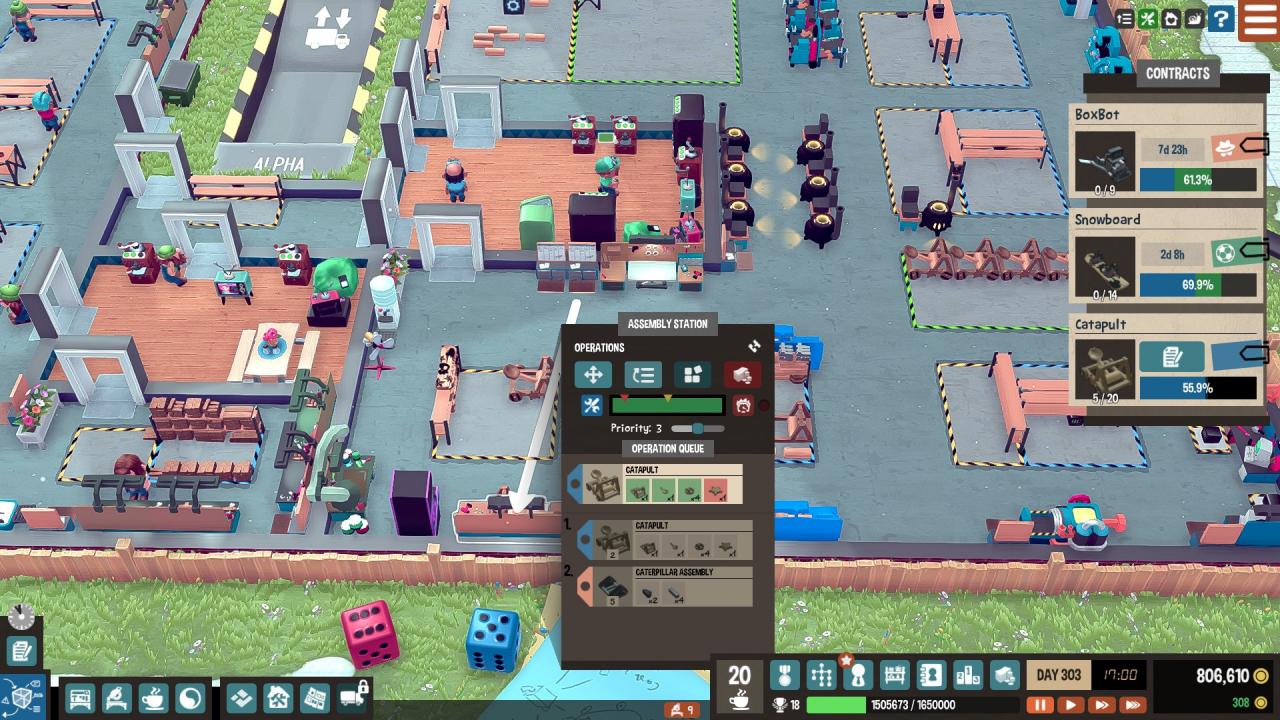
The first picture shows us 3 things.
1 – Look at the order, which you do. There are color-coded stripes next to the paperclip. These colors represent the orders themselves, which you can use to quickly scan your boards / machine tools.
2 – Looking at the board, we can see, what work is assigned to each machine, to which he is attached. It's comfortable, to see, do the boards work correctly.
3 – Board shows, what is queued for distribution in what order. Yet again, it is used, to see, where is what order. You can define, are your queues messed up?. Use this, to speed up the production of parts, but very important, so you rush them in the right order.
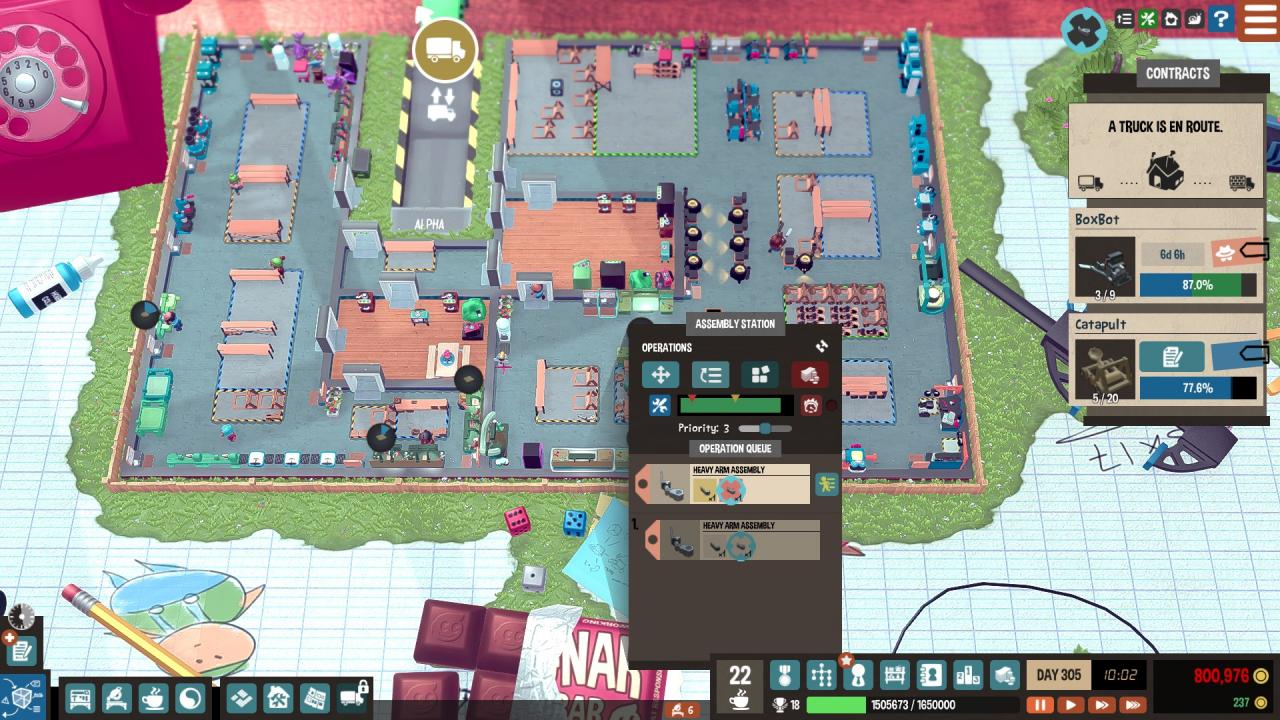
The second screenshot shows some of my jobs, working on the wrong projects. Time in my two client contracts may be running out, if i don't fix this thread. so, 5 of 6 my assembly workbenches run on catapults instead of fixed-term contracts. Let's fix it.
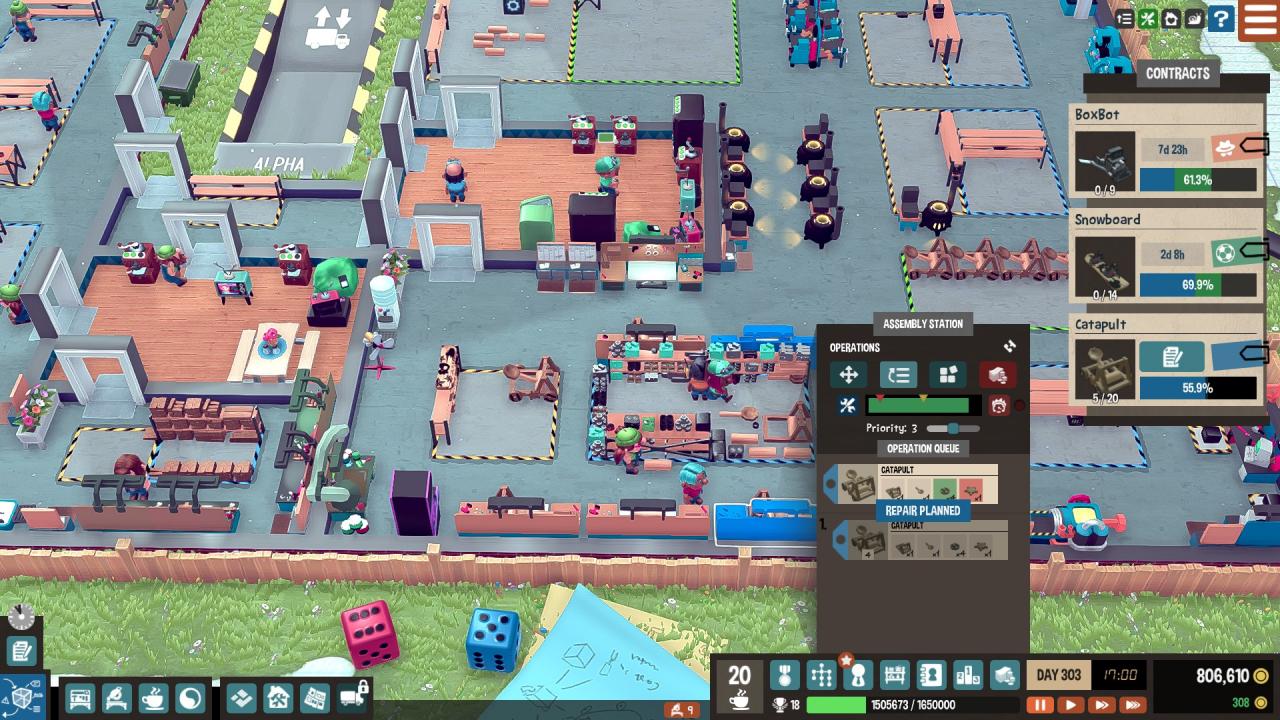
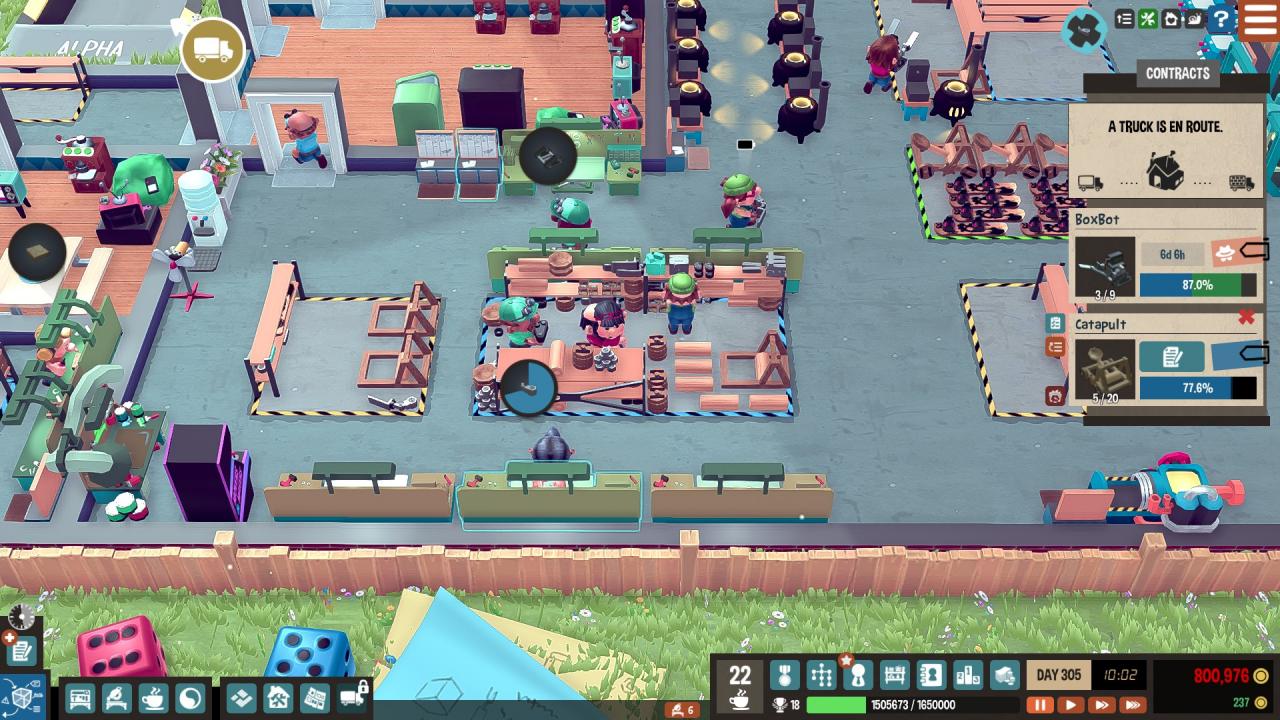
This screenshot is now focused on the assembly table.. We will need to go to the board and move the entrance to this assembly station. Hover over the correct color tab, To make sure, that you are moving the correct assembly, and then hover over the part, to see the arrow, pointing right, and click it. Then the stations will be highlighted on the screen, who can accept this operation, and click build station. Select build station, to see something like this.
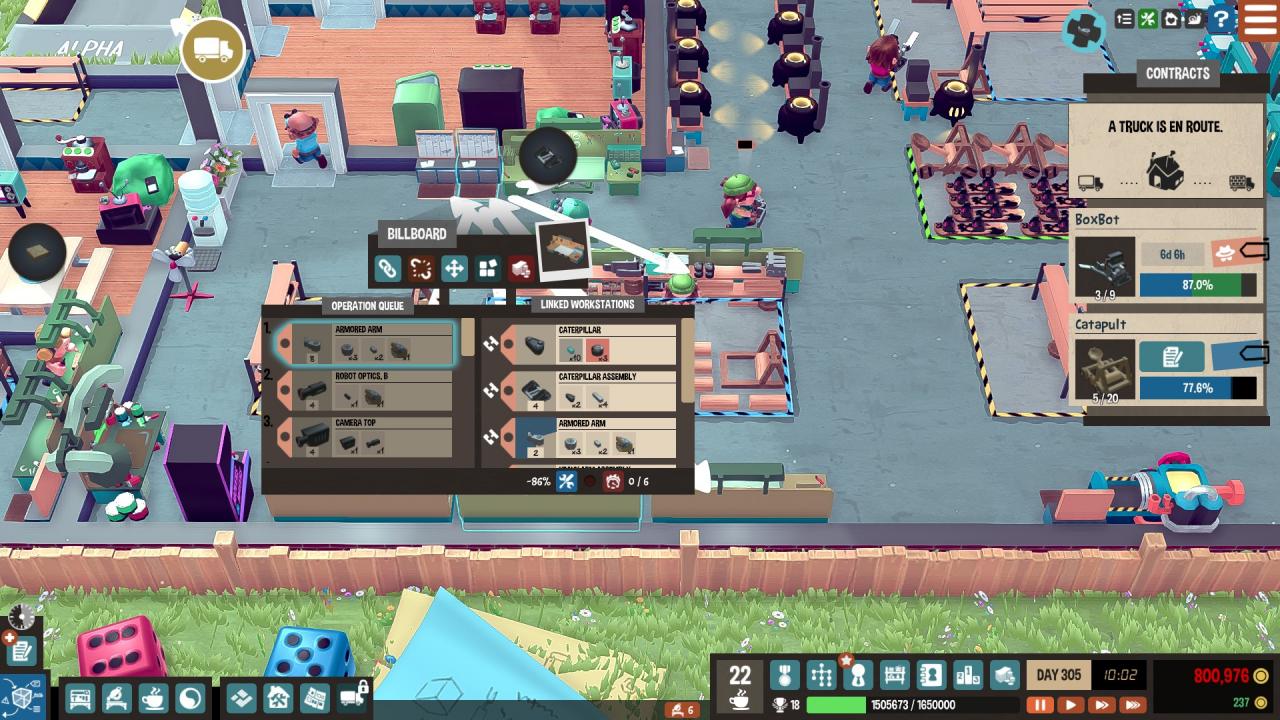
We see two tabs in blue and one in pink.. The pink tab will need to be moved to the beginning of the queue. Hover your mouse over 2 tasks above it and select the down arrow, to move it lower in the queue, or click the right arrow, to move it back to the board. The rush order has now been moved up the priority list. You can do this with every assembly table., working on the wrong project, to get your urgent ones to the top. Just schedule each task cyclically, until your urgent tasks outpace those of low priority.
All now 6 assembly stations work on fixed-term contracts, and that one, who has no fixed-term contract, lowest again, and now he will have a better chance of delivering these contracts on time.
Now suppose, what are you looking at this assembly station and wondering, why don't they build. I clicked on the red part, which is displayed by a small blue crosshair. In the upper right corner of the screen, the same part is highlighted in a circle.
Clicking on it will show you, which machine is working on it along with all the parts, its members. Play with this system, to find out, how to trace a part to its root components. It's worth learning this mechanic. Using this approach, you can fix the number of dangling chains. In this image, you can see, that a board is involved in the manufacture of this part and 1 assembly place.
The board itself also shows 1 party.
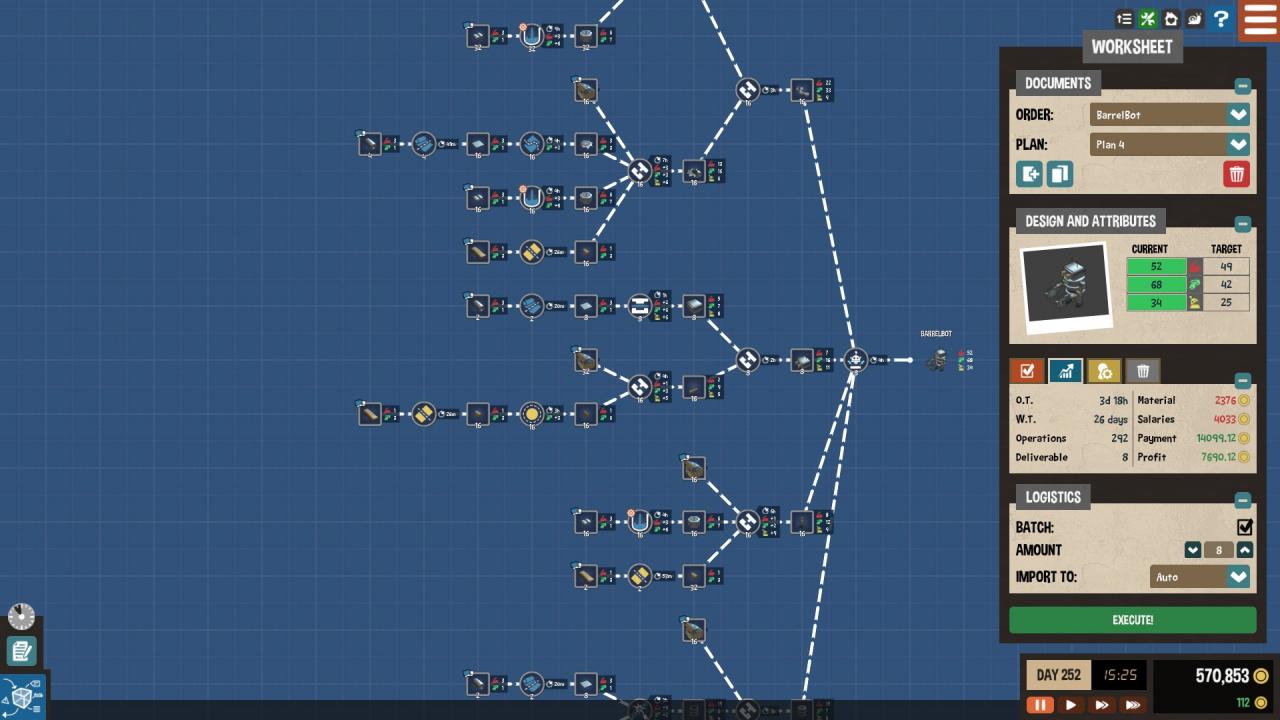
Finding ways to make projects big / smaller attributes
Good news – the emergence of new market offers, undoubtedly, has already been done once or twice before. Excellent, now I don't have to sit here for a long time to create a recipe for a robot, etc.. d. I can just view it, set quantity and execute. It took me 30 seconds, and I look at my ants again, who scurry from work to work, got lost on the road, things fall and fall every second step, looks cute!
Bad news – these are all early orders, some of them were high, and some – low-spec products. so, a new order appears, I have a good recipe, so I just click "Run".
What do you think, what is the problem with this approach?
Still thinking?
ATTRIBUTES
So, all high quality products, which you did earlier, will now cost you money, and sometimes a lot.
That task, which you just viewed and executed, had characteristics of less than half of that, what have you just built for this order. so, everything 78 gold items, which you had to use last time, now cost you so much, how much 78 – 18 = 60 gold for each, what do you order. When ordering 50 pieces you will receive 50 x 60 = 3000 gold. Subtract this from your profit., and also with other things, materials and workers' salaries.
When you're done messing around with the recipe and you can get close to the level, but still not green, there are a couple of tricks, who will help you, and one small rule.
A little rule – after that, how is the recipe finished, and if you have wood products, try using these numbers, to get the item in green first, since the tree – cheapest material. Don't start with metal things, they are more expensive.
Costs
Wood 18, 24, 76 and 126.
Metal 18, 30, 126.
6 additional gold coins for the 2nd jump in metal for 1 bought. When ordering from 50 will be 300 gold. Lost profit ……
Here's an example.
See statistics. He was too clever.
Now take a look at this picture, this is the same plan, but with other choices, and it is much closer to the requested statistics.
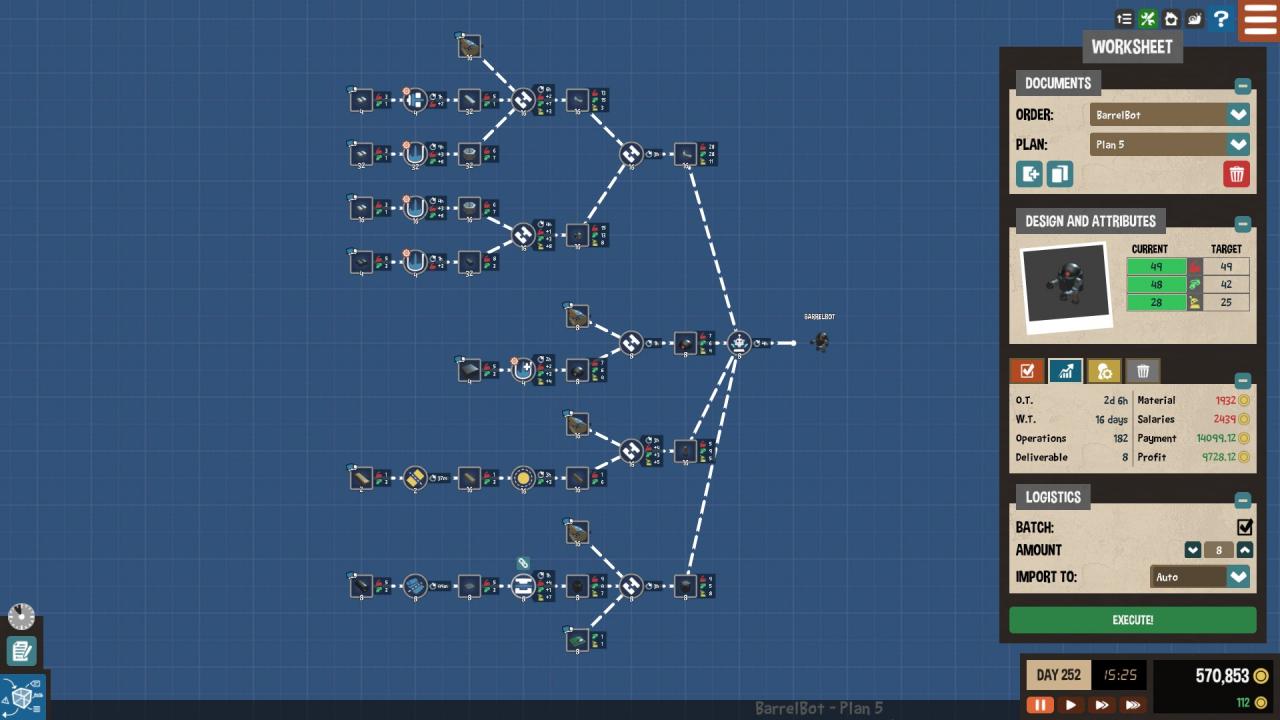
I also saved myself a couple thousand $ $ $ $. Late play is sometimes your profit, so it's worth really trying to fit the statistics. I suppose, you could be perfect and sit on this screen for hours ??? Depends on your point of view.
Tips for machines and zones
ZONES
Zones are really important, because your efficiency depends on it. Profit too.
there is 3 type of zones. Yellow – general goods, blue – job specific / boards, green – finished products.
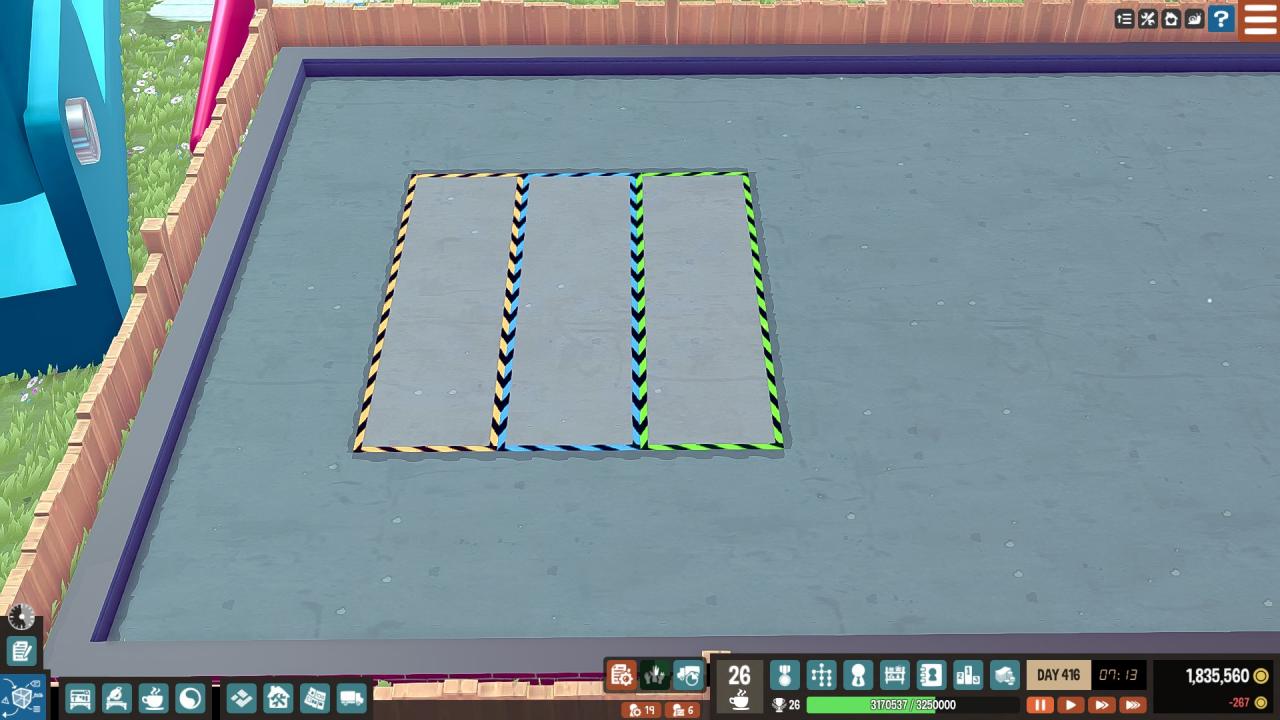
so, let's take a look at the chain of events, starting with the delivery of your materials.
A truck drives up to your unloading area and delivers a load of prescription goods, which you just designed and are running. Depending on the size of the order, it will be determined, how much space is required for your total (yellow) zones. Add some shelves, to increase the capacity of the zone. In late games, orders can add up to hundreds of parts, and in the early – from 20 to 50, whichever, what product did you decide to make.
In this way, after that, how the parts will be unloaded into the common area, movers will start trying to move this inventory to zones, located closer to workplaces. If you do not have movers and you have several rooms, possibly, it's time to hire one, just to work with your feet.
It is very important to add areas near your workstations for product flow and increased work efficiency.. If they have to go a mile for every detail, your profit will fall with every step. The old saying “Time – money, money – time".
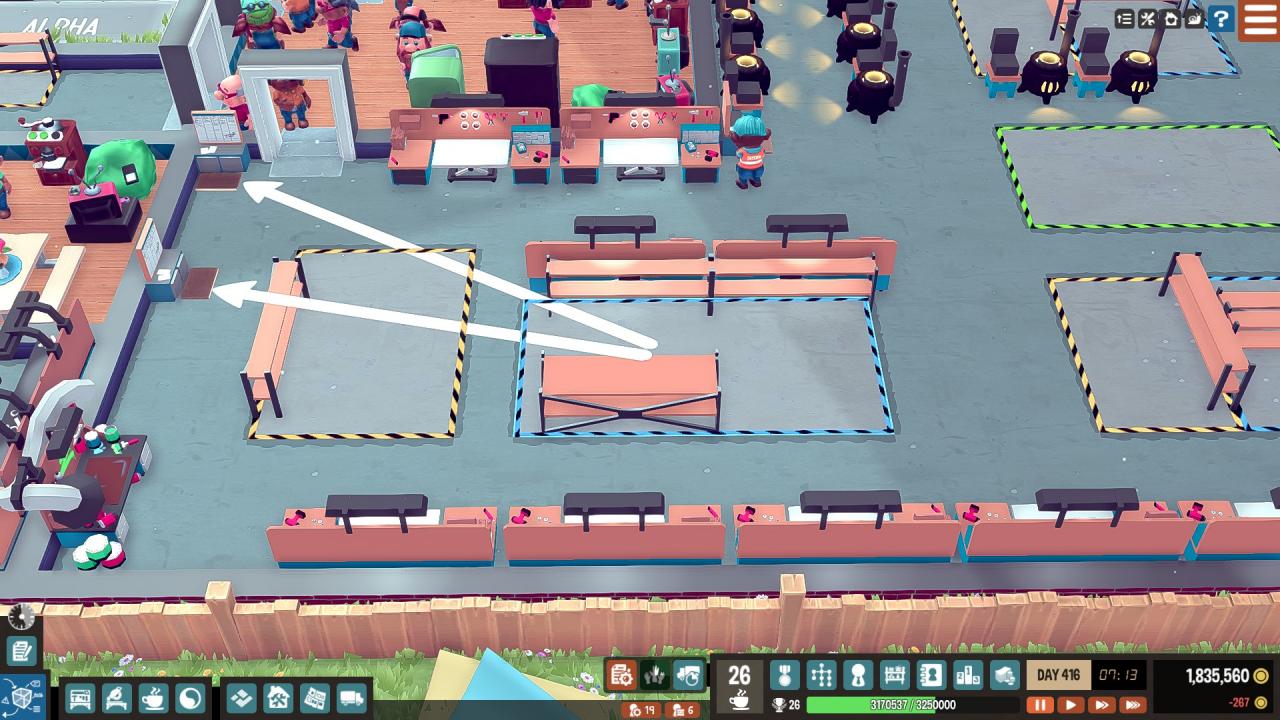
Add shelving as needed. For a smooth running of the factory, do not let cartoon characters put things on the ground in zones, since the AI will still go through the pile and tiptoe through the details, slowing you down. Imagine, that they run through several zones like that. Shelving will help stop this.
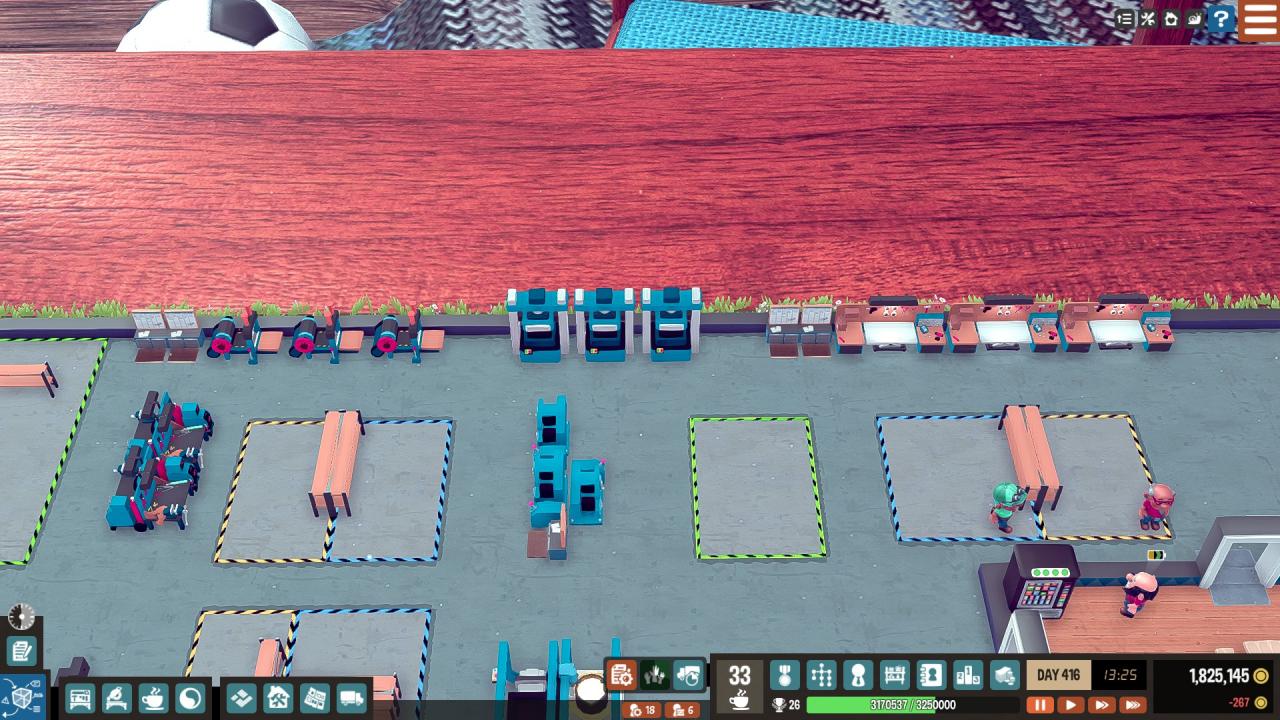
MACHINES
When you get a little deeper into the game around that time, when you get to robotics, you will notice, that several recipes always have the same combinations of machines on the assembly table. Metal and plastic, metal and wood, plastic and foam, cutting and bending. By placing your rooms, i try to group this in the room area, so that some of them do not have to move too much to the next machine.
There's a guillotine here, metal bending machine and assembly points. This takes care of the subassembly blueprint line itself, not transferring the element to the other side of the plant, to do subassembly, only to get it back for the next step. There are also a couple of other combos nearby., which often appear. You will make many, many tires for small cars, etc.. d. You will understand this reasoning, when you get to this point.
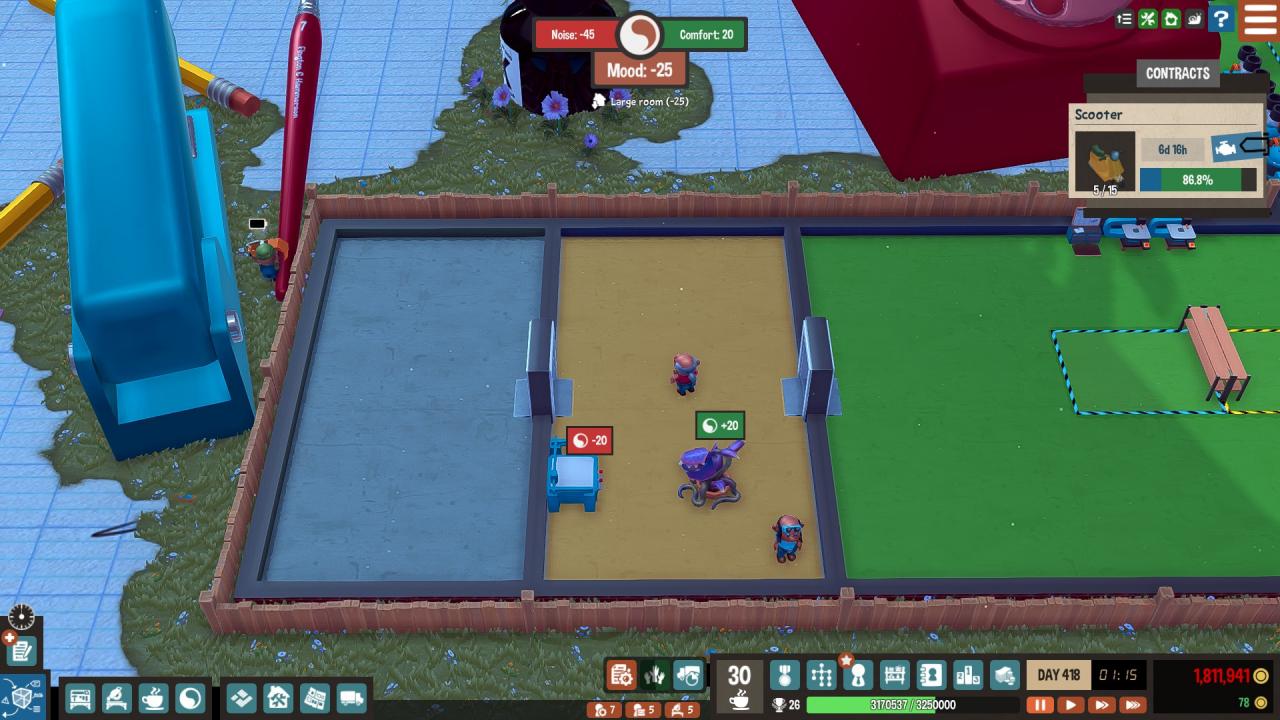
Jewelry and happiness
Now your rooms should have a shade: red (-50) – very bad, yellow (-25) – badly, grey – neutral (0), and shades of green – everything, which is higher 25.
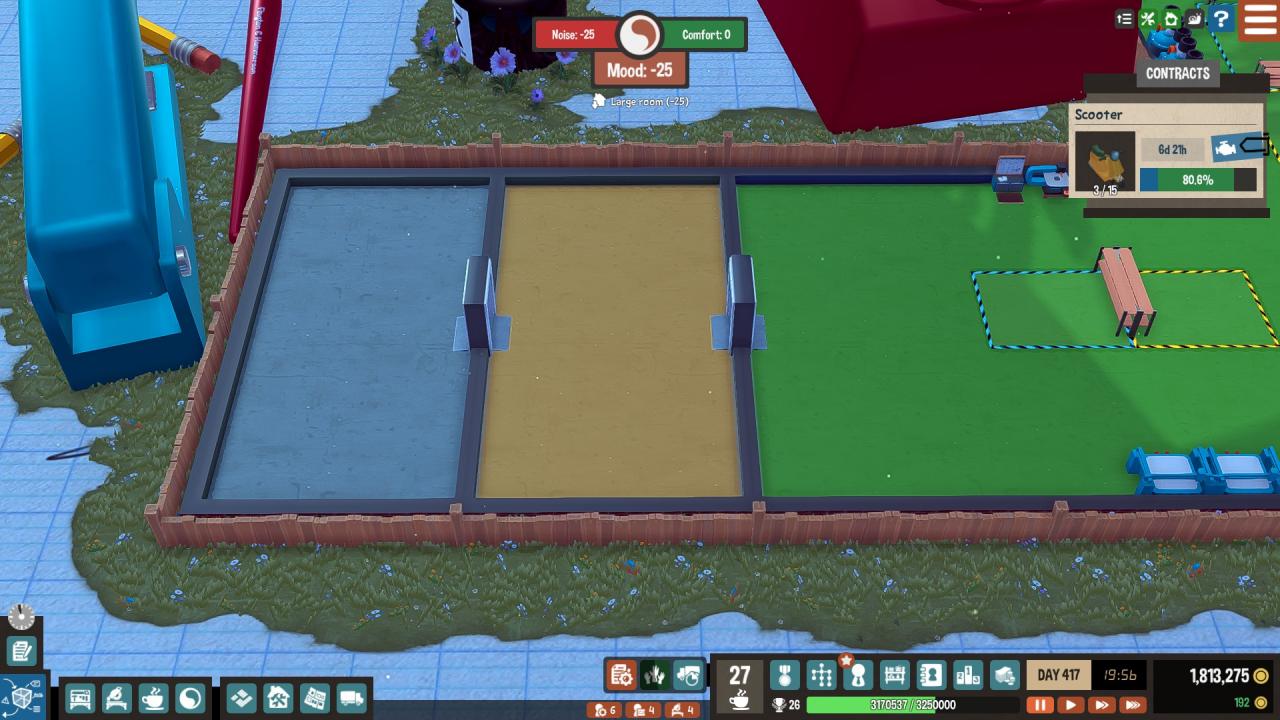
So how do we understand, how this rating works?
First, it depends on the size of the room..
Huge rooms will be fined -50 (no matter, how big are they), a fine is charged for the average -25, but for small – 0.
Further, machines have a noise factor, which lowers the overall rating of the premises. The more machines, the more decor items you need to maintain a mood in a dark green color. Finally, the idea is, so that your employees work as long as possible between breaks.
Pay attention to the numbers on the objects in the room. To see them, find a small house with a heart on the overlay in the upper right corner of the screen. These 2 objects neutralize each other, so the room is still -25. Workers will lose motivation to work longer, before taking breaks, when the room is in bad condition. Pump those numbers to three digits. More 100, and you get motivated employees.
TROPHIES
First playthrough is a bit tricky, but still quite manageable. Once you complete a few final customer trials, you will receive a trophy, which will increase your rating in 2 times for every trophy in the room. It's very easy to dial a plus 100 and more points. Complete the last customer test, to earn it. They are great for late game, to make your rooms much bigger. Walls and doorways take up space, forcing workers to move parts away from really big factories.
Rest rooms
This picture shows 3 rooms with different characteristics.
First cell (jug-like) shows, how quickly points are gained. The numbers below – it's counting.
The second field says, how many points are currently available. Bottom numbers below it – this is the maximum number of rest points in the room.
The third field shows, how many workers are currently using the room. Smaller numbers show, how many workers are now heading in this direction.
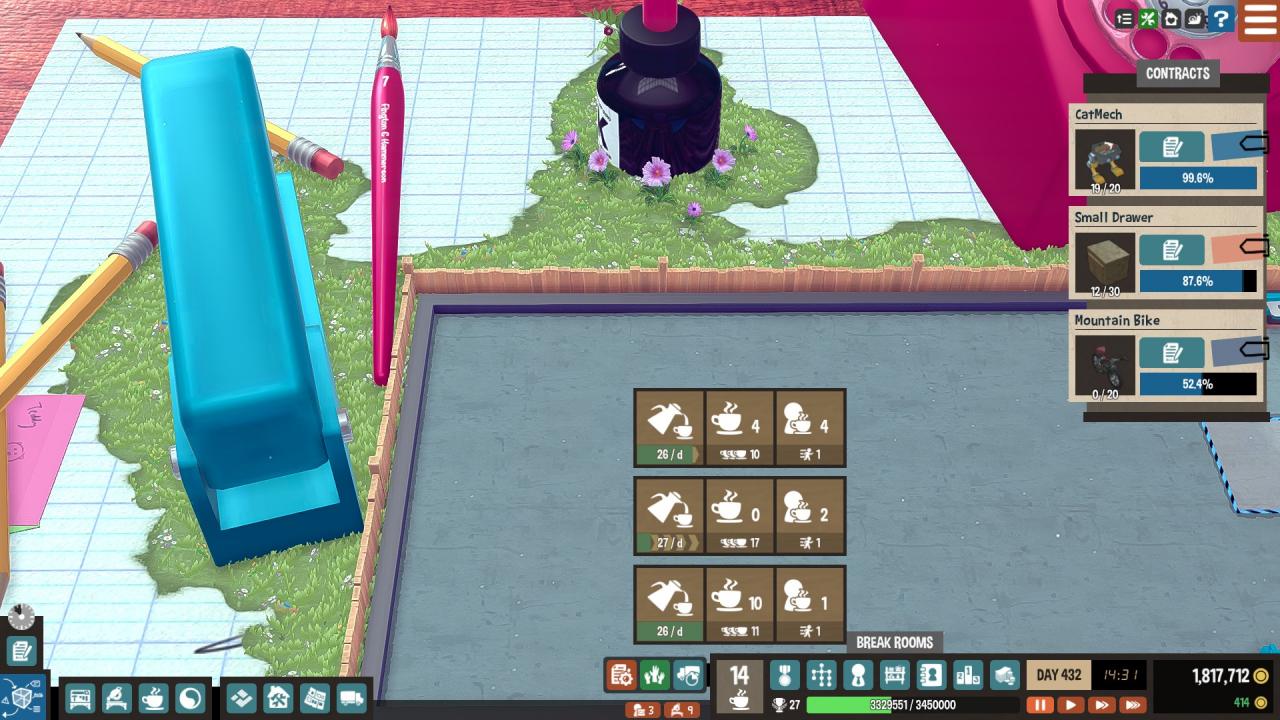
Advice
If points run out very quickly, add one more car. You can also add more decor to the break room., to increase the refueling speed.
To slow down the use of break rooms, make sure, that the decor rating in the work areas is 100 more than, as soon as you reach the middle of the game. Workers work longer, giving your break room replenishment points time, to restore more rest points.
Leave a Reply