
Step by step instructions for building a house, in which all residents have the most optimized routes. All machines are available.
In this guide, I tried to count everything to the last stone, so you will know for sure, how many resources do you need.
Attention everything is calculated for approximately standard residents with a small margin, on this if you have 24 gluttonous resident, you will need a little more food or space at the table if they are ascetics. (Or other features and deviations).
List of required resources
If that at the end summed up the total amounts, so you don't have to count yourself.
Base of the building:
484 Walls – 5 any kind of resource, 2420 in total
1278 Floor tiles – 2 any kind of resource, 2556 in total
56 Doors – 15 wood, 840 in total (9 of which external, therefore it is better to make them armored + 90 iron ingots, I highly discourage the use of lattice doors, despite the ability to shoot through them, the strength lags behind those fortified on 200, this is practically the strength of 2 additional conventional doors)
16 Windows – 12 any kind of resource, 192 in total (Additional 7 on the first floor, but the calculations are shown without them)
7 Stairs – 45 any kind of resource, 315 in total
10 Wooden beams – 15 wood, 150 in total.
Furniture:
24 Thatched beds made of wood – 40 wood and 20 straw, 960 wood and 480 straw in total
1 High quality large table – 100 wood
12 Chairs (Diamonds not included) – 25 wood, 300 total of wood
4 Altar – 80 limestone, 340 total of wood
4 Backgammon tables – 75 wood, 300 total of wood
27 Roasted – 10 any resource and 5 wood, 270 any resource and 135 total of wood
18 Bookshelves – 20 wood, 360 total of wood
24 Armor racks – 15 wood, 360 total of wood
24 Clothes chest – 10 wood, 240 total of wood
40 Shelves – 20 wood, 800 total of wood
4983 ballpoint pens – 71 year, 4 total heart attacks (Joke)
Production:
1 Forge – 100 Lime blocks or bricks
1 Bench (Armor) – 80 wood 5 gland
1 Bench (Luke) – 80 wood
1 Sewing table – 80 wood
4 Kiln for firing – 50 clay or lime, 200 in total
4 Smelter – 70 clay or lime, 200 in total
4 Brewery – 50 wood, 280 in total
1 Distillation plant – 50 Lime blocks and 20 gland
1 Carcass cutting table – 50 wood
1 Fireplace (Hearth) – 50 any resource and 5 gland
1 Healer's table – 50 wood
1 Basic research table – 60 wood
1 Research table – 80 wood
1 Advanced research table – 150 wood 5 mechanical parts
2 Mason's workbench – 80 wood, 160 in total
Next, you need to decide which basic material for the building to use.
Wood:
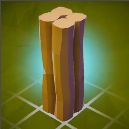 -10968 (Storage 6 on 6) Wood
– 470 (Storage ) Lime blocks
– 800 (Storage ) Limestone
– 25 (Storage ) Iron ingots
– 480 (Storage ) Straw
– 5 (Storage ) Mechanical parts
Clay:
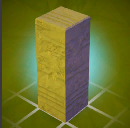 – 2927 (Storage 3 on 5) Clays
– 8041 (Storage 3 on 5) Wood
– 470 (Storage ) Lime blocks
– 800 (Storage ) Limestone
– 25 (Storage ) Iron ingots
– 480 (Storage ) Straw
– 5 (Storage ) Mechanical parts
Limestone:
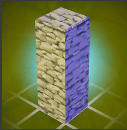 – 6283 (Storage 4 on 7) Limestone
– 5485 (Storage 2 on 3) Wood
– 470 (Storage ) Lime blocks
– 25 (Storage ) Iron ingots
– 480 (Storage ) Straw
– 5 (Storage ) Mechanical parts
Lime blocks:
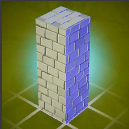 – 5953 (Storage ) Lime blocks
– 5485 (Storage ) Wood
– 800 (Storage ) Limestone
– 25 (Storage ) Iron ingots
– 480 (Storage ) Straw
– 5 (Storage ) Mechanical parts
Brick:
 – 5483 (Storage ) Bricks
– 5485 (Storage ) Wood
– 800 (Storage ) Limestone
– 25 (Storage ) Iron ingots
– 470 (Storage ) Lime blocks
– 480 (Storage ) Straw
– 5 (Storage ) Mechanical parts
Preparation
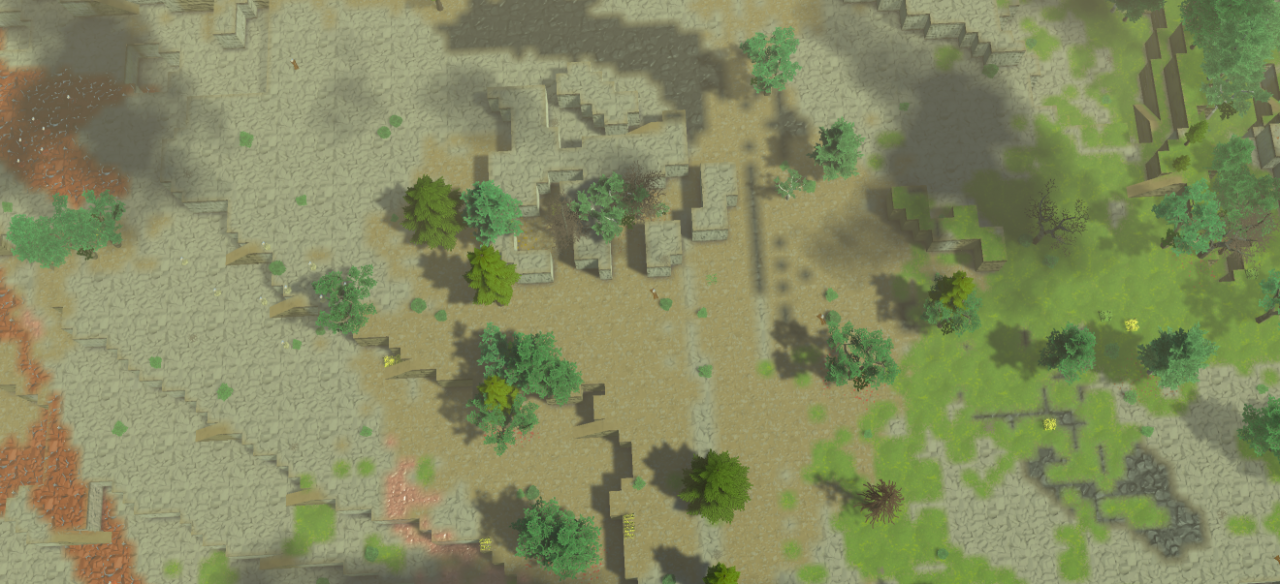
so, after we have found a place we make a markup.
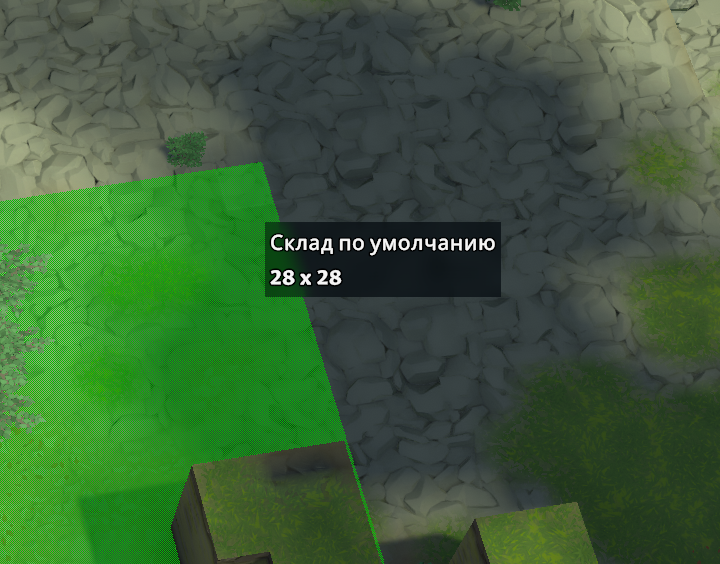
Don't forget to clean everything
Further, take a look at the diagram.
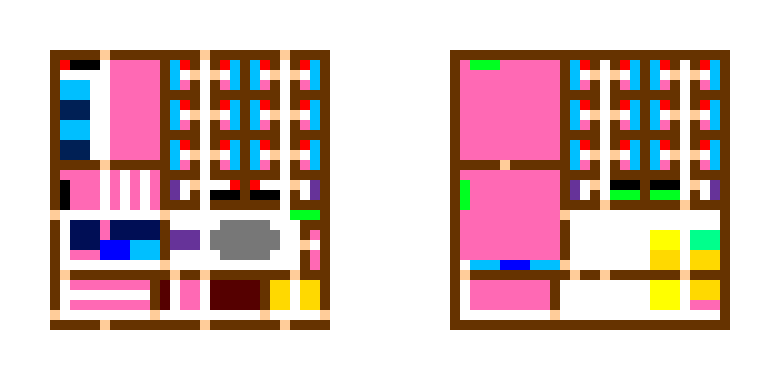
- Brown – walls
- Beige – Doors
- Green – stairs down
- Black – stairs top
- Blue – Beds
- Blue (Different shades) – craft tables (Different shades, to distinguish them not in the scheme)
- Yellow – Everything about food
- Violet – Altars and entertainment
- Red – Roasters
- Grey – tables and chairs
- Burgundy – research tables
- Mint – healer's table
- Pink- warehouses, racks, shelves and stuff
There is no point in looking especially closely now, we mostly need her, to align the walls correctly.
Building base and furniture
 We expose the walls focusing on the diagram or the screenshot below
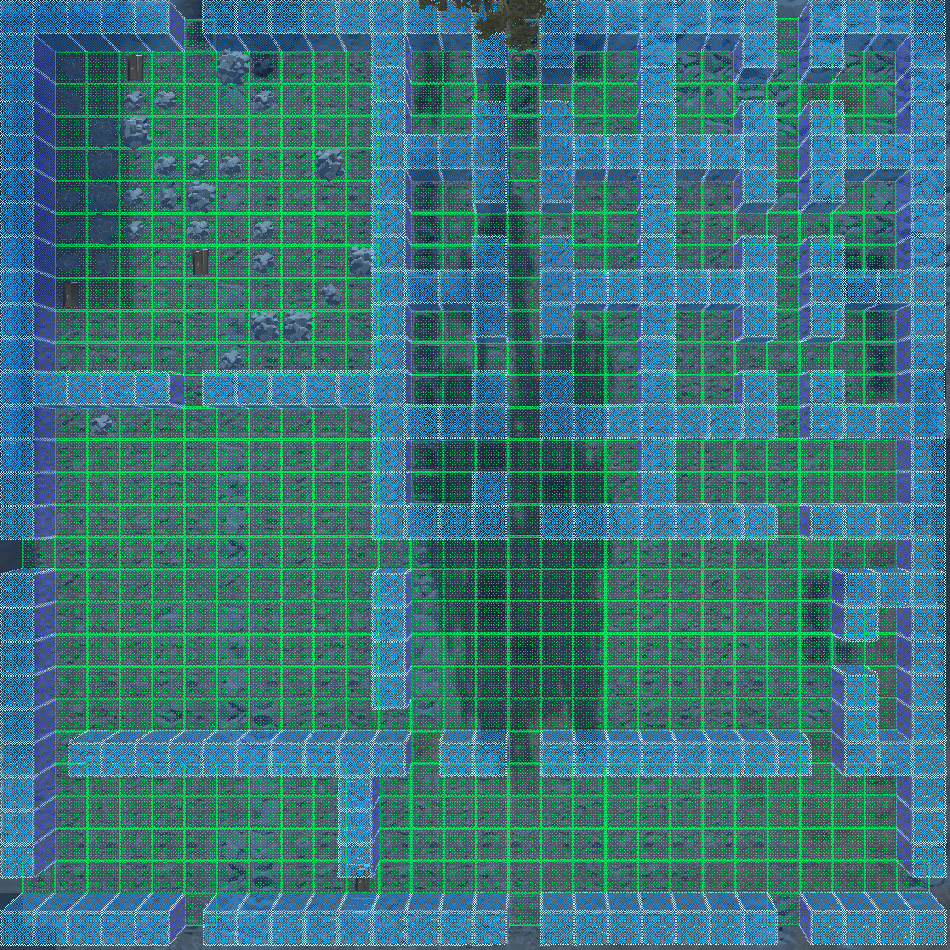 Add doors, stairs and non-load-bearing walls, she's the only one between the library and the kitchen.
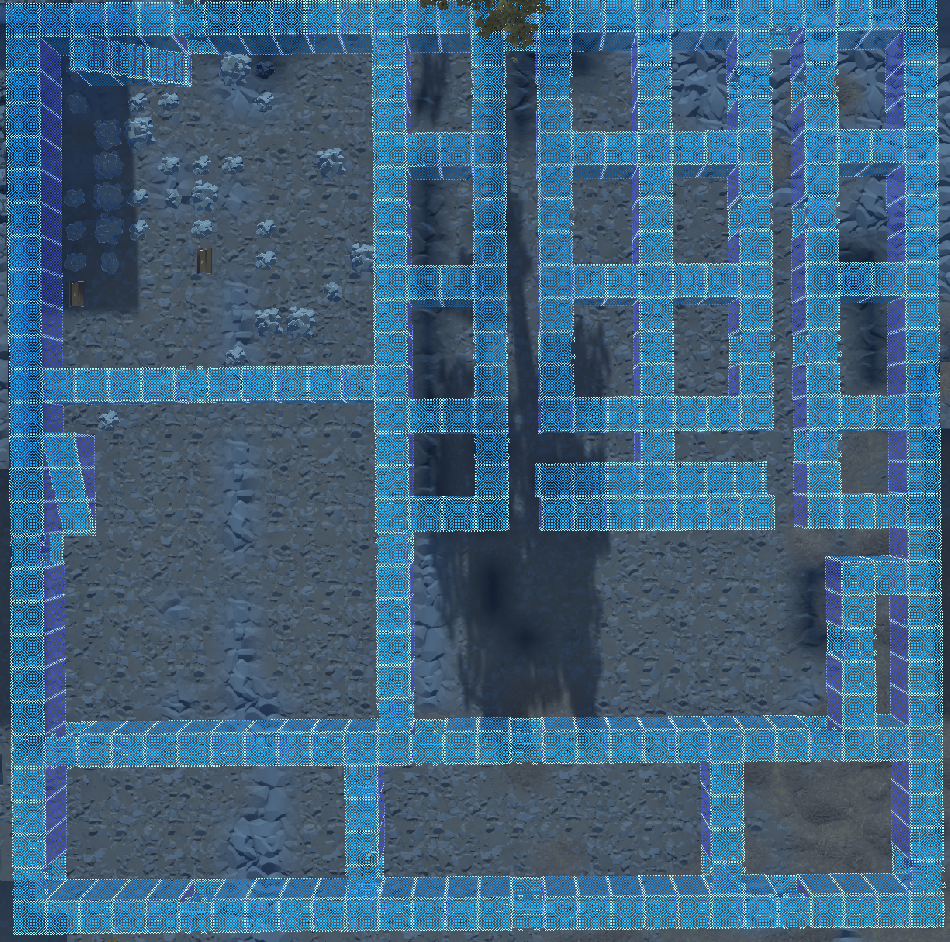 If not clear, what is where, you can look at the diagram from the previous section)
We put the next floor of the walls, this must be done before, how to mark the floors, to save about five hundred resources.
Attention, I put some extra windows for beauty, they are not required there, if you want to repeat it will add 119 units of corresponding resources.
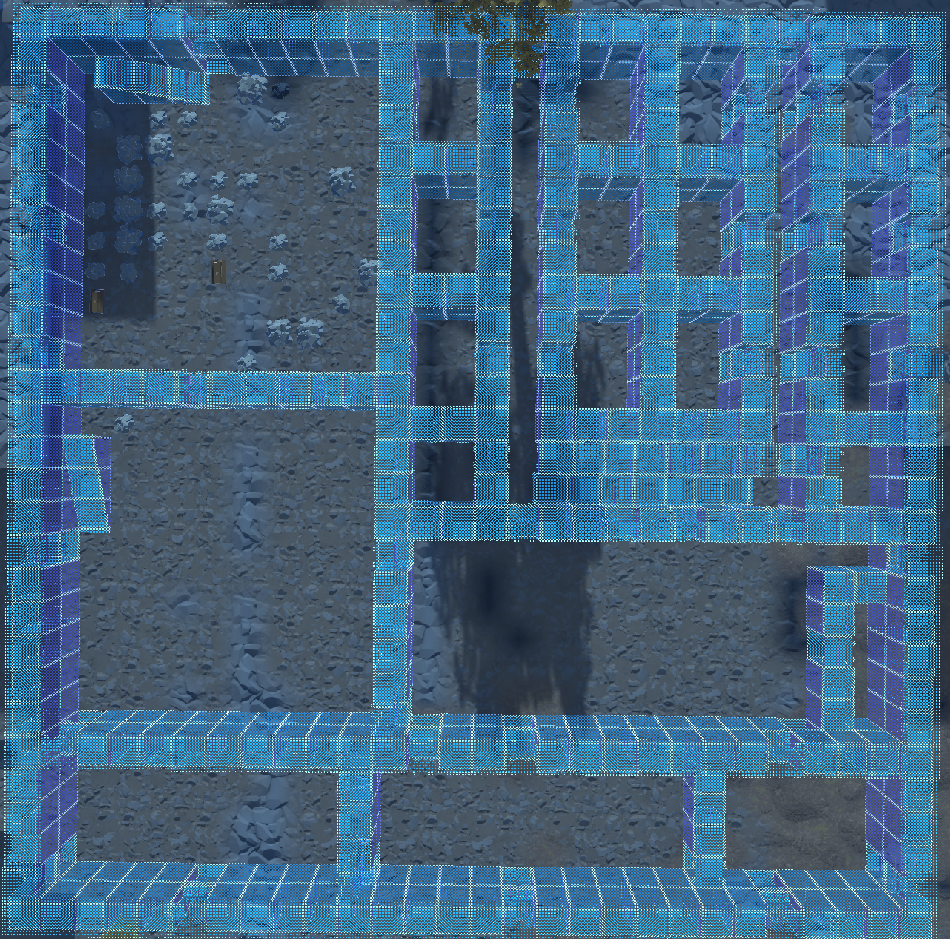 We are waiting for everyone to build
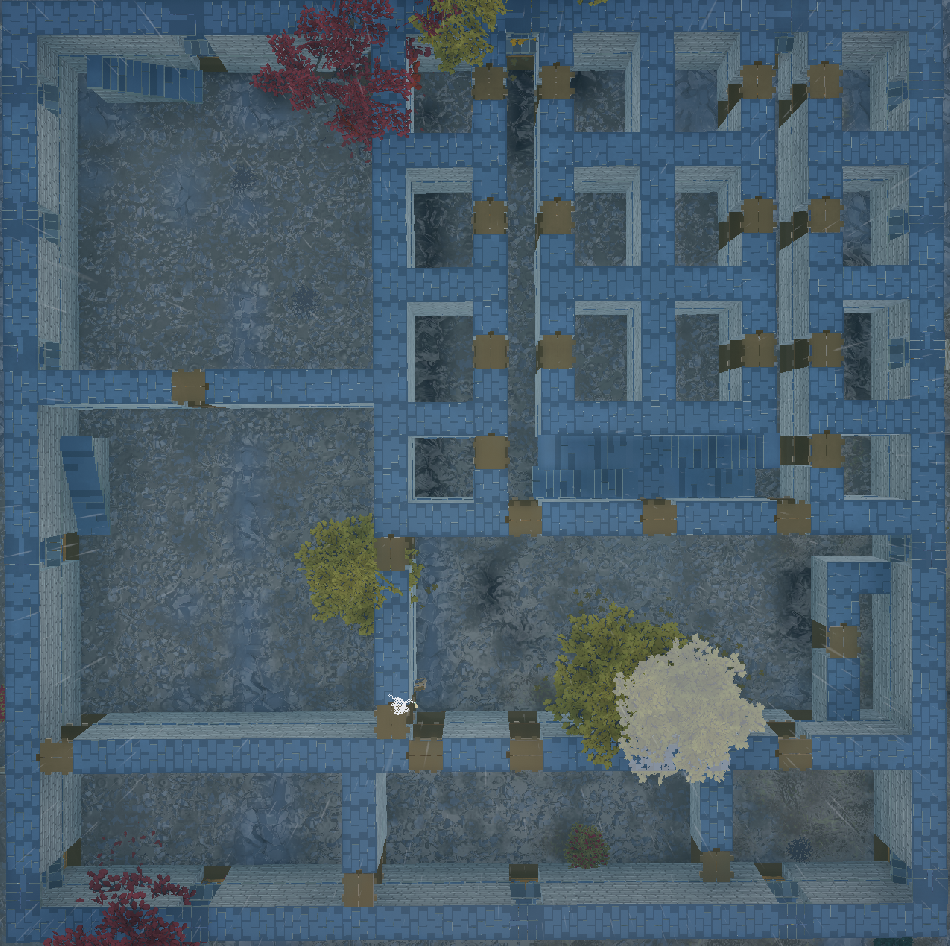 We put the floors of the first floor and beams in large rooms
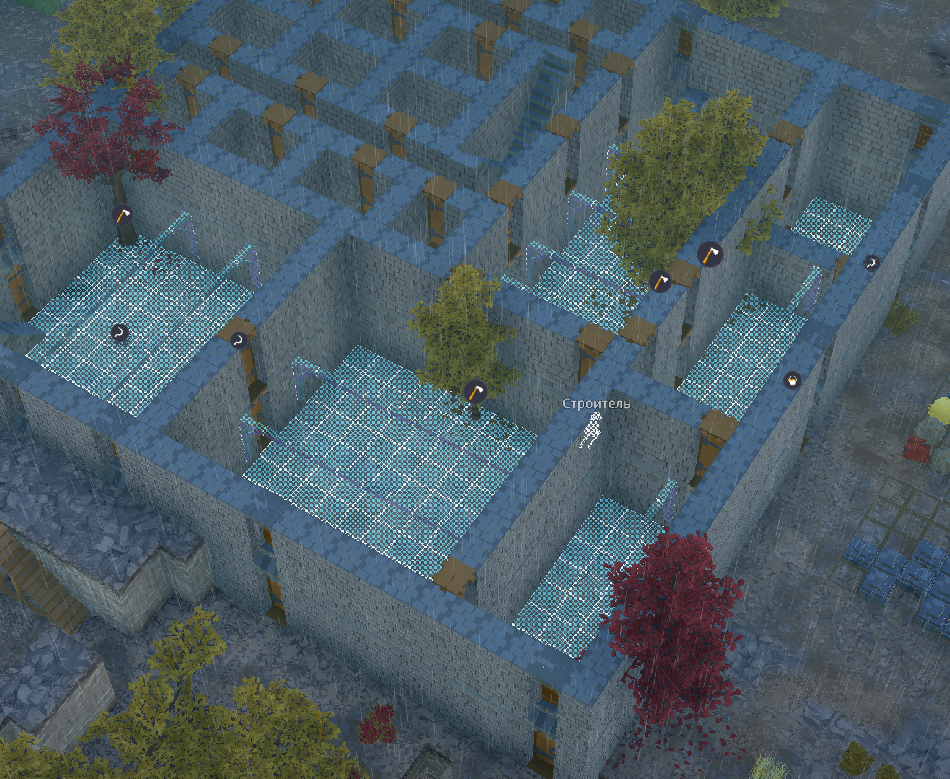 Second floor beams as in the picture
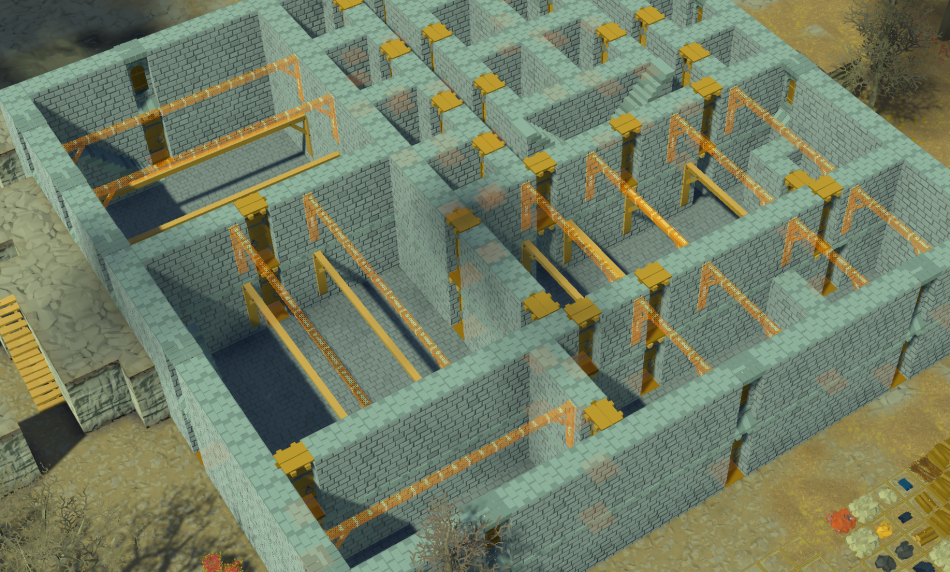 And we cover everything with floors at once the second floor and the roof
The base is ready, we fill the floors with furniture.
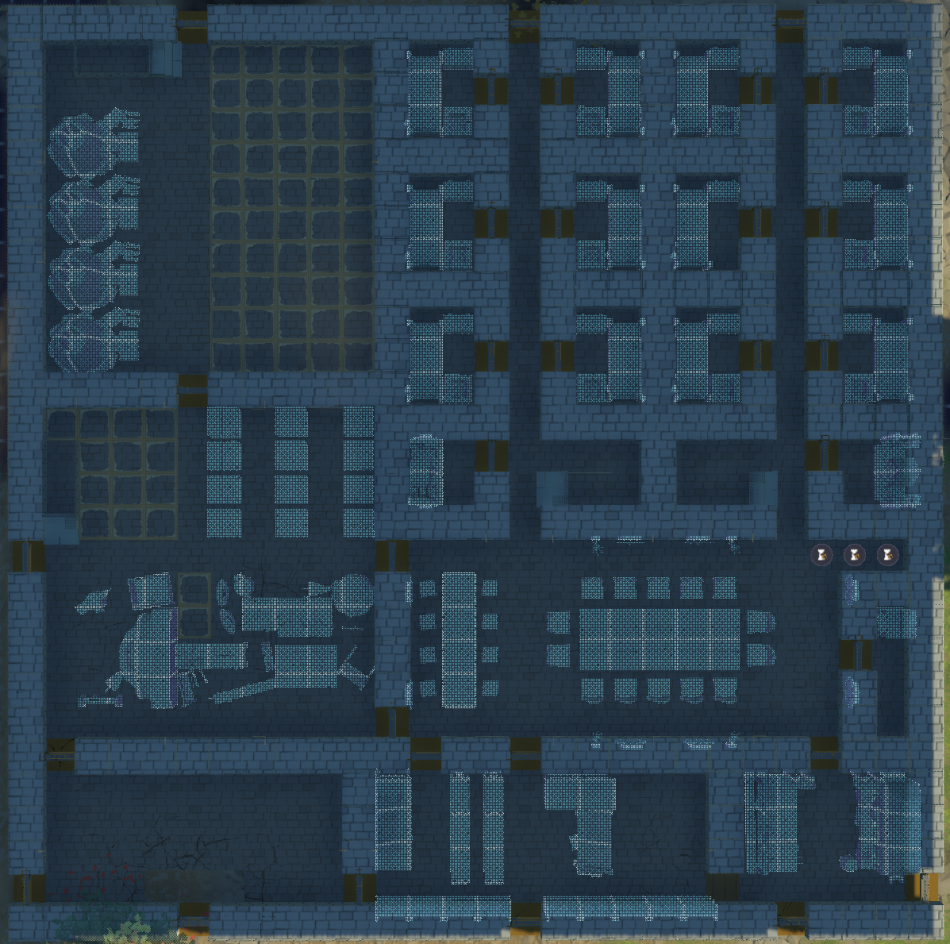
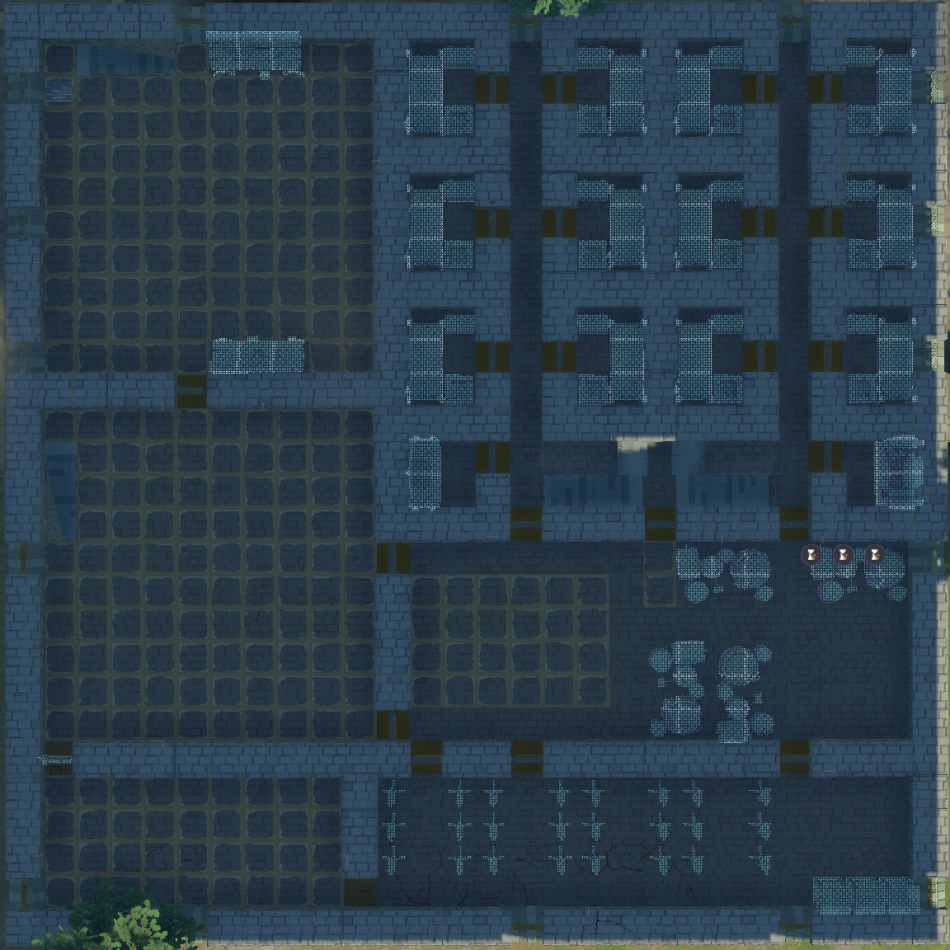 At the time of the creation of the guide, I was missing some technology, but let me remind, mint is the doctor's table, but 3 on 3 yellow is a distiller. The rest of the space you yourself can think of where to define.
Placement of warehouses.
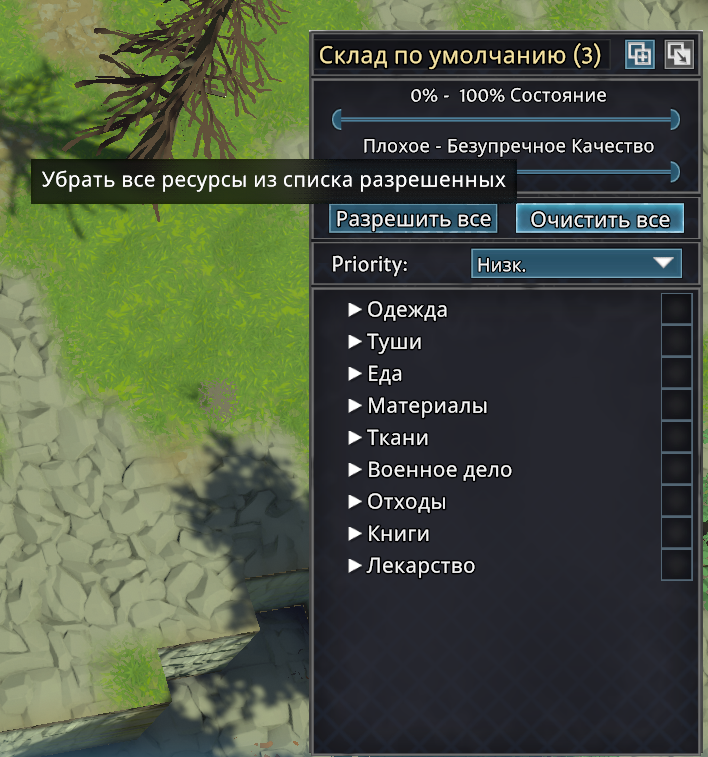
[Set priority high]
In the workshop you need to keep 2 place for coal, between the armored man and the forge and precisely between them, because the archer and seamstress don't use it, behind the armor there are shelves for fabrics, and in the corner under the stairs fold all the steel, which you will find. Ditto if you think, that the seamstress works more often than the armorer, you can change their location to mirror, that is like this. The productivity of the seamstress and archer will be increased, but the armored man will run a little longer before they began to run.
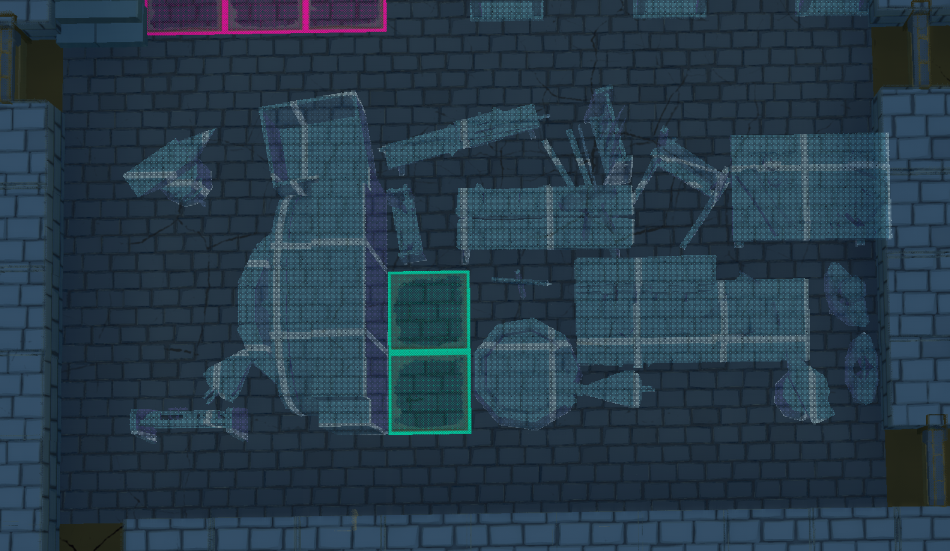 [Set priority high]
In library, bookshelves 18 PC, along the wall, between tables and on the wall near the workbench 1 lvl, you can put them there, though the texture will overlap a little
[Give priority to the highest]
To the left of the large hall and on top of the kitchen there is a small nook, with one shelf and two storage cells, shelf for a lush meal, and put beer in the warehouse, it is imperative, so that your settlers don't run to the basement for food, every morning, and then back to the main hall. The food there will spoil very slowly., and if it does go bad it will be a small part (Each settler has 2 pieces of food per day consumes, this is 200 nutritional value, so this warehouse will be updated regularly, if you have at least 10 settlers).
[Give priority to the highest]
Each settler room has a chest, remove military affairs from there, leave only summer and winter clothes. (That is, at the only moment there should be, for example, a hat and a winter, or hat and summer, since there are two places).
[Set priority high]
On the second floor above the smelters, stack the clay, limestone lime blocks and bricks, as well as a pellet, gold, silver, silver and mechanical parts
[Set priority to low]
On the second floor above the workshop, fold, iron ingots, steel ingots, gold bars, fabrics, timber, straw, sickness. You can also throw military affairs and clothes from fallen enemies there., to melt.
[Set priority to low]
In the brewery room, two storage cells for coal and a storage for barley, in the future, it is better to make shelves for barley there, but only if he suddenly stops climbing.
[Set priority high]
Above the library are 24 armor stands, very useful at the time of the attack. Display only armor there and choose a specific set of armor, which the settlers now use and also limit the quality at the lower border. If you don't want to control it yourself, you can set the mode of melting any armor in the forge whose condition is lower 80%, and prohibit racks to keep armor less 80%, then set the mode in the forge “maintain the number” eg 24 plate armor, thereby, your settlers will always have as much armor as possible and you will not miss the moment with the need for repair
By the way, what is the impact of the margin of safety of the armor and how to make steel armor and other items, you can take a look in my other guide

By the way, you can do exactly the same with clothes and weapons.
There are also shelves for the doctor in the same room., but there just stack up some herbs and medicine, be careful, herbs suffer from fever, don't keep them there a lot, one shelf is more than enough.
Basement
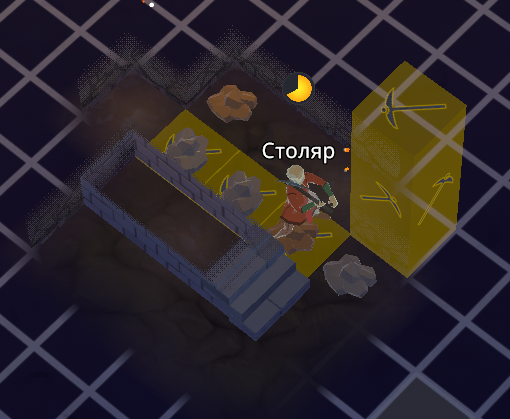
 This is immediately followed by a door and a descent below, but do a little indent, to form a room, it is needed for heat transfer.
And also the passage, to the kitchen pantry (Where we have a shelf with food and beer). Make beams just in case. We will need this passage, to cool the pantry, to the state of frosty freshness, the higher the house is above the granite, the more effect you can achieve.
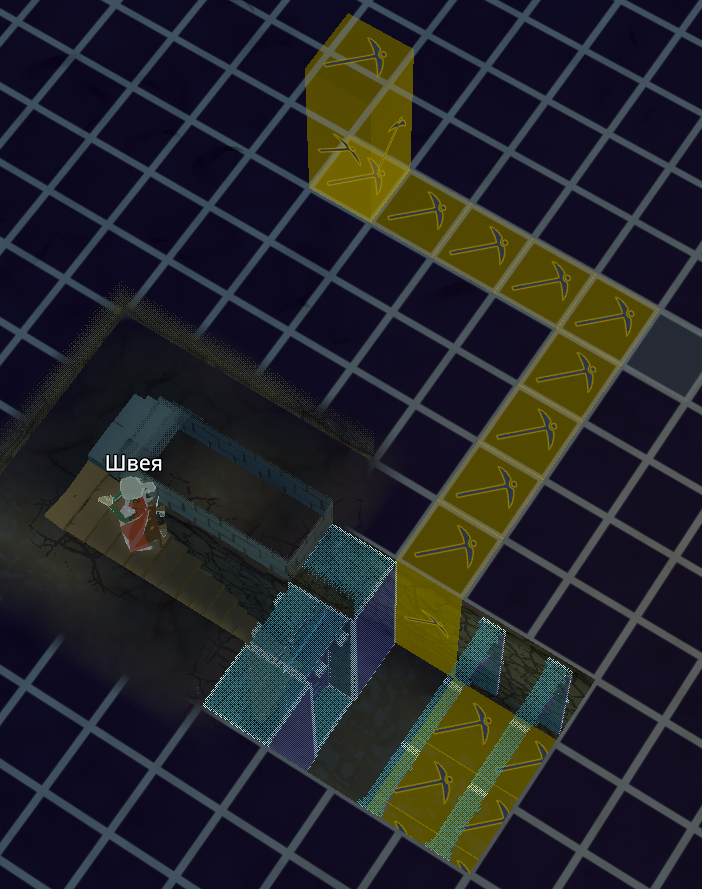 We make a move down at least three levels, creating mini rooms between them, generously wherever possible by placing beams.
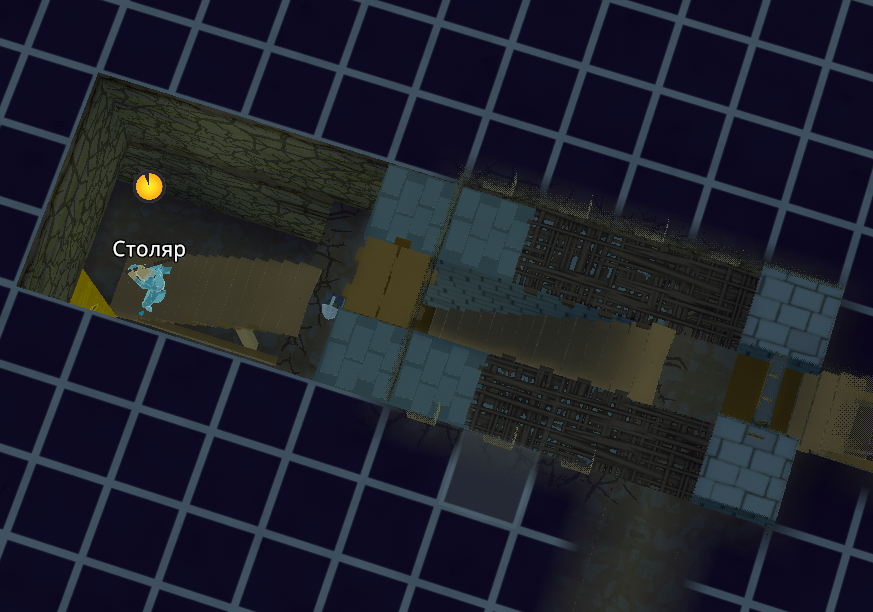 When you reach -4 floor we need to make a thermal well.
Just the descent is the very bottom, the easiest way is a pit 5 on 5 (Don't forget about beams)
Temperature inside one room, always the same, so roughly 2 degree Celsius can be achieved exactly, even with a heat wave, maybe lower
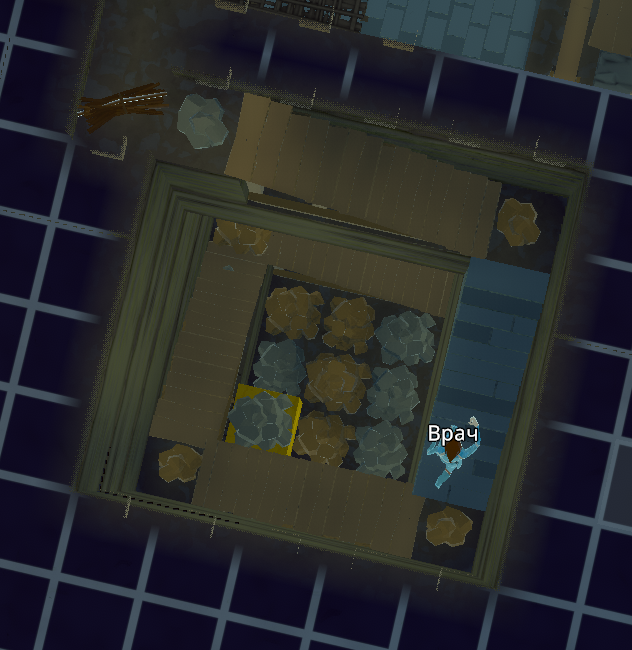 Then make a warehouse of absolutely everything, you can even in -1 floor, most importantly, do not forget to push the beams to the maximum.
Building defense (Stage I)
First of all, you need to replace all external doors with reinforced ones. note, that despite the fact, that a lattice door is more expensive, it has less strength, its advantage, that you can shoot through it (At the same time, it does not have thermal insulation., which is really bad)
The second thing to do is the teeth with the mashicules. (This is one object in the game., prong).
An important point, the prongs can be placed in two ways, on the wall and in the butt to it, the difference is, what if you put them on the wall, then only teeth will remain, and the mashikuli will hide, thus, the settlers will be deprived of the opportunity to shoot down. I would still recommend the second option, since shooting under the door is useful.
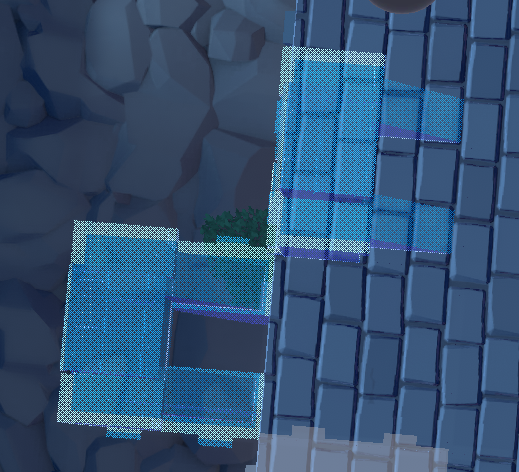 By the way, settlers can stand on the battlements, only if mashikuli are open (That is, the prongs protrude in front of), otherwise, they will just stand in front of them.
I made straight away from stone bricks, but you learn, in the future, we will still partially remove this. On the defensive stage II and III
And the last, what should be done, this is to arrange the exit to the roof (By the way, on the roof, you can organize a warehouse of stone and everything that does not deteriorate, if you really don't have enough space, by the way, I don't really like sloping roofs, you can't even walk on them)
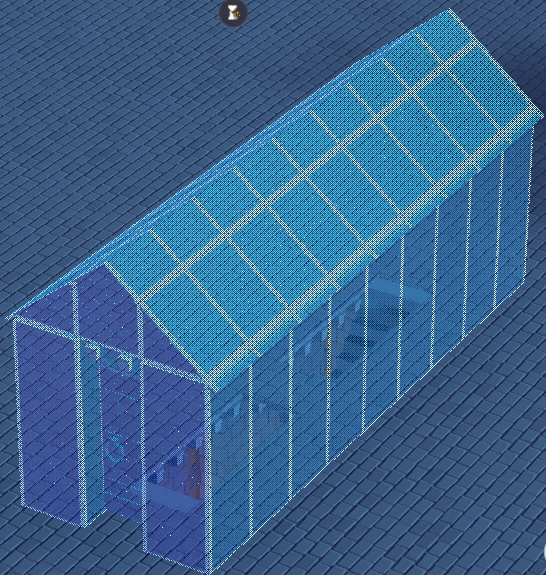 Not very elegant, but what you need.
Related Posts:
- Going Medieval: Crafting steel items
- Going Medieval: Finding the perfect settler skills
- How to make a good cellar in Going Medieval
- Going Medieval: Small guide (For newbies)
- Going Medieval: How to make a wall

Leave a Reply