
The guide is aimed at completing all tasks and tests, including finding the diary and curses. And also a quick overview of what's new in the Season Four update. Update is out 23 september 2021 of the year. The guide is updated with more information with every new event and update. You can find out more in the section “Updating the manual”
~~~ Robber Pass ~~~
There is a Battle Pass in Sea of Thieves. In the game, he got the name: “Robber's Pass”

This pass, like many others, contains two branches of awards. Plain and “Premium”.
Into a regular pass, which is available to everyone for free, robbers include rewards in the form of in-game items and various currencies, including ancient coins.
IN “premium”-the branch contains only items, who are or will be in the Pirate Shop. There will be no exclusive items in this thread, therefore, the players will not have an opinion about the purchase of this pass, for the sake of some limited subject.
The pass can be purchased at the Pirate Shop and will cost the player 999 ancient coins, which is equivalent to 259 rubles or 10$.
In the pass of the robbers of everything 100 levels. The pumping of these levels depends on the performance of various actions in the game, eg: Dug up the treasure, killed the skeleton, sailed another mile, visited the island, put treasure on a ship, etc.. In addition to these actions, Challenges also appear in the game, for which, you will speed up the leveling up in your pass.
We will talk about the awards below., in the relevant section!
Season 4 rewards. Part 1
Hat “Wicked web”
LEGENDARY PIRATE: Cursed Traveler's Saber
Rank: Legend of the sirens wrath;
LEGENDARY PIRATE: Wanda's Spyglass
~~~ New Emissary Rewards ~~~
New Emissary Rewards Added in Season 4. Players, who have already received all the awards, will be able to earn new rewards starting in October:
For a high rank in the rating table with the Gold Hoards, Orders of Souls, Trade Union and Dead Man's Bones players will be able to earn a spire, flag and sails!
For a high rank in the rating table at the Treasures of Athena, players will receive a new spire and steering wheel!
Due to the release of a new update, the world map has changed. New locations have been added to it. Use it in your travels!
Unfortunately Steam limits the size of the images that can be uploaded. I will add two links for high definition quality.
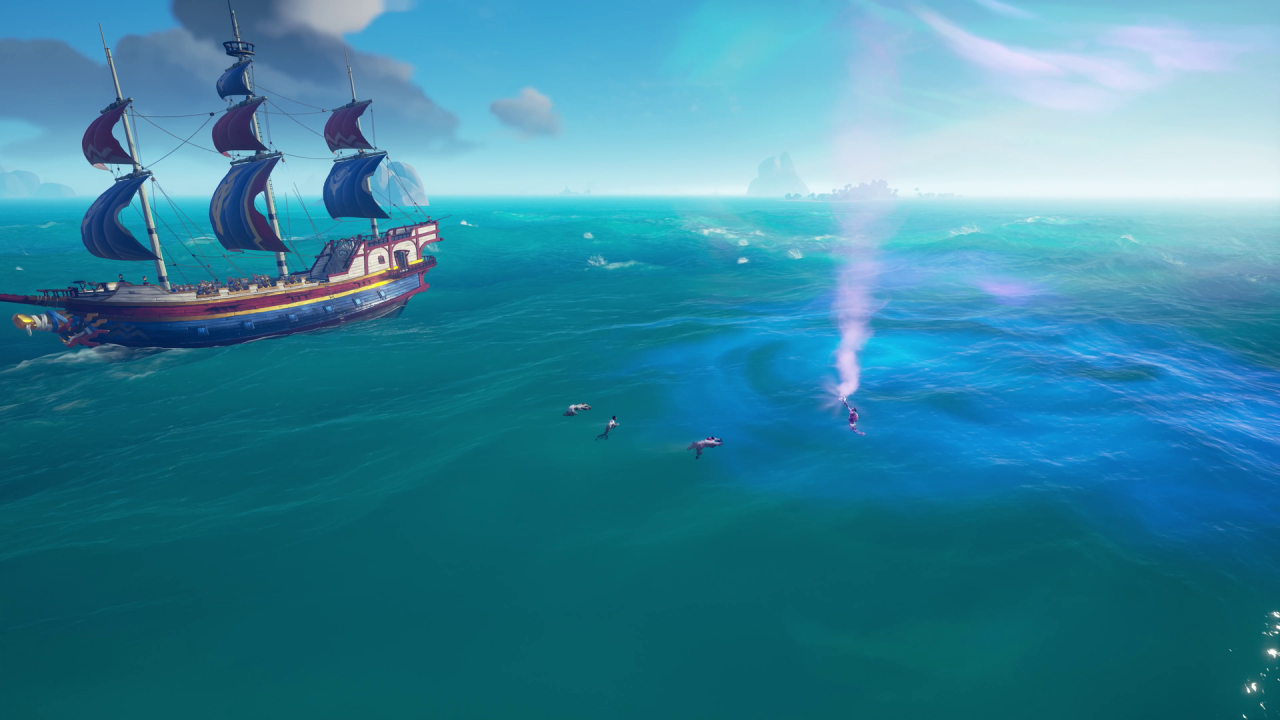
In the fourth season, added 9 new, unique locations. Their main feature is, that they are all underwater.
To discover these underwater sanctuaries and treasures, you just need to look at the world map, on the ship.
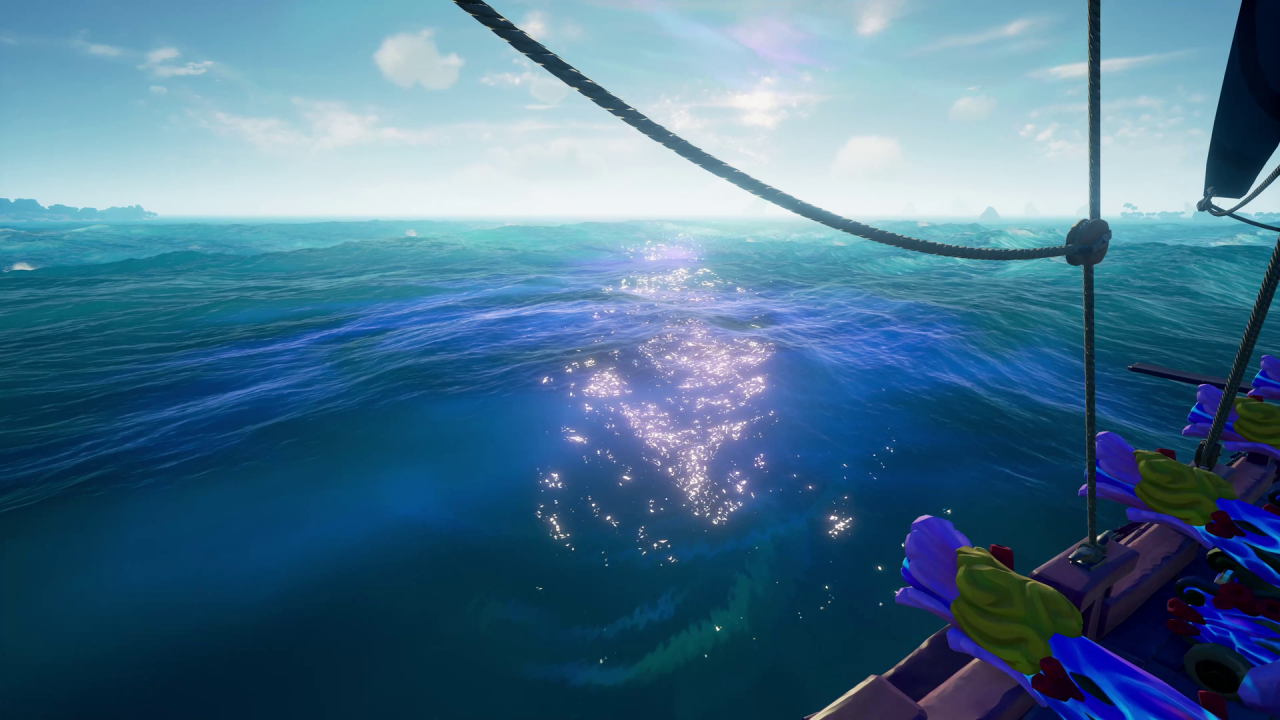
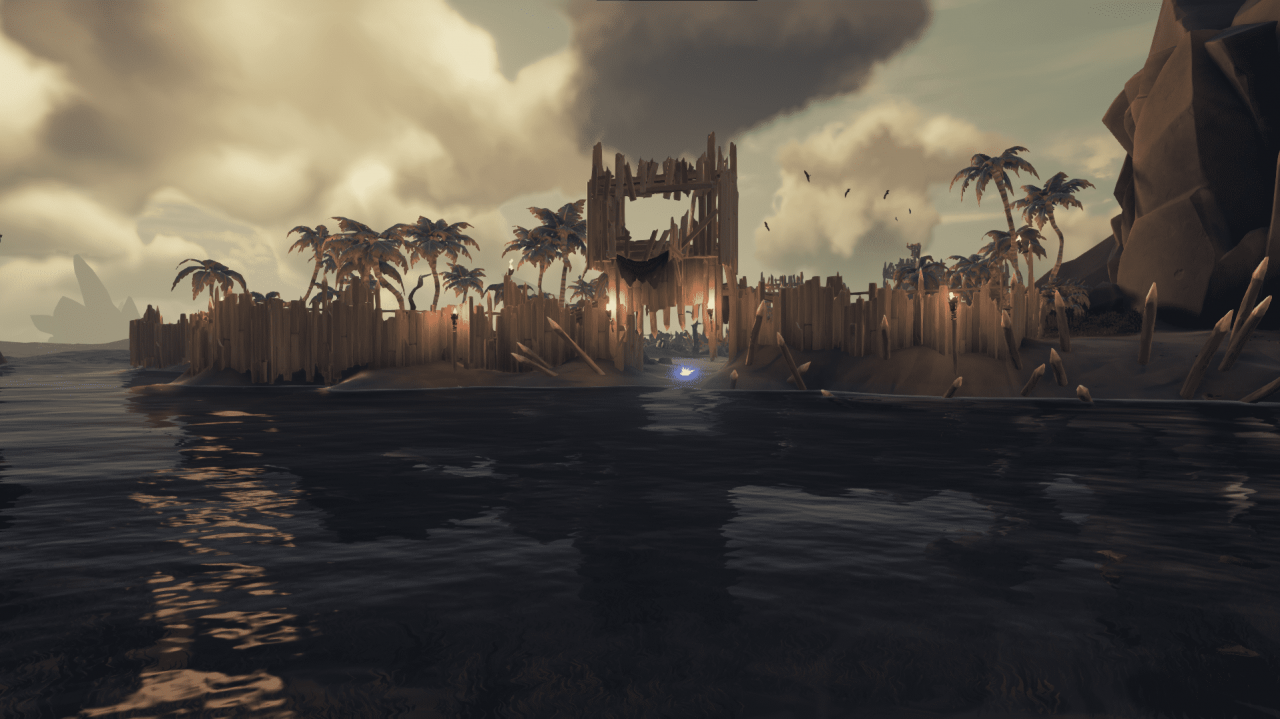
As you approach the underwater fortress, you can see its outline in the form of a huge purple pillar of light.

- Coral Tomb Shrine (H-5)
- Ocean Destiny Shrine (D-14)
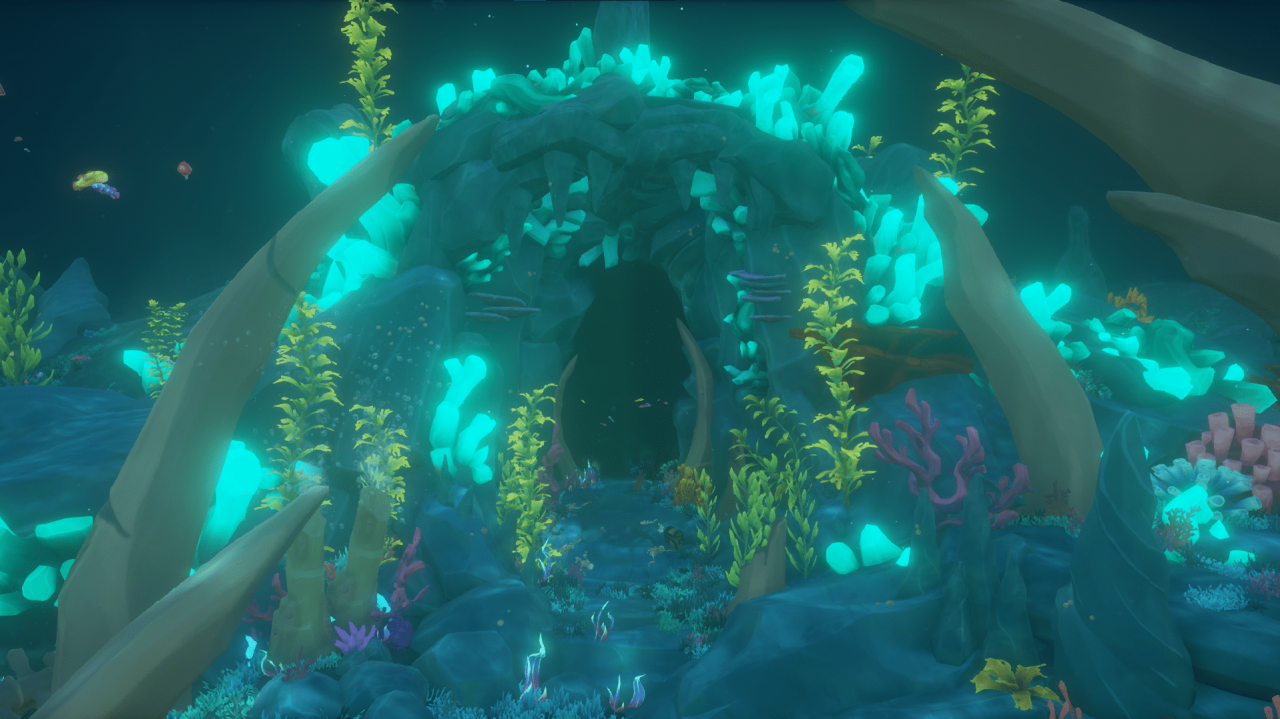
- Shrine of hunger (Q-5)
- Shrine of the Drowned Embrace (N-12)
- Sanctuary of Gifts (G-18)
- Shrine of Ancient Tears (N-20)
- Sunken Shore Treasure (D-3)
- Secret Treasury of the Wildlands (L-3)
- Treasury of a Lost Civilization (H-15)
The main rule when diving is the dive site. Dive only within the purple pillar of light! This way you get bonus breath supply, and you can stay under water longer. You can replenish air in air pockets or near corals, from which the oxygen source comes.
Inside each shrine, unique challenges await you. We will talk in more detail about each sanctuary in separate sections..
Inside the treasuries, waves of bottom dwellers await you (crab, electric eel , slimy hermit), coral skeletons and sirens according to the rules of the skeleton fort. At the end, a mini-boss will be waiting for you. It's boosted in 20 once a bottom dweller or a siren. The treasury from phase to phase will be filled with water or deprived of it, thereby making battles dynamic and varied.
In each location, statues of mermaids are placed in many places, which will take before 20 treasure units! Choose treasures wisely!
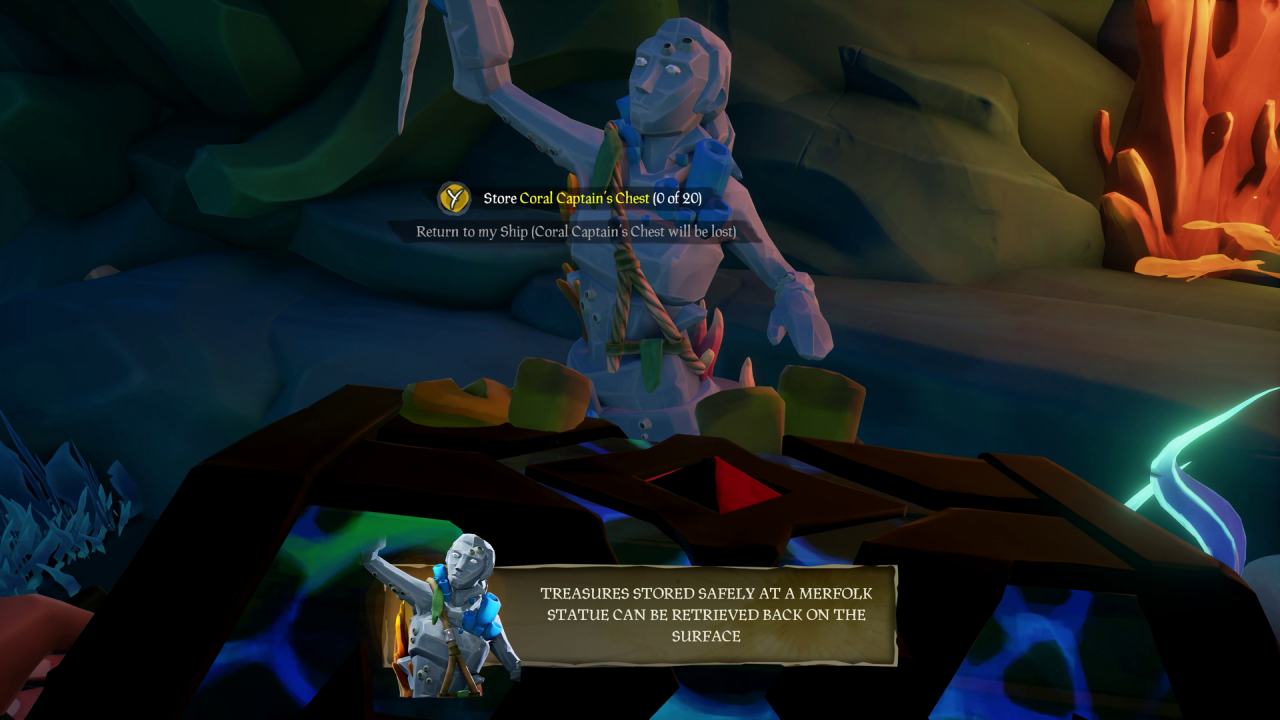
Treasure chest, in which you can put up 3 three items, will be counted as one item.
After that, how will you get back to the ship. A mermaid with purple smoke will be waiting for you in a purple pillar of light. Swimming up to her, you can get all the treasures, who put in a statue of a mermaid in the fortress.
In addition to new locations, the developers have added many achievements, associated with the sunken kingdom. Several of them are associated with diaries, located in every sanctuary. Each diary reveals plot details about the kingdom, characters and not only.
Total 5 diaries for each sanctuary. For reading all the diaries in all shrines, you will receive the achievement “The Mystery of the Sunken Kingdom”, as well as access to the quest of the rookies. In the sections below you will be able to see the location of all the diaries. However, I recommend finding them yourself., and only then return to the manual and find the missing ones for you.
We will talk about the opening task in a separate section..
MUST READ EACH DIARY TO THE END. PROGRESS IS COUNTED AFTER PRESSING “CLOSE” ON THE LAST PAGE!!!
The sanctuary is filled with levers and hidden areas, which are opened by solving riddles using levers. Once you get to the sanctuary, your task will be to find on one of the walls of the sanctuary the order of using the levers.
A task: fill the sanctuary with water, to access the main treasure group.
Only three stages. At each stage, 3 lever. New zones open after each stage, in which there are new levers, and also mermaids will appear, as a threat.
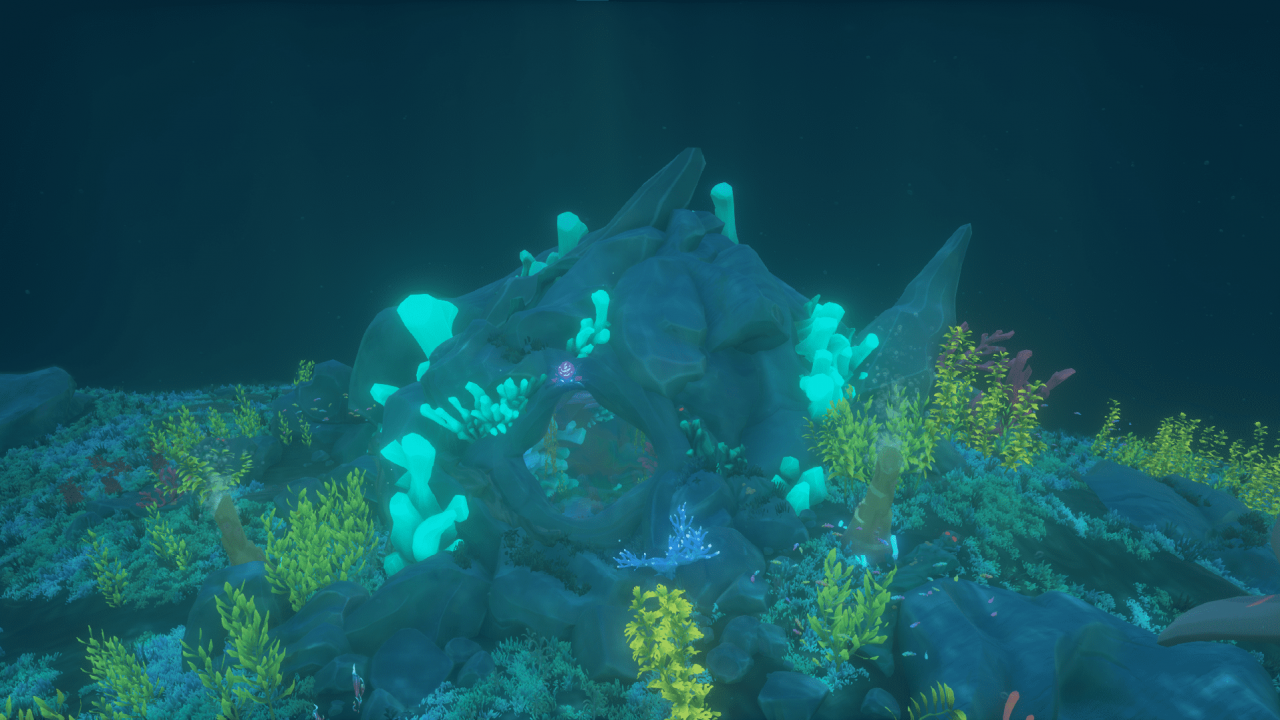
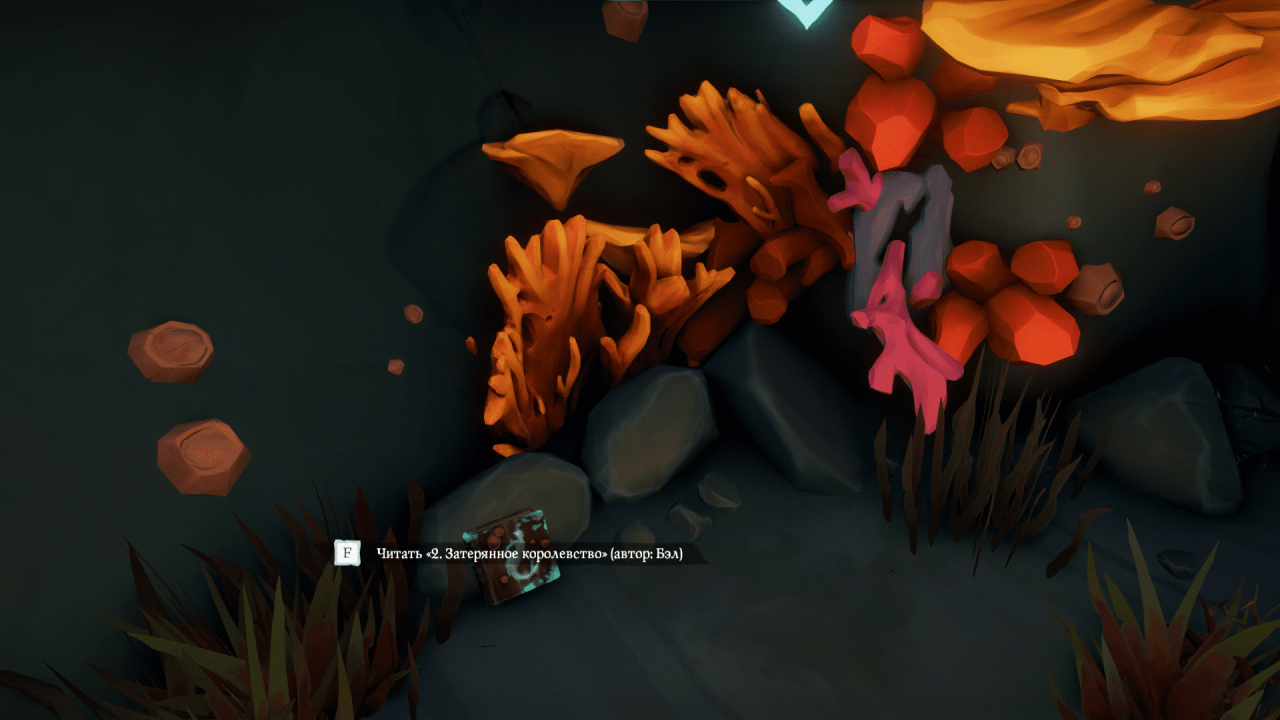
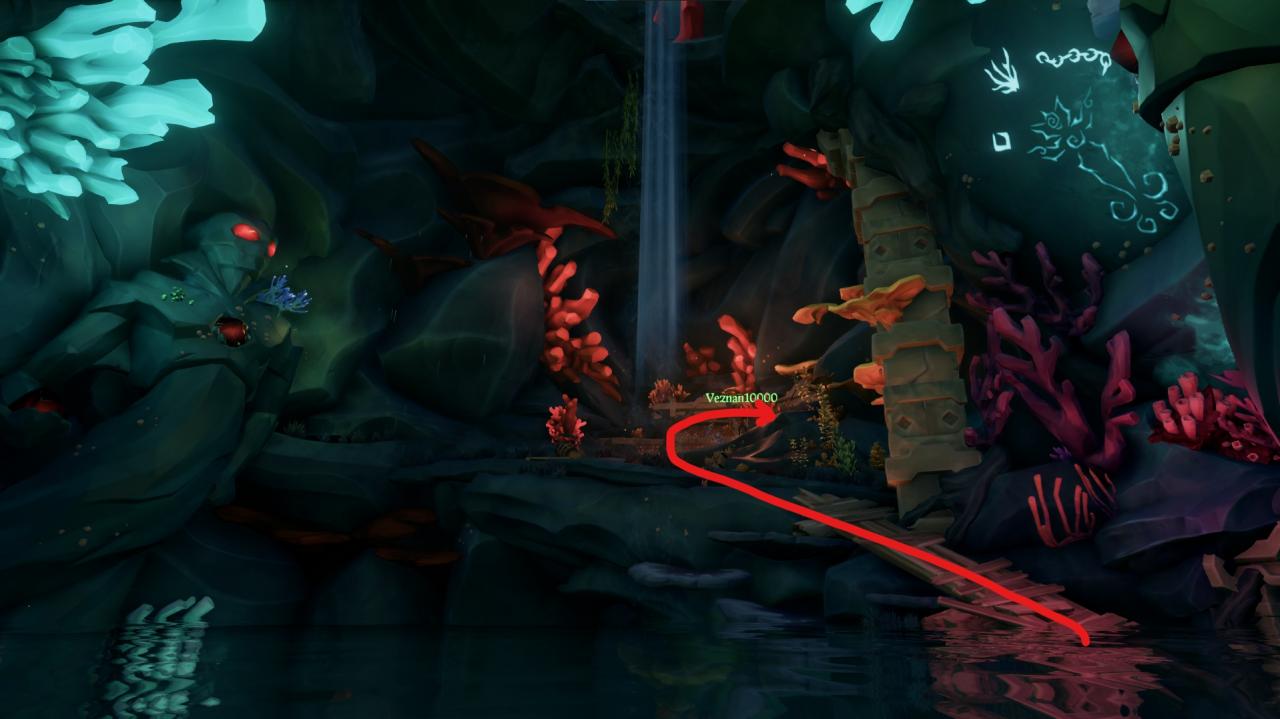
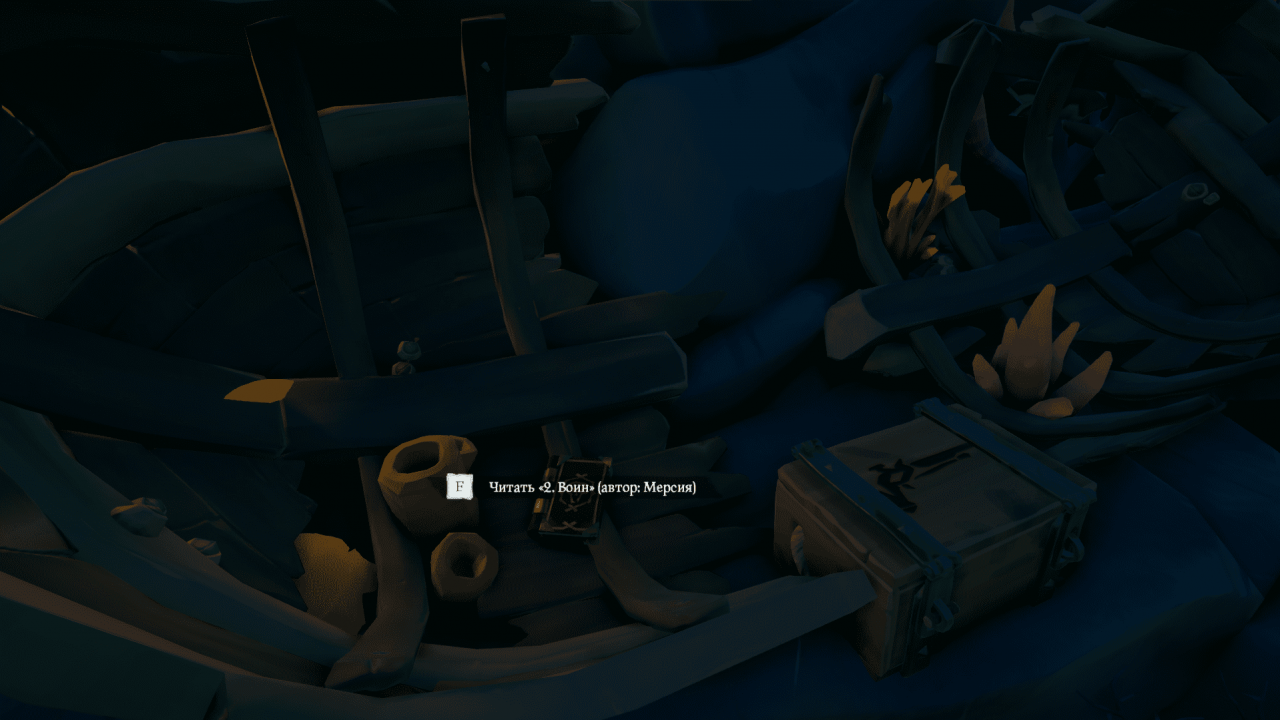
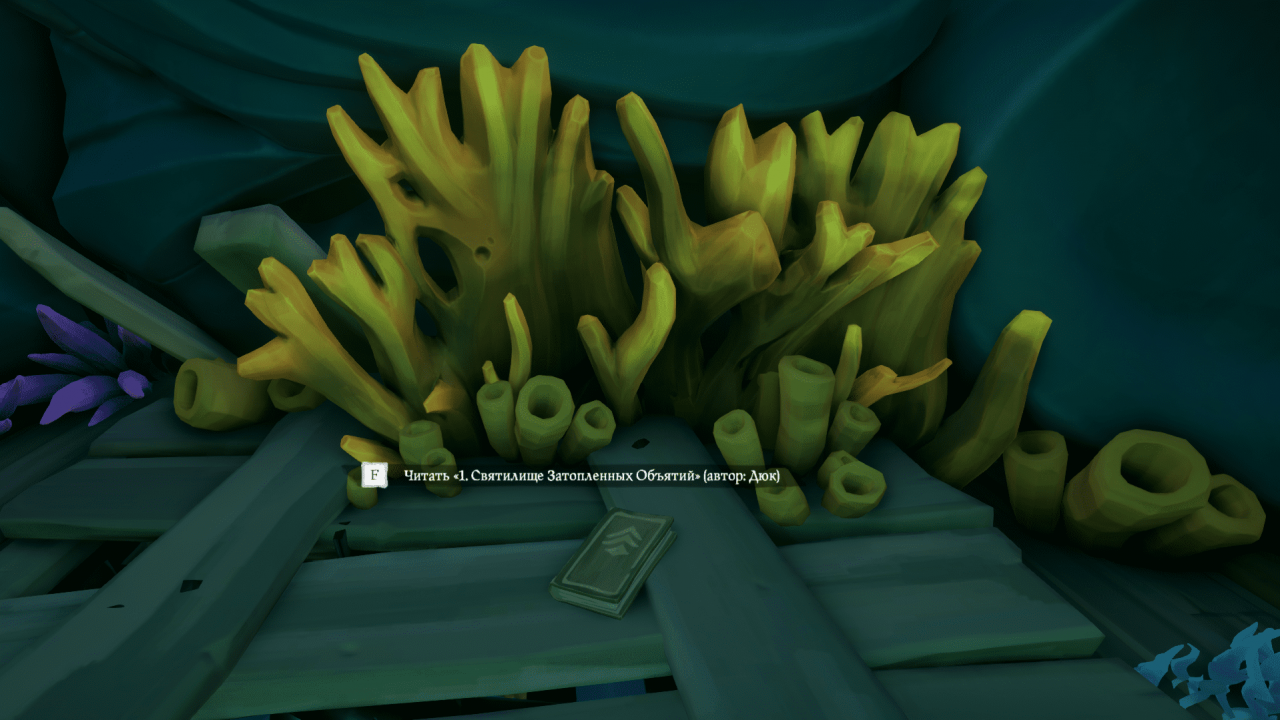
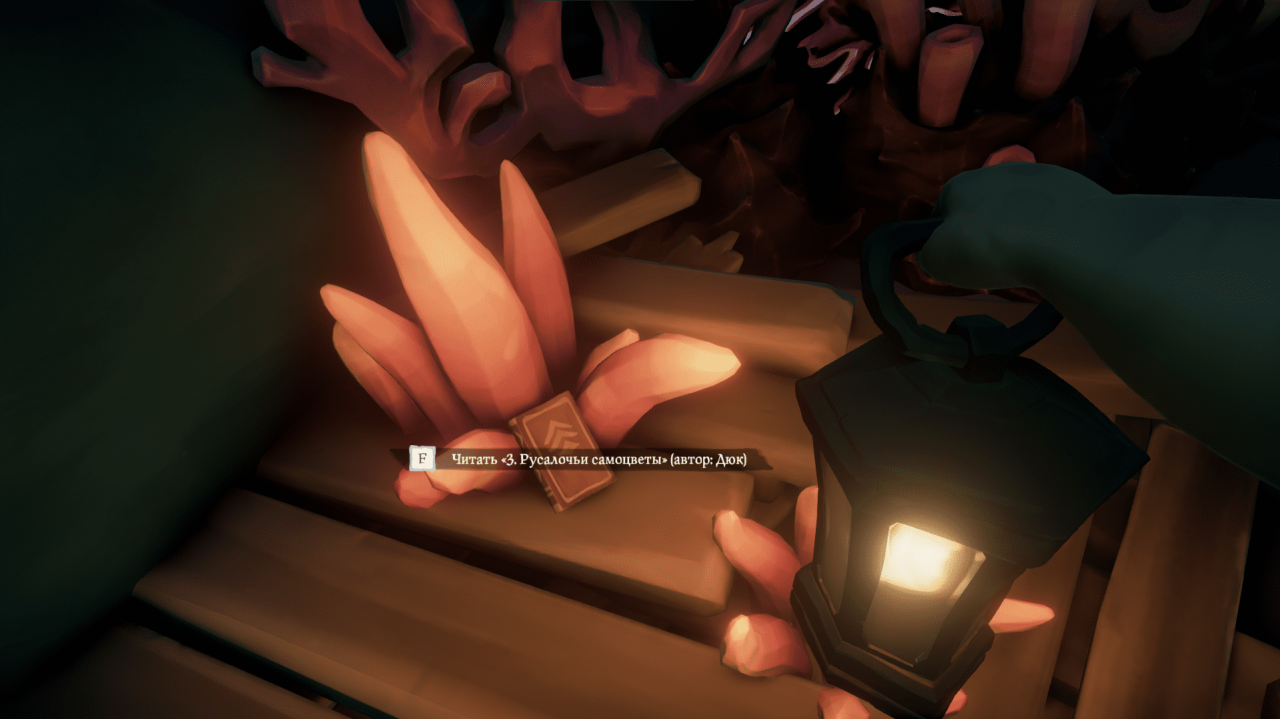
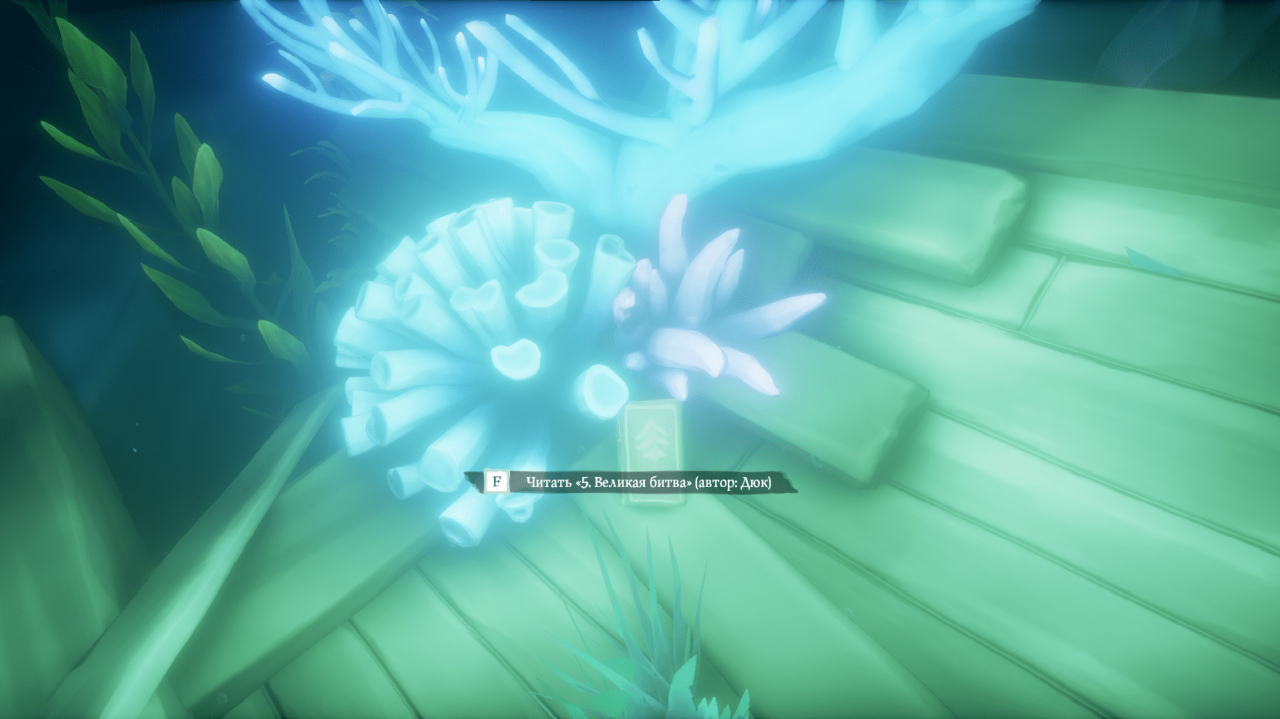
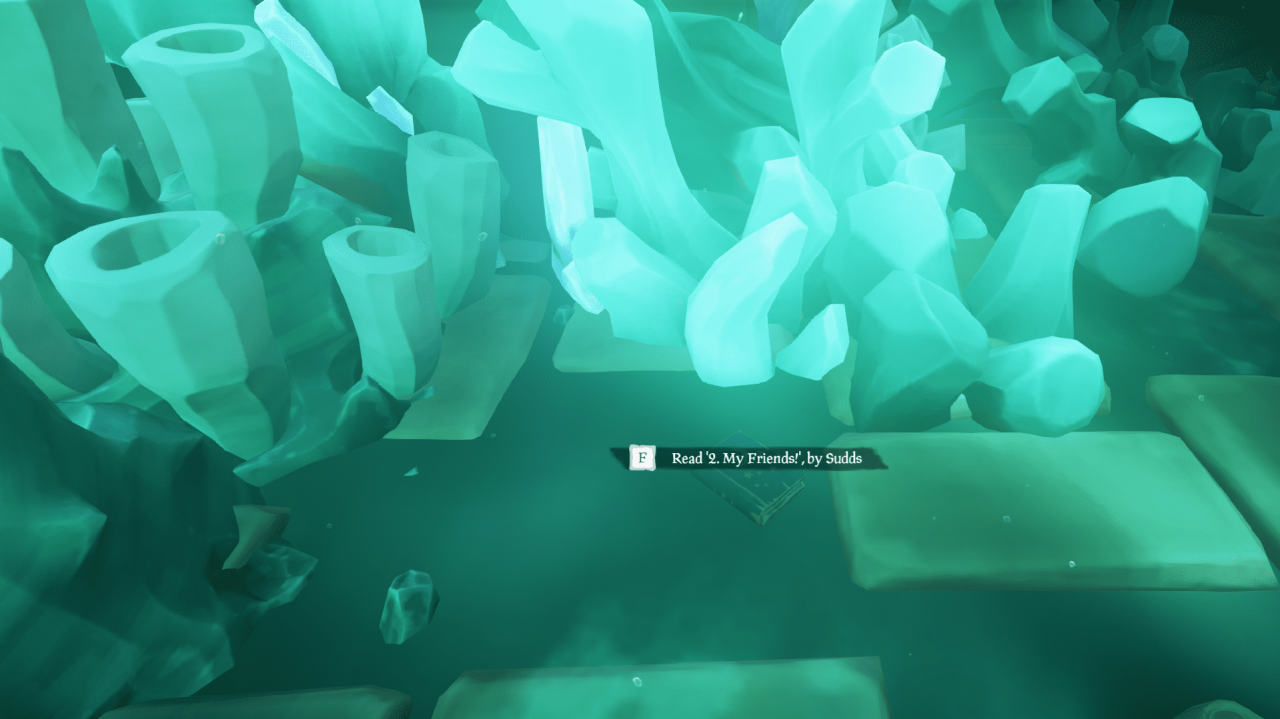
Immediately after, how do you get to the main part of the sanctuary, dive deeper. There will be the first diary next to the ammunition box..
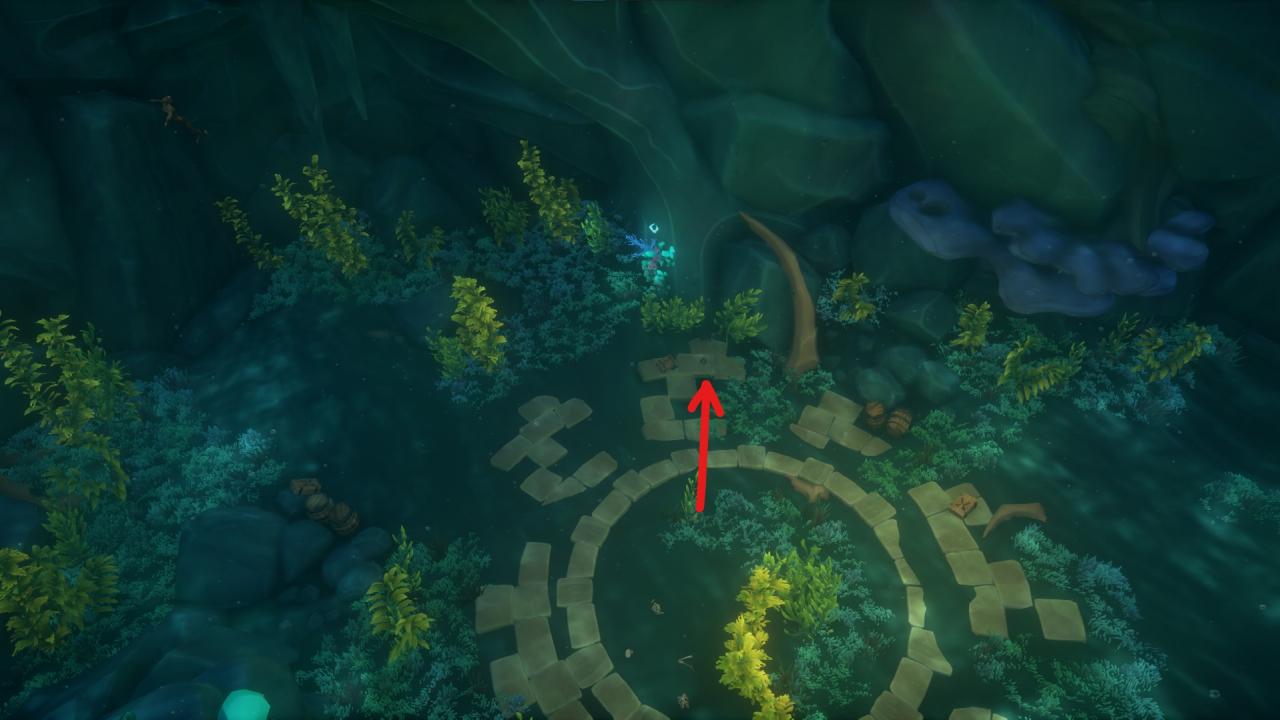

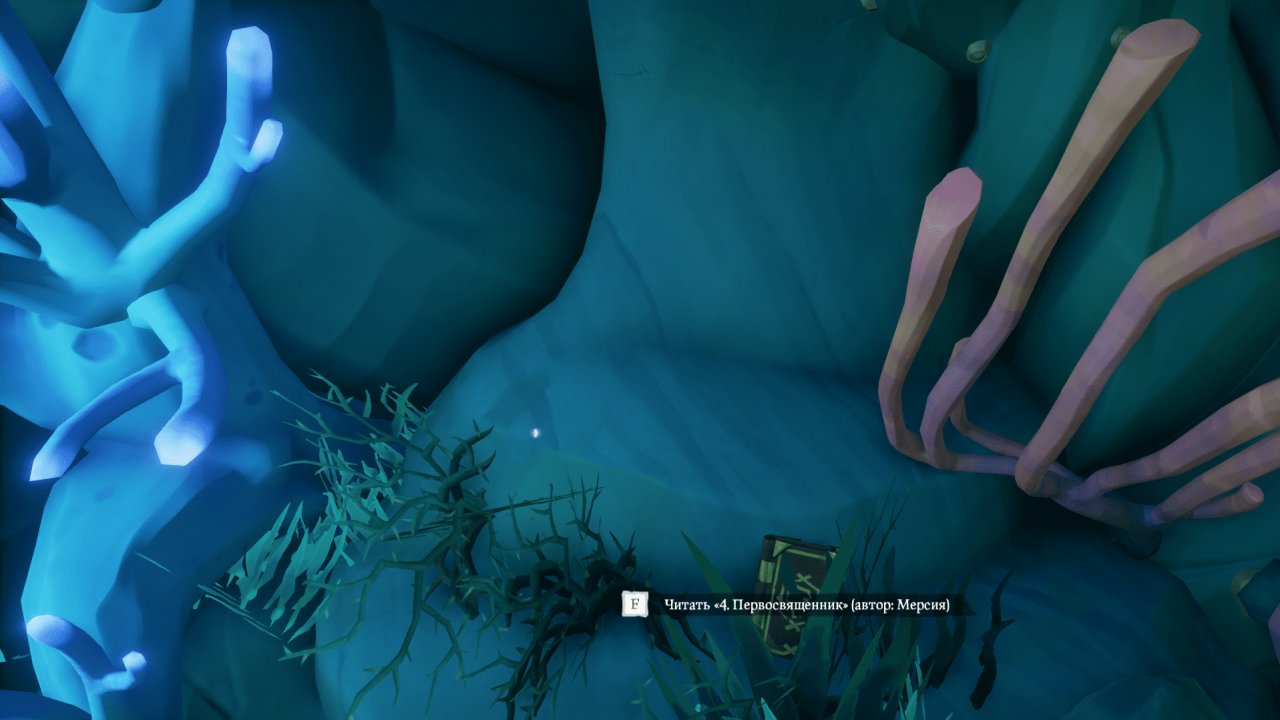
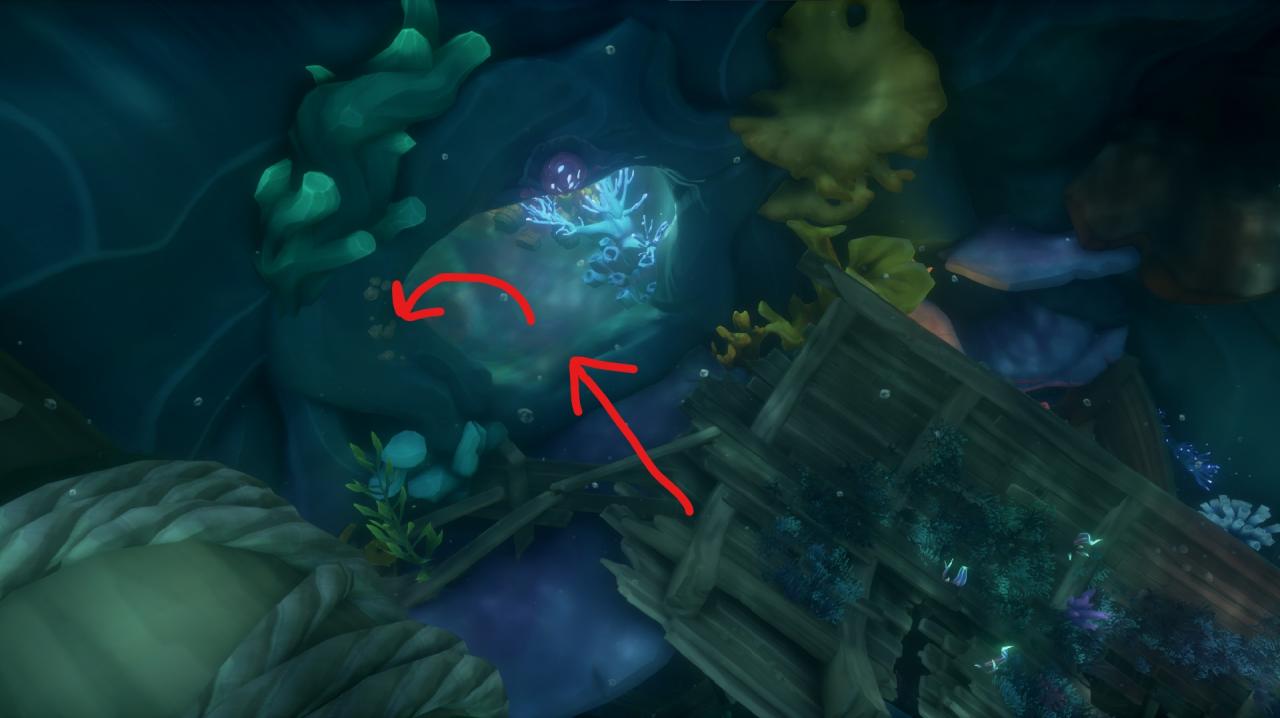
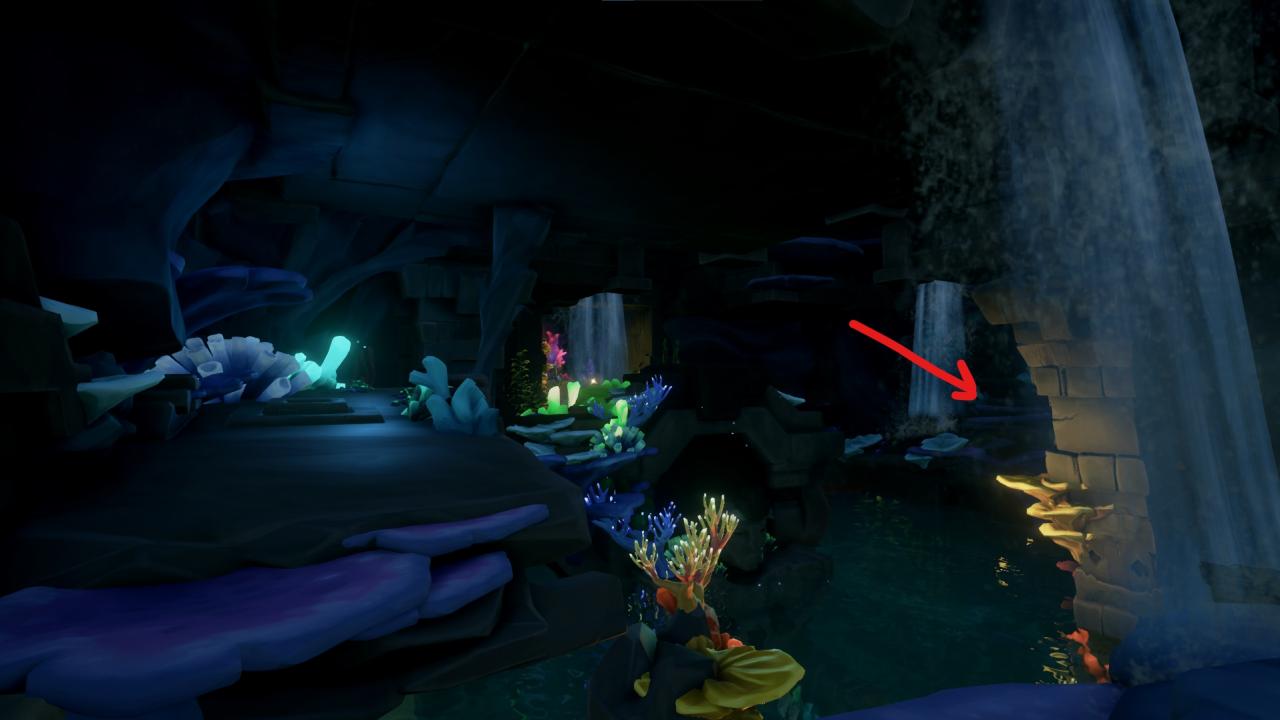
After solving the first three levers, new zones will open. One of them will have a lever, and also a diary, to the left of the lever. Look for a mermaid for treasure, as an identification mark.
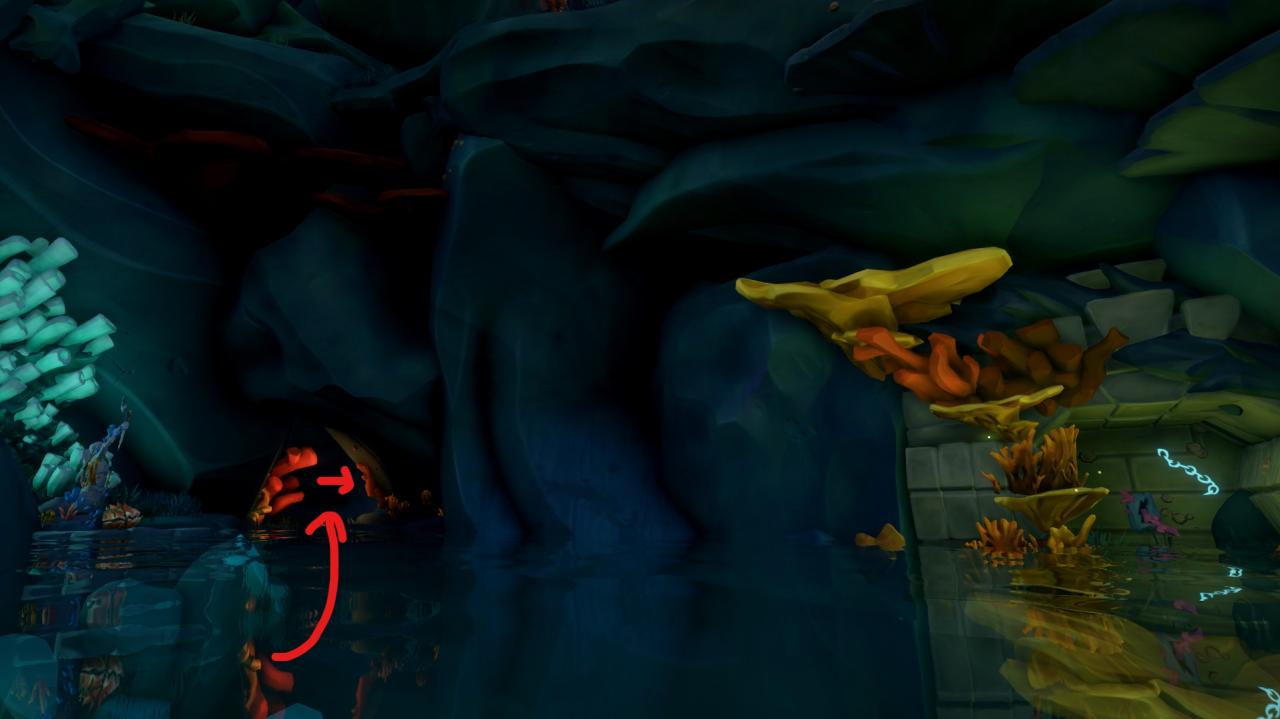
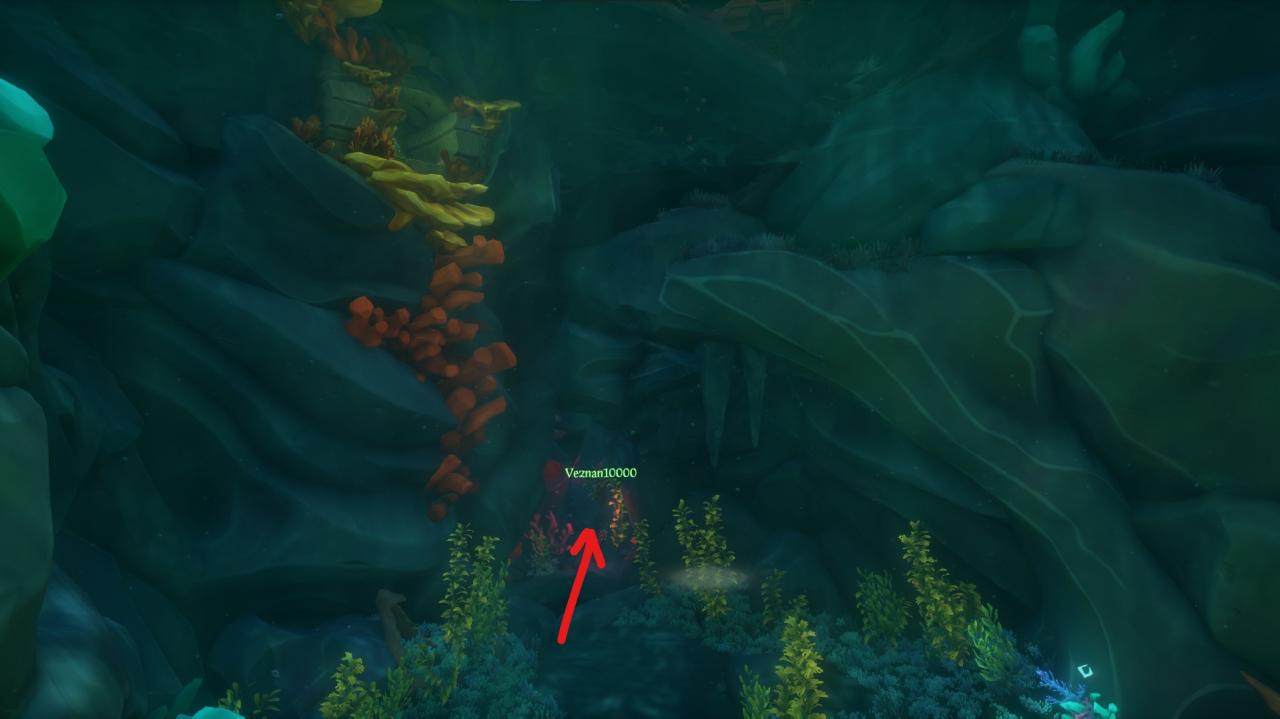
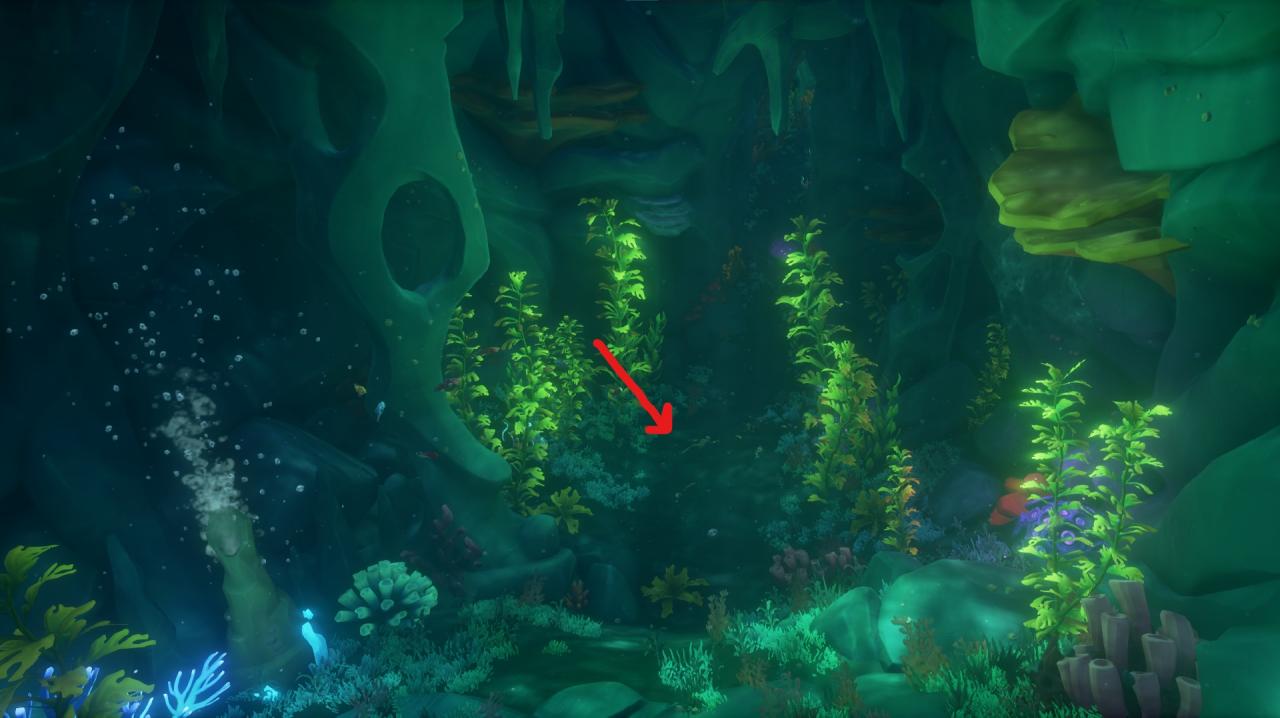
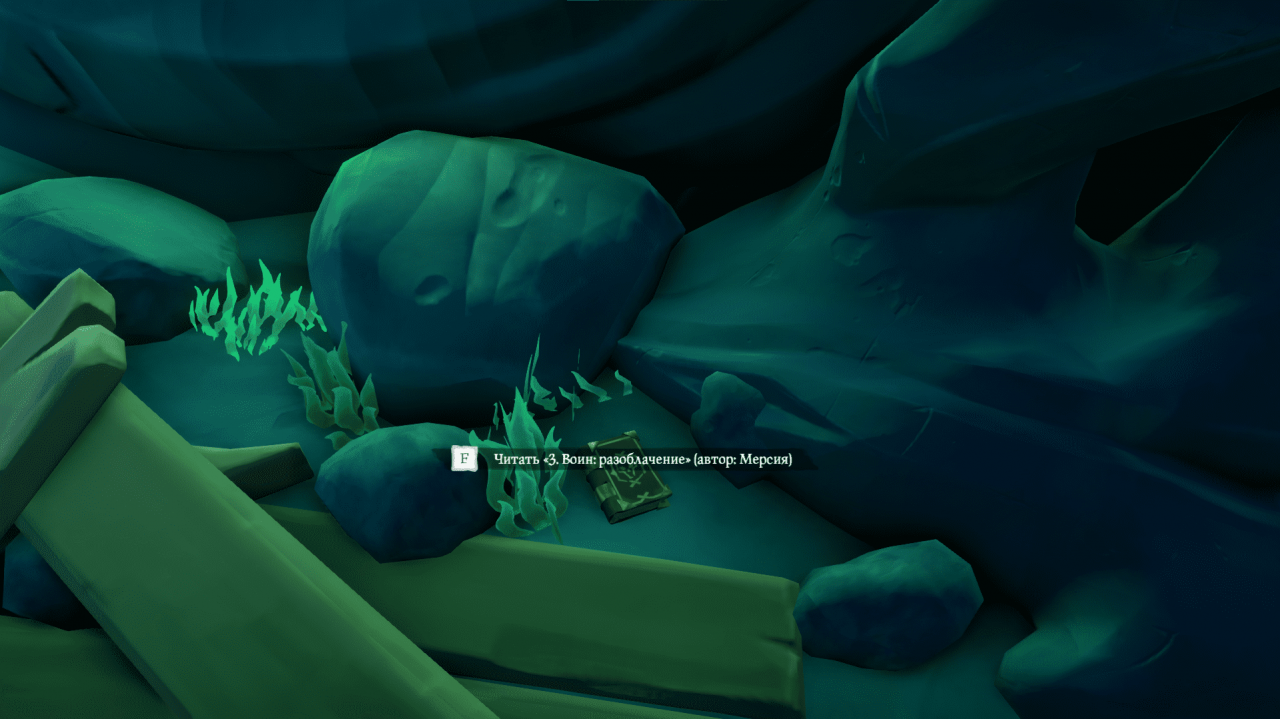
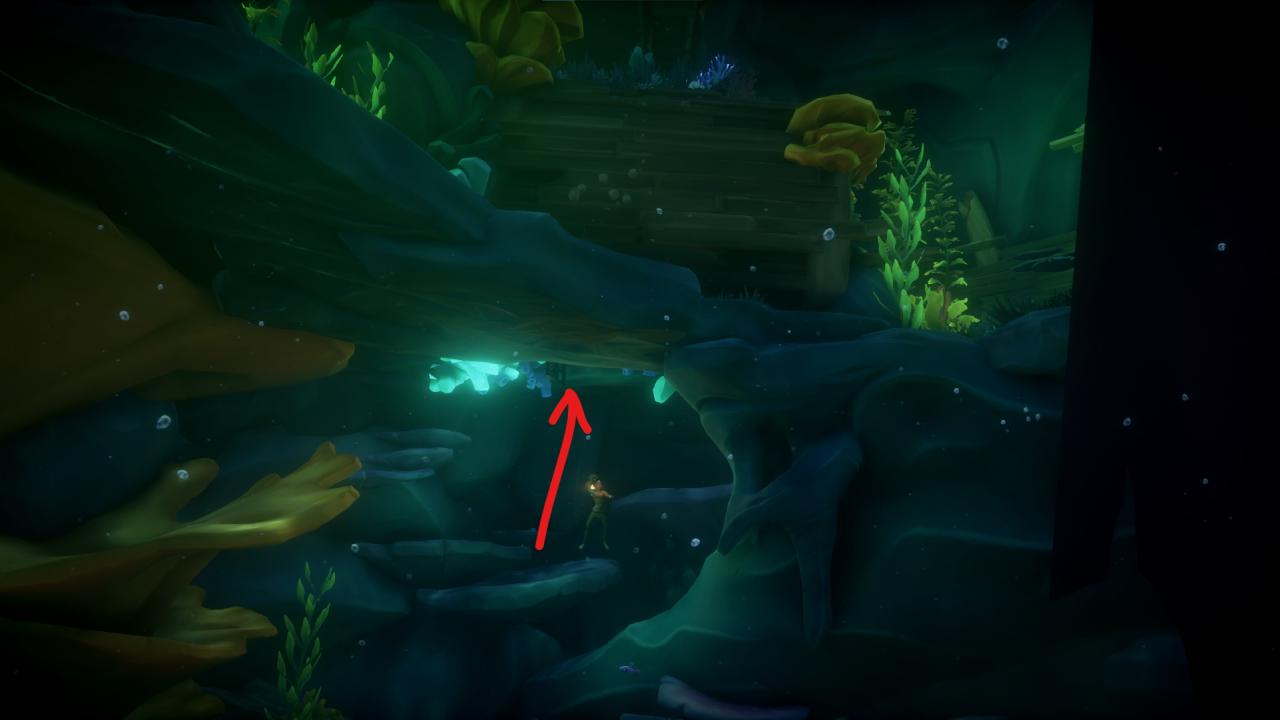
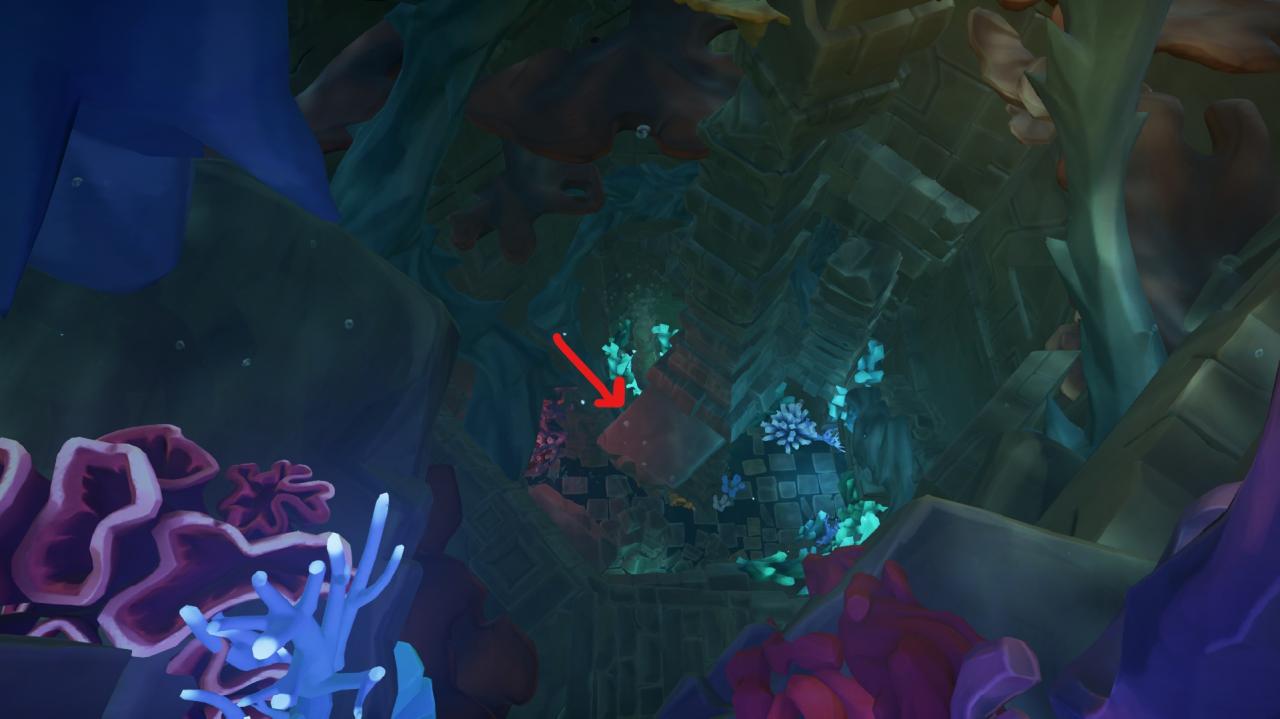
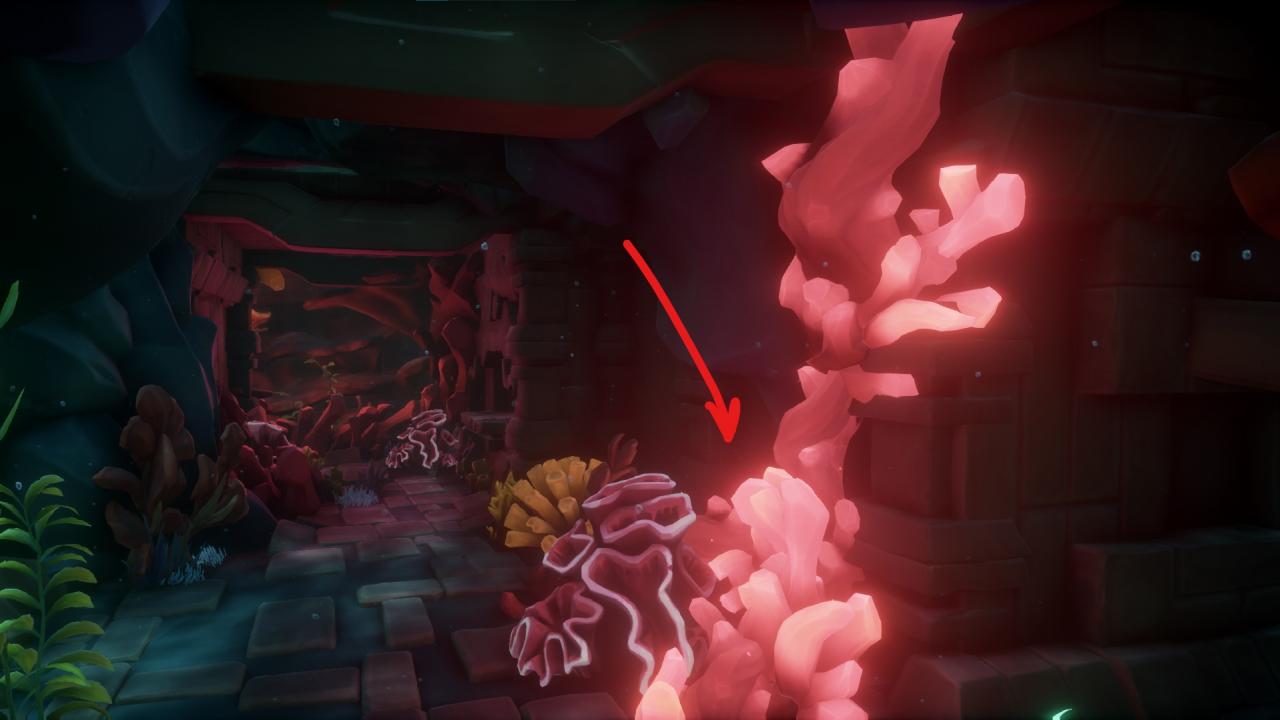
After solving the second three levers, new zones will open. A huge rock will open under the water. At the end of this underwater tunnel, a lever will be waiting for you.. But the diary is practically at the entrance to this tunnel.. Immediately after entering, turn to 45-60 degrees and look near the bottom.
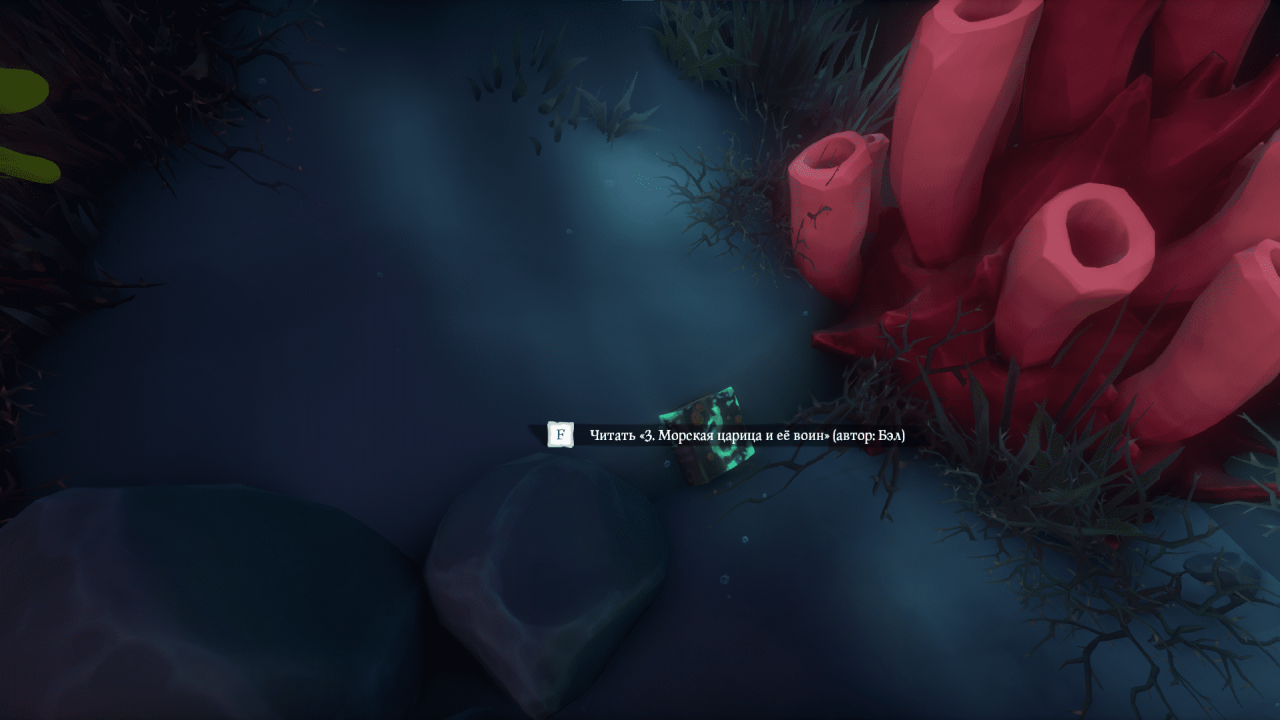
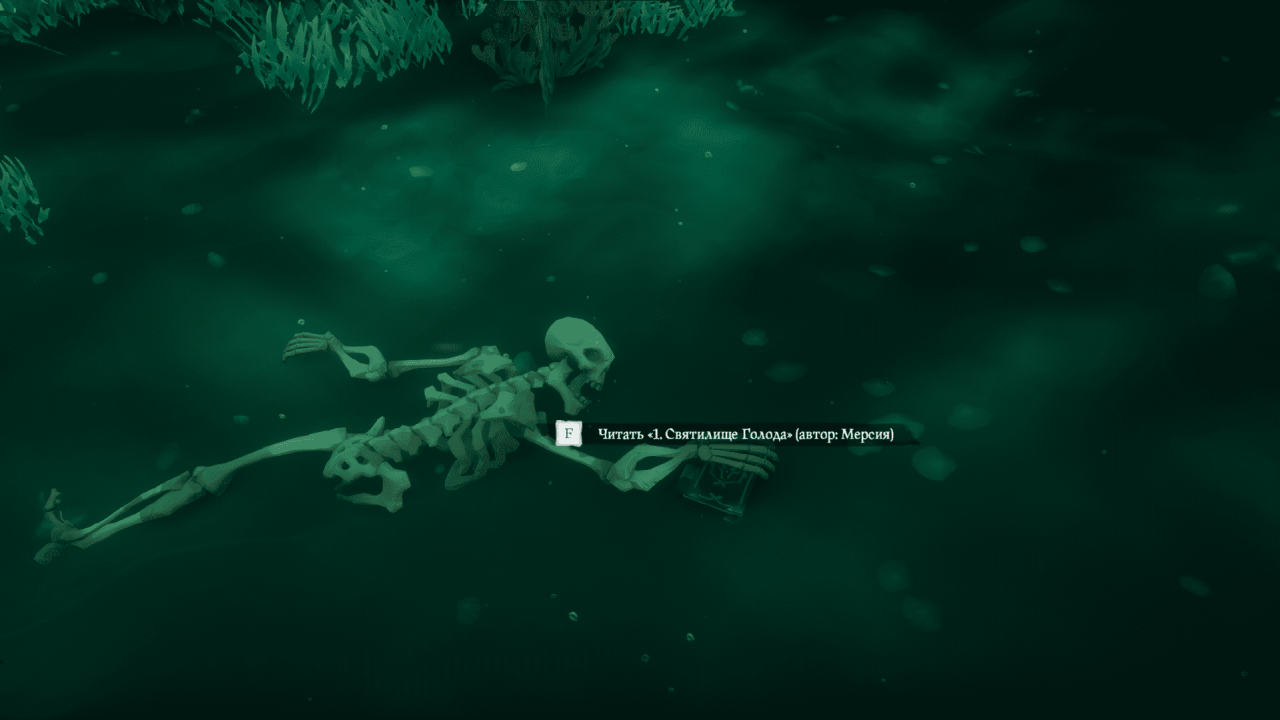
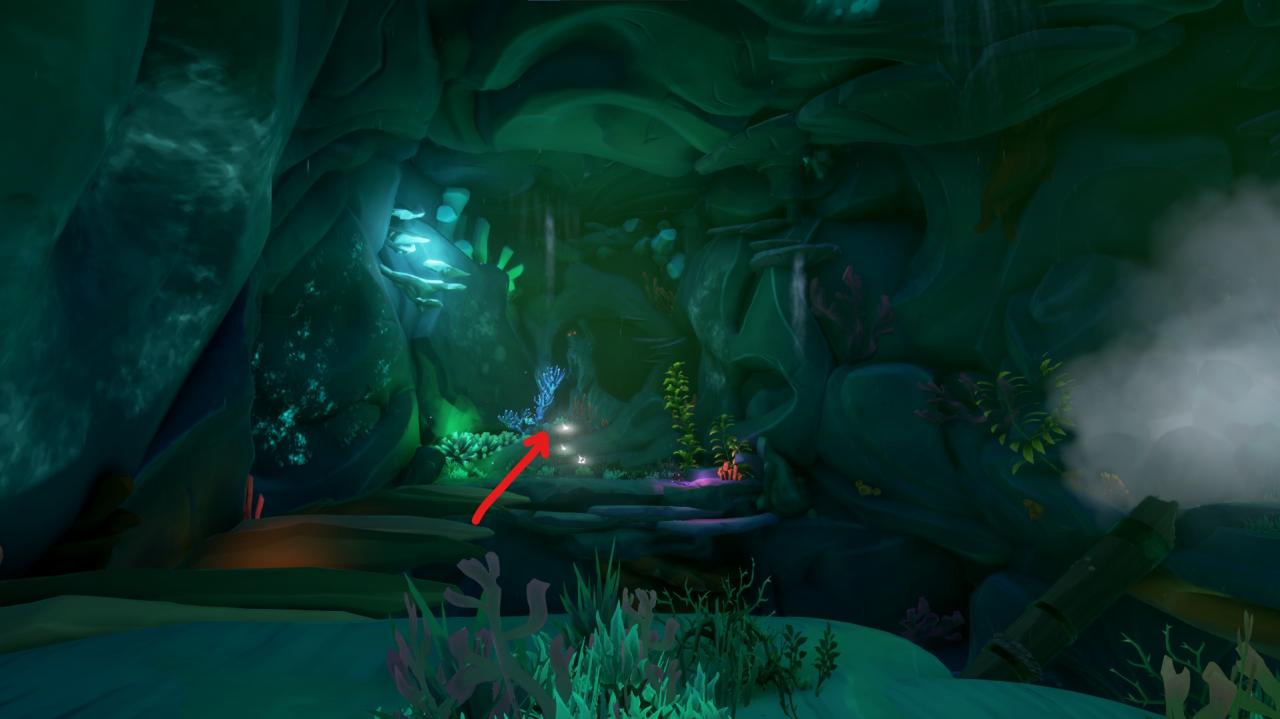
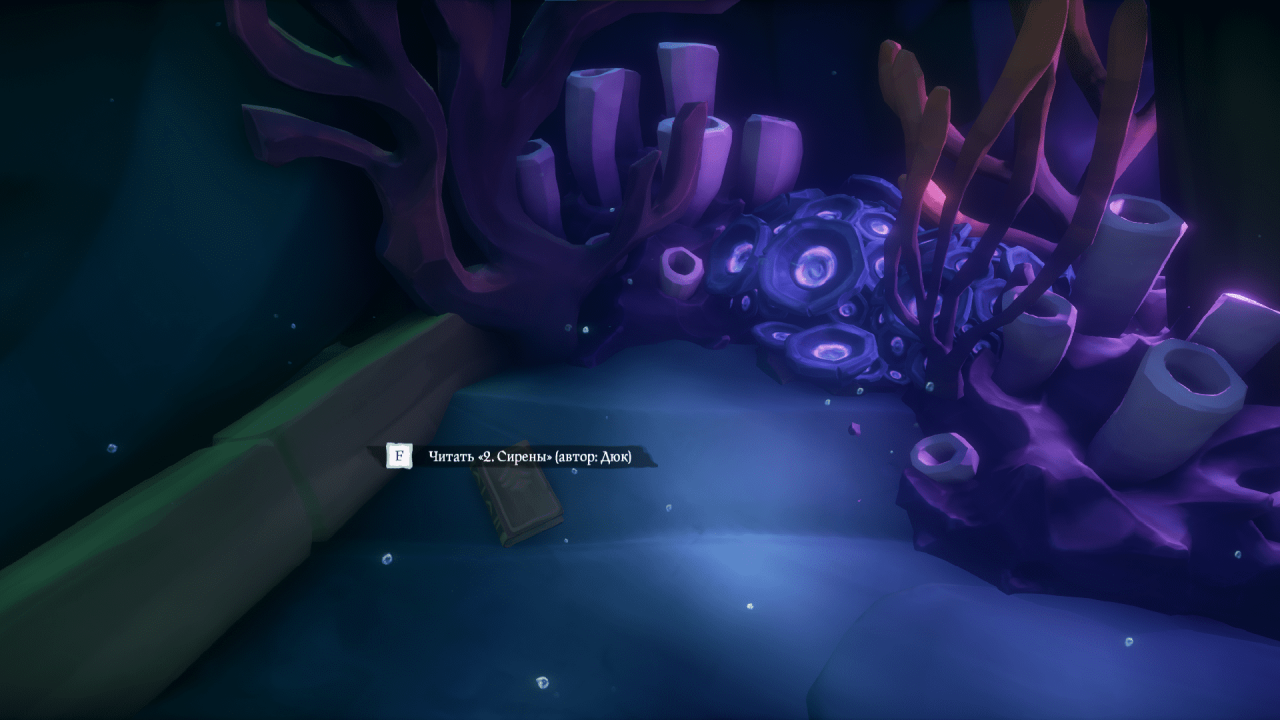
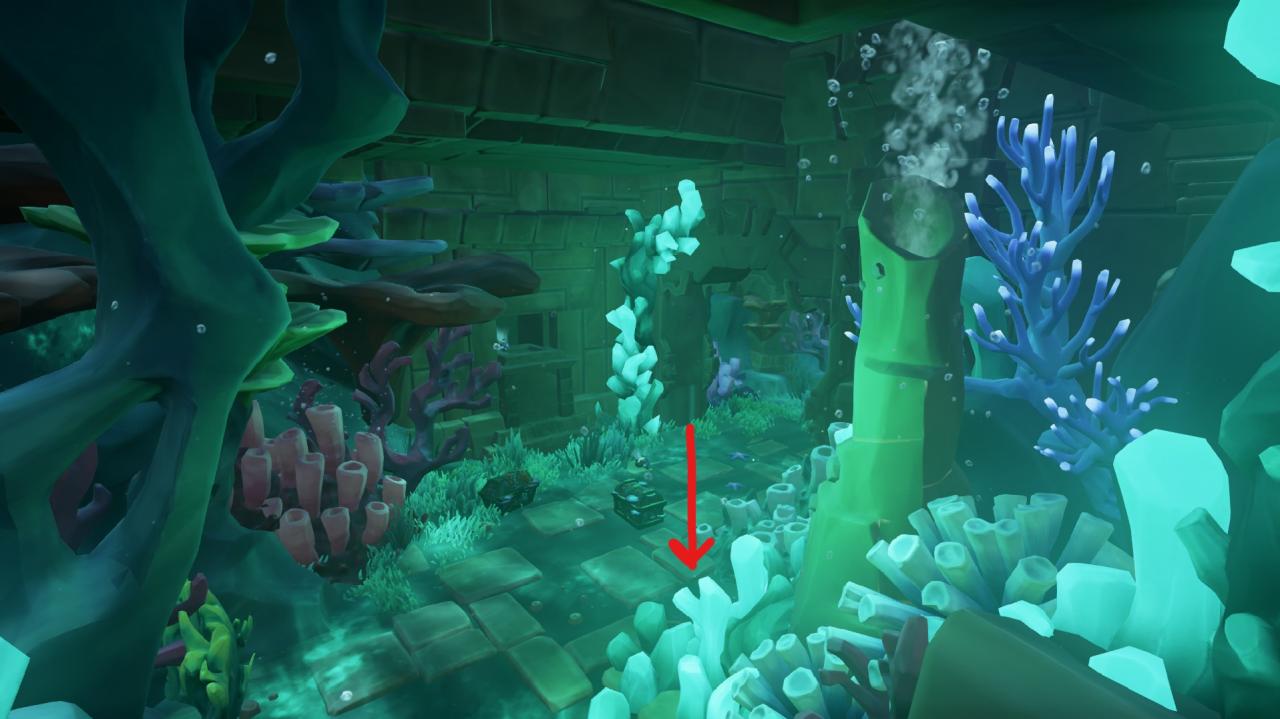
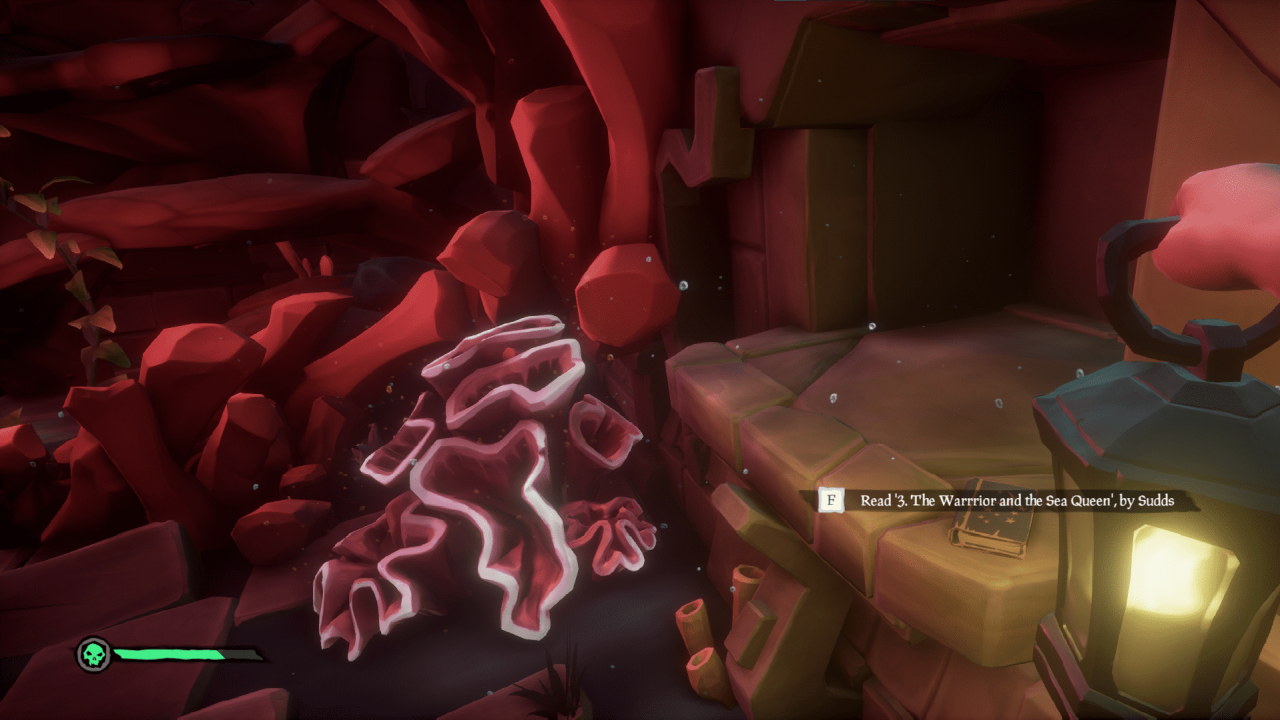
After solving the last three levers, the water will rise. You will be able to ascend to the surface. Identification marks: blue glowing growths and a giant ruby mermaid statue to the right of the aisle. The diary will lie near a pile of skulls.

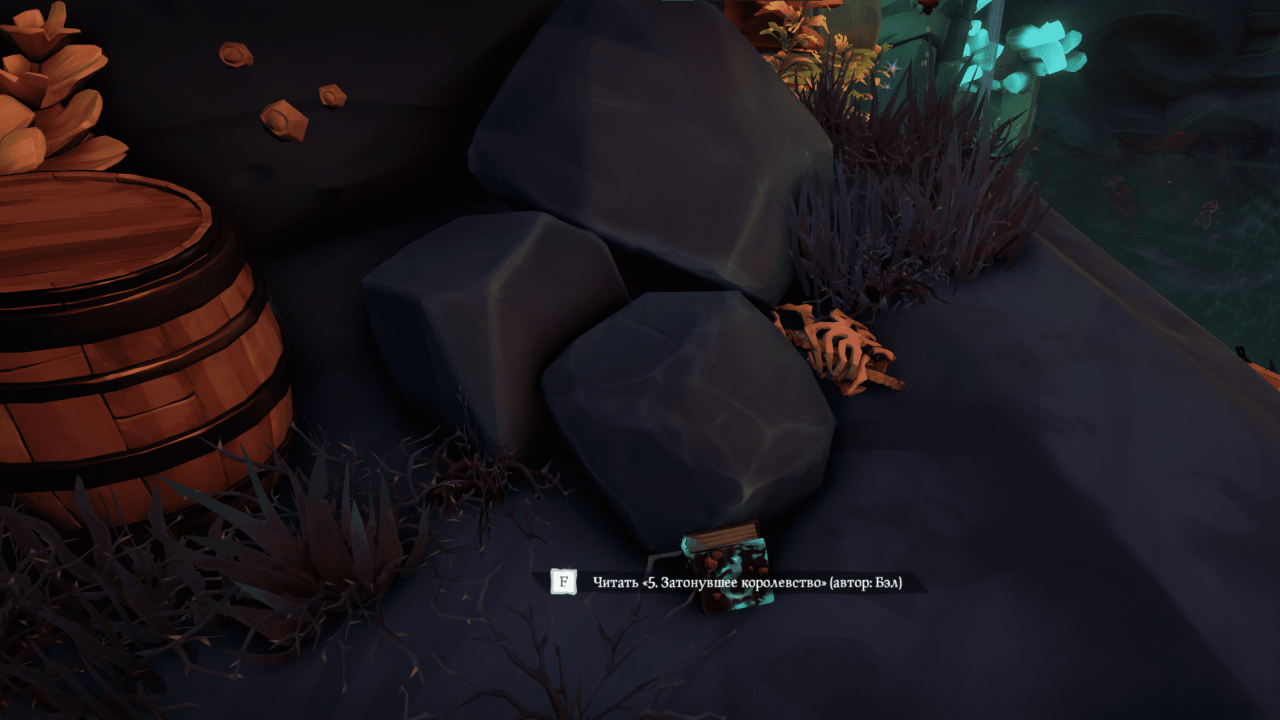
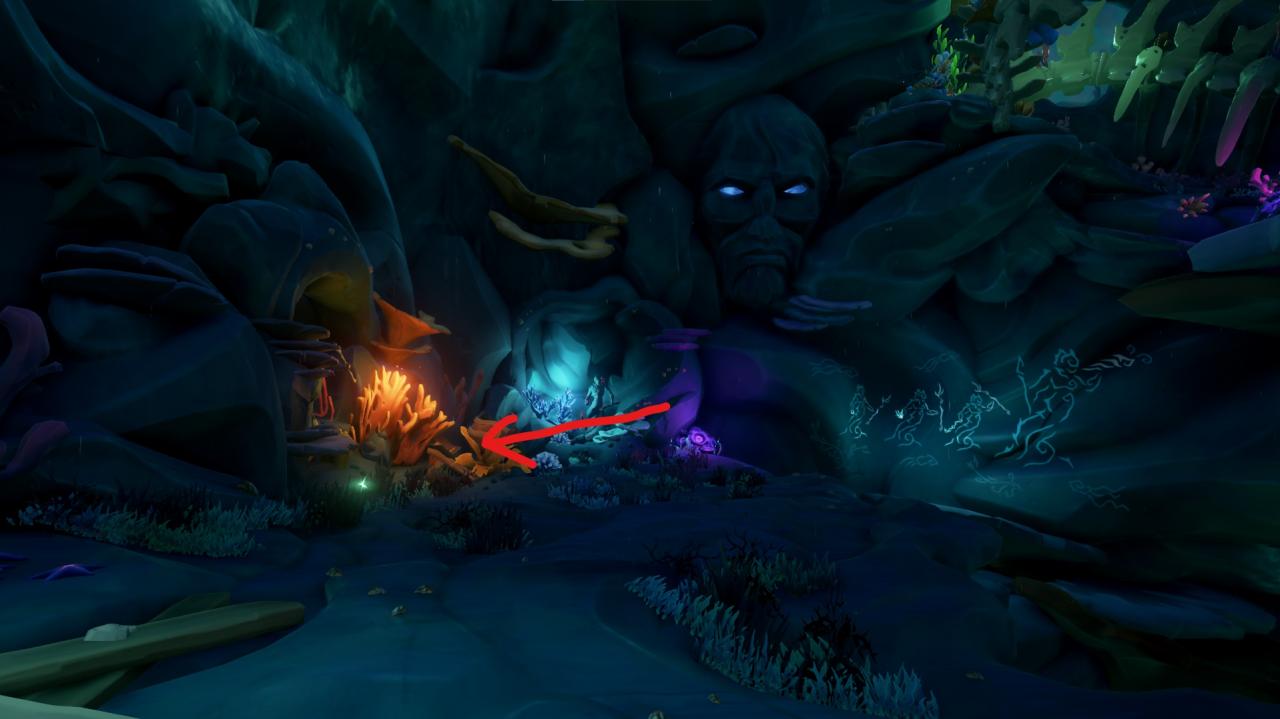
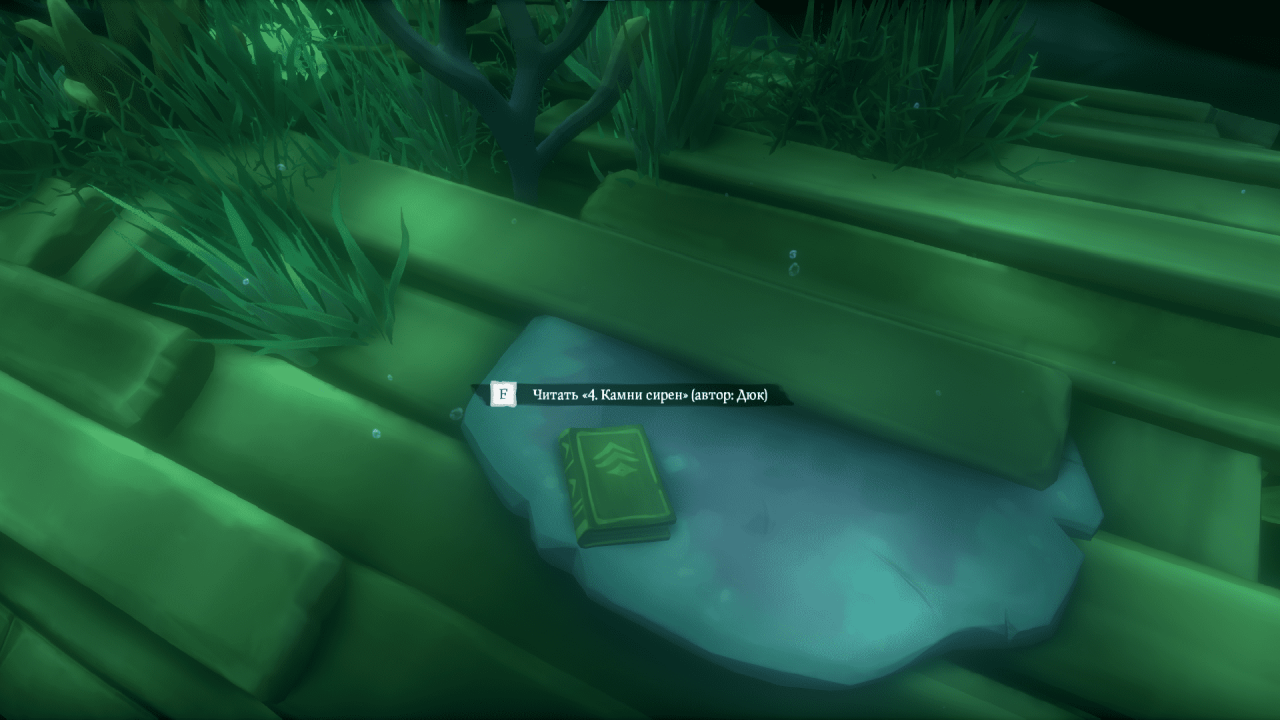
The last diary is in the treasury, which you were aiming for, lowering the levers. Climb the boards and turn right. The diary will lie neatly on the stones.
The sanctuary is filled with many obstacles and requires careful movement from the player. Any mistake leads to a significant drop in altitude.. Multiple interactions with different mechanisms. Among the opponents you will meet bottom dwellers and coral skeletons.
A task: get to the upper levels or the very top (subject to availability of mercenary travel).
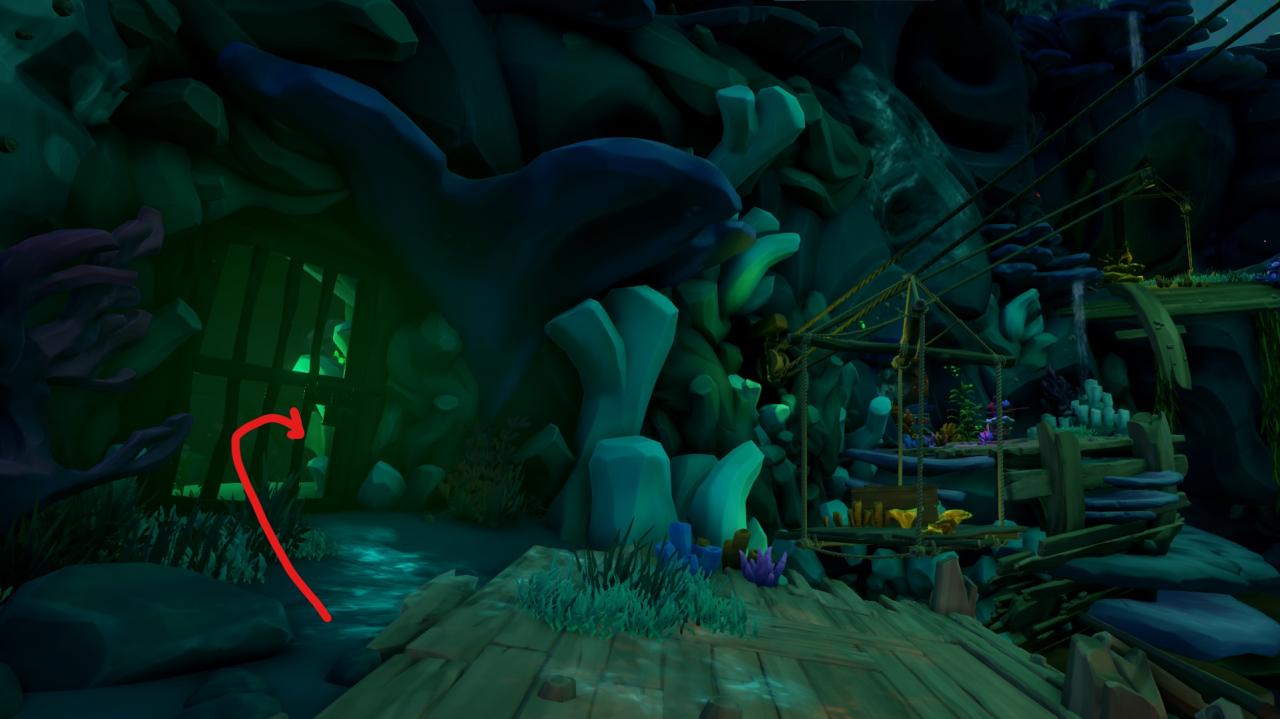
Immediately after entering the sanctuary, turn right. The first diary will be on the boards.

Moving up a little from the first diary, you will find a locked checkered door. This door opens from the inside, it will be useful to you in the future. Lever side, take a close look. There will be a second diary.
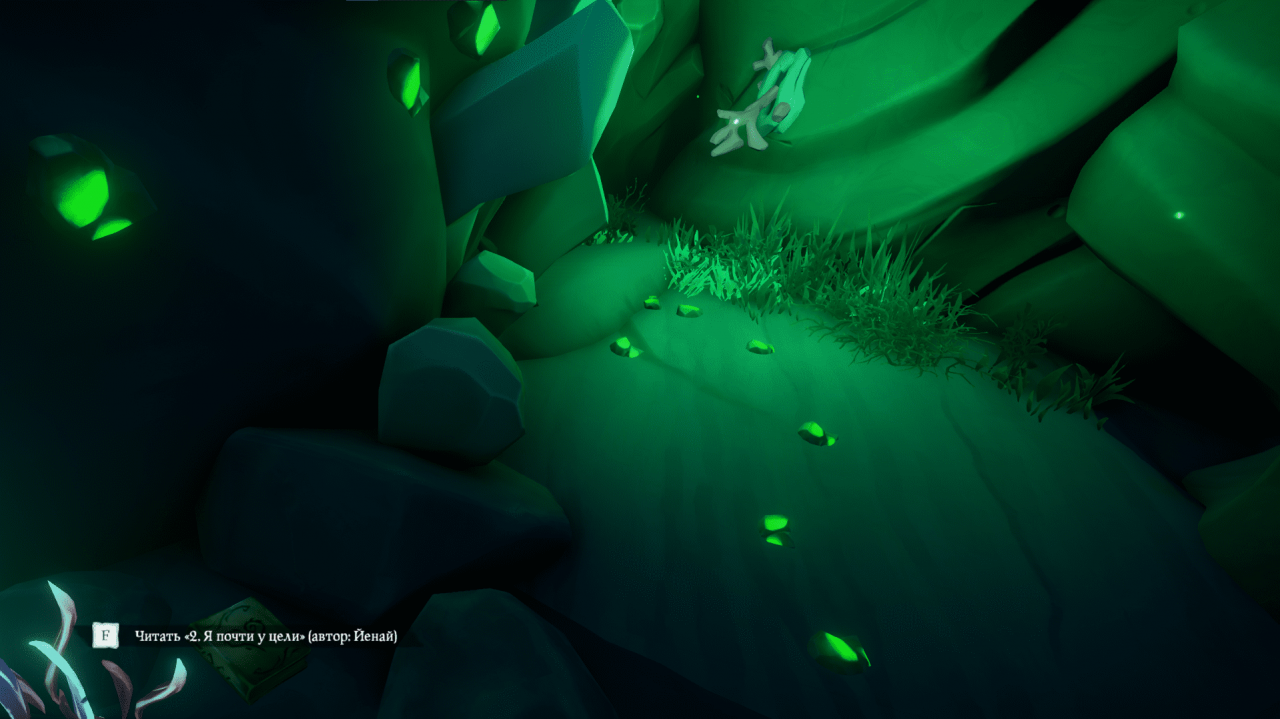
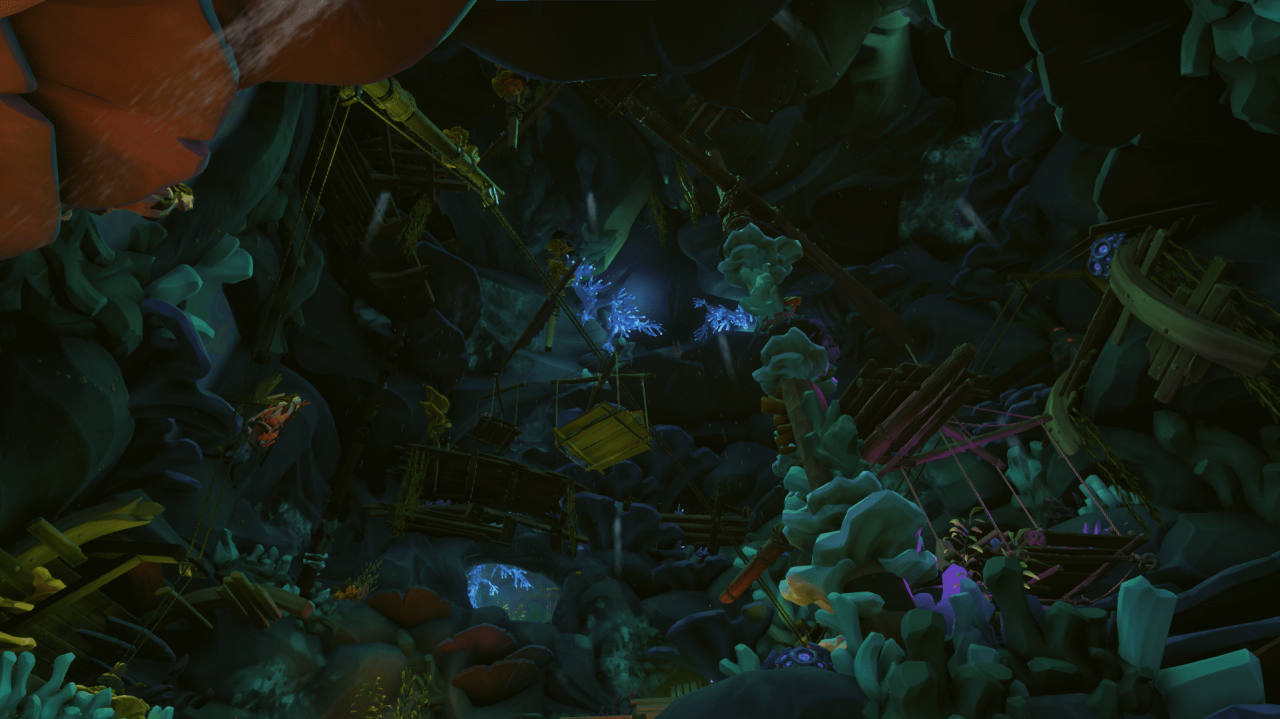
Once you get to the spire, which needs to be omitted, to navigate the platforms – do not rush to do this. Looking at the spire, turn around. the third diary will be waiting for you among the sea plants.
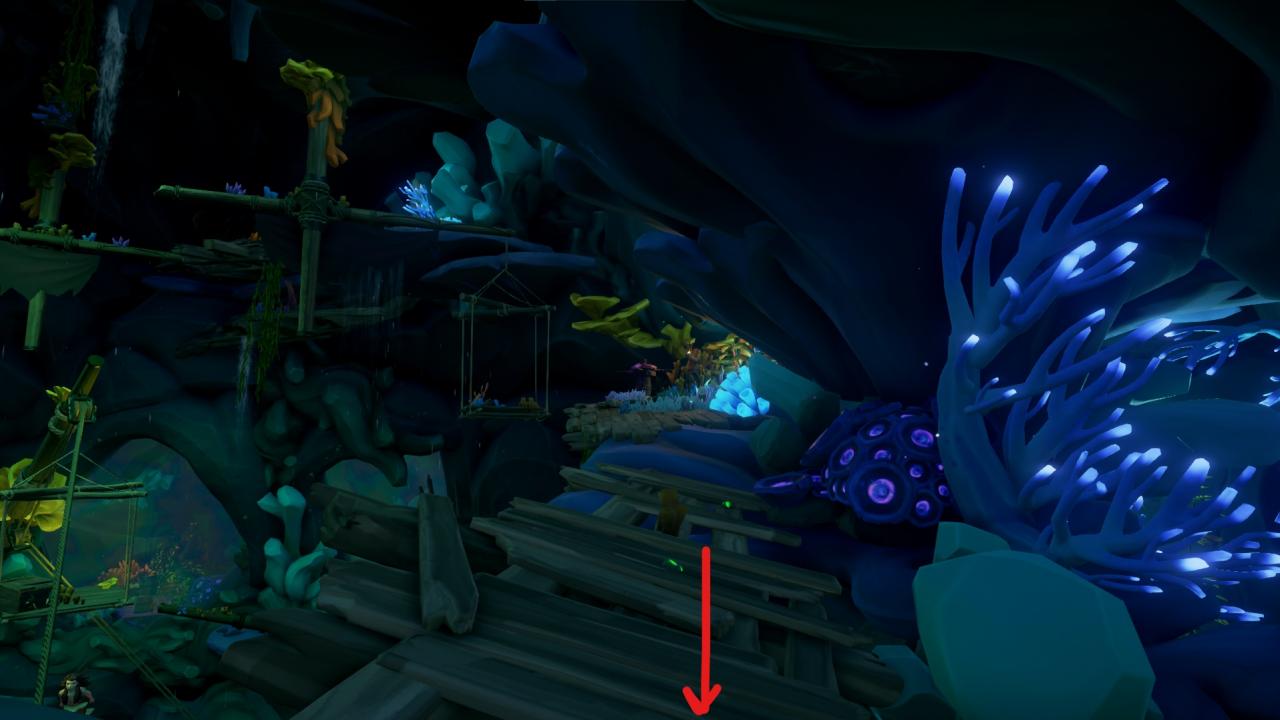
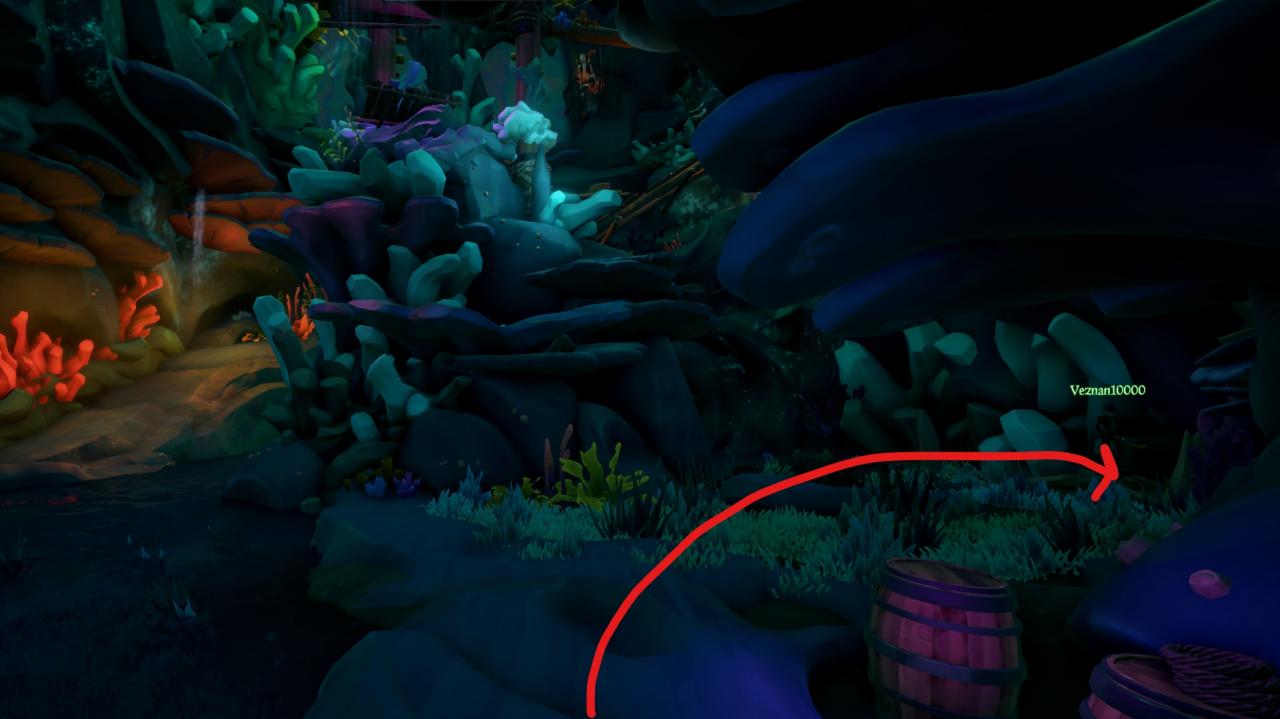
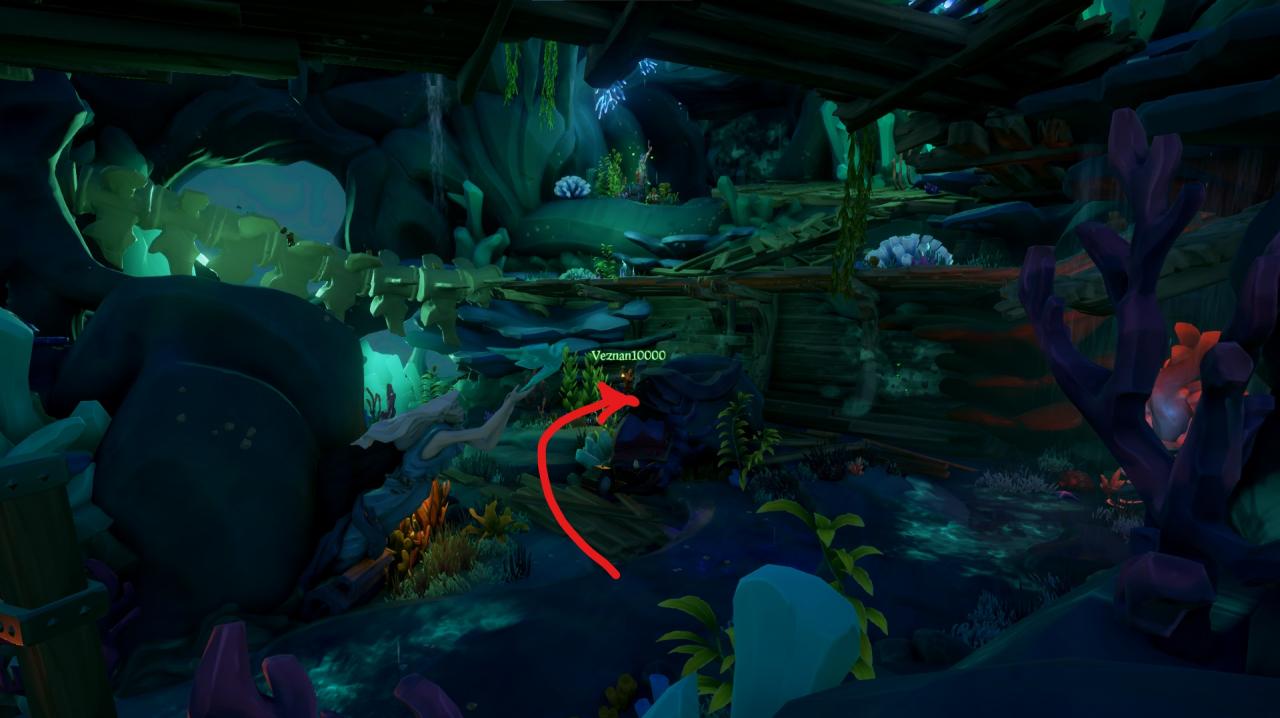
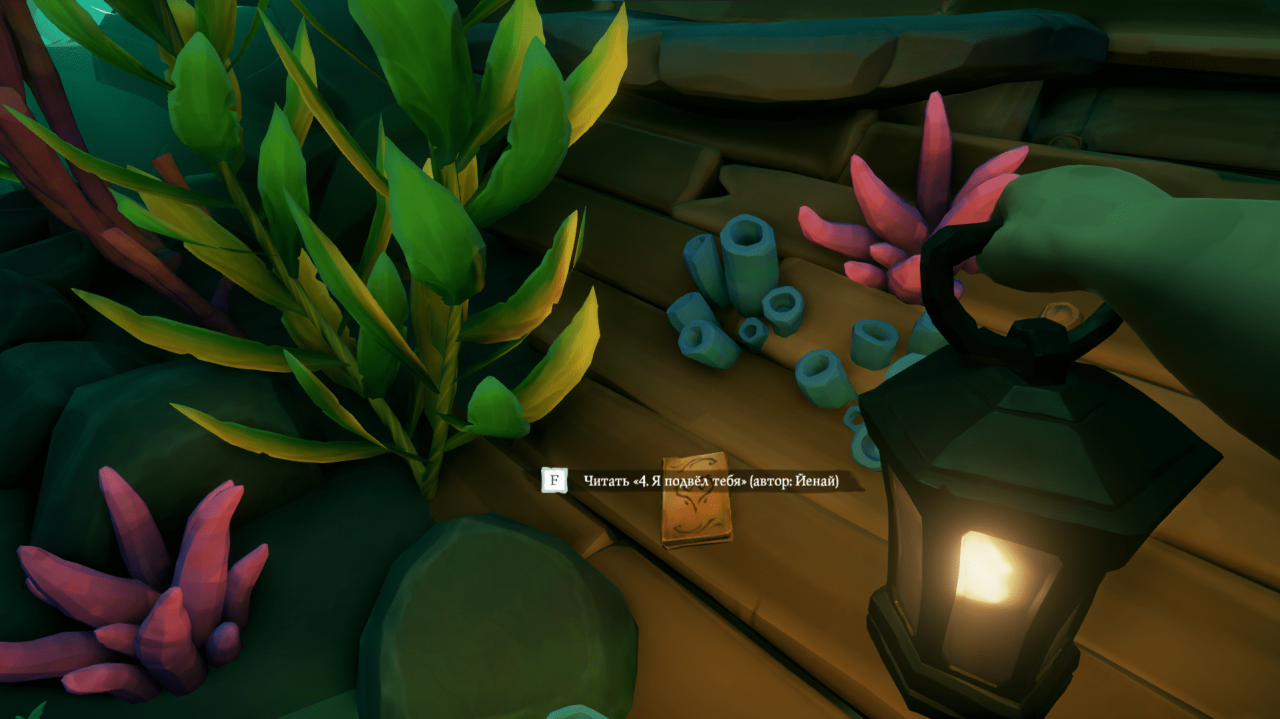
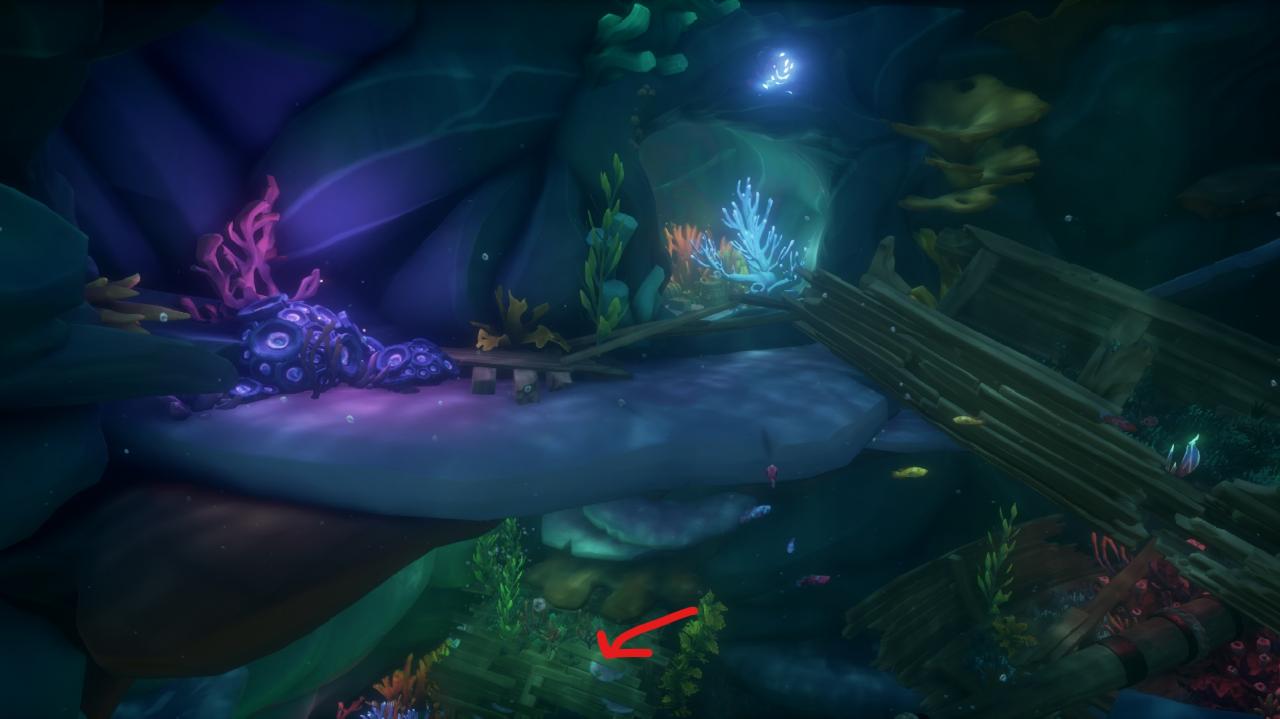
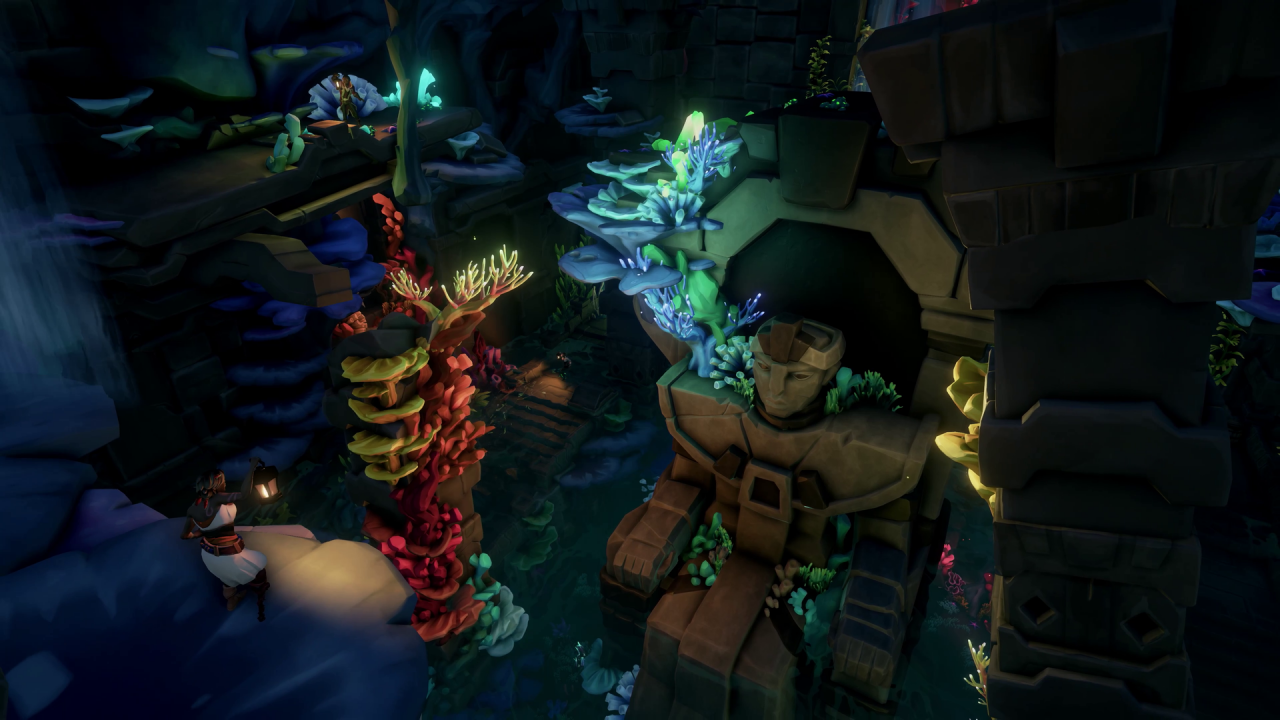
Leaving the first giant and spacious area, you will find yourself in a more enclosed area. Look closely at the screenshot. Near my colleague there is a destroyed part of the ship.. The fourth diary will be waiting for you on it..
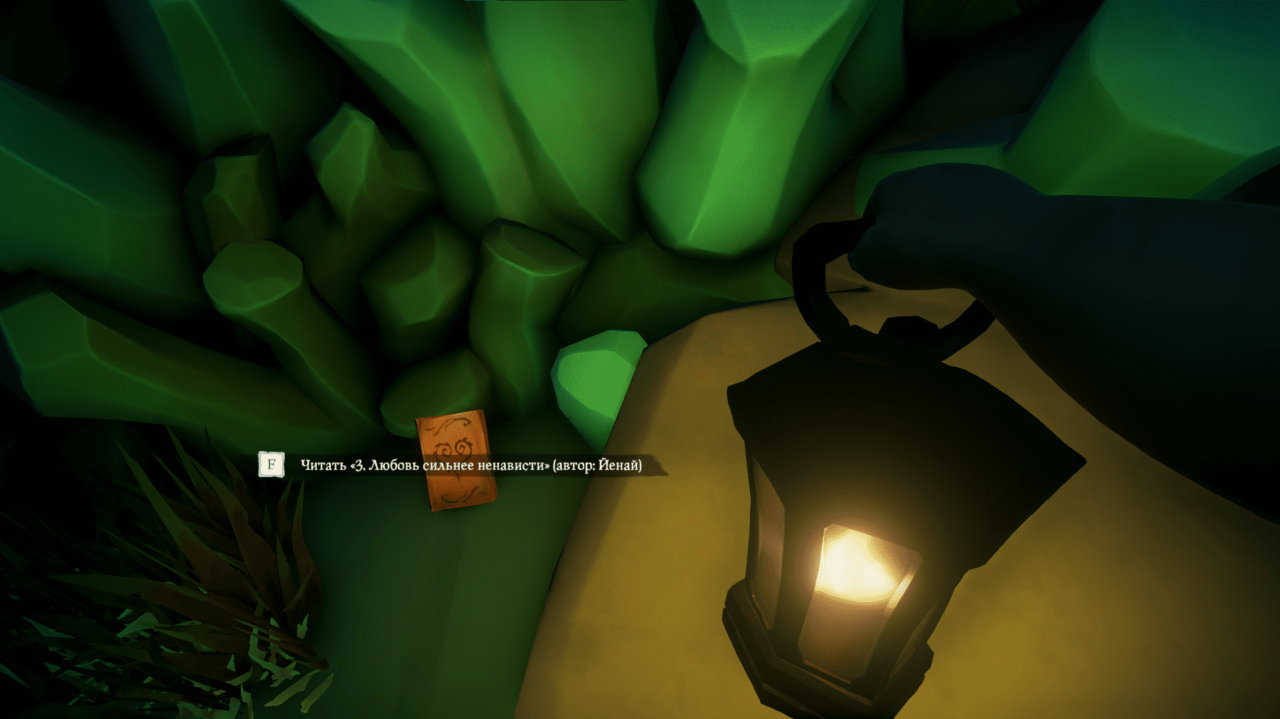
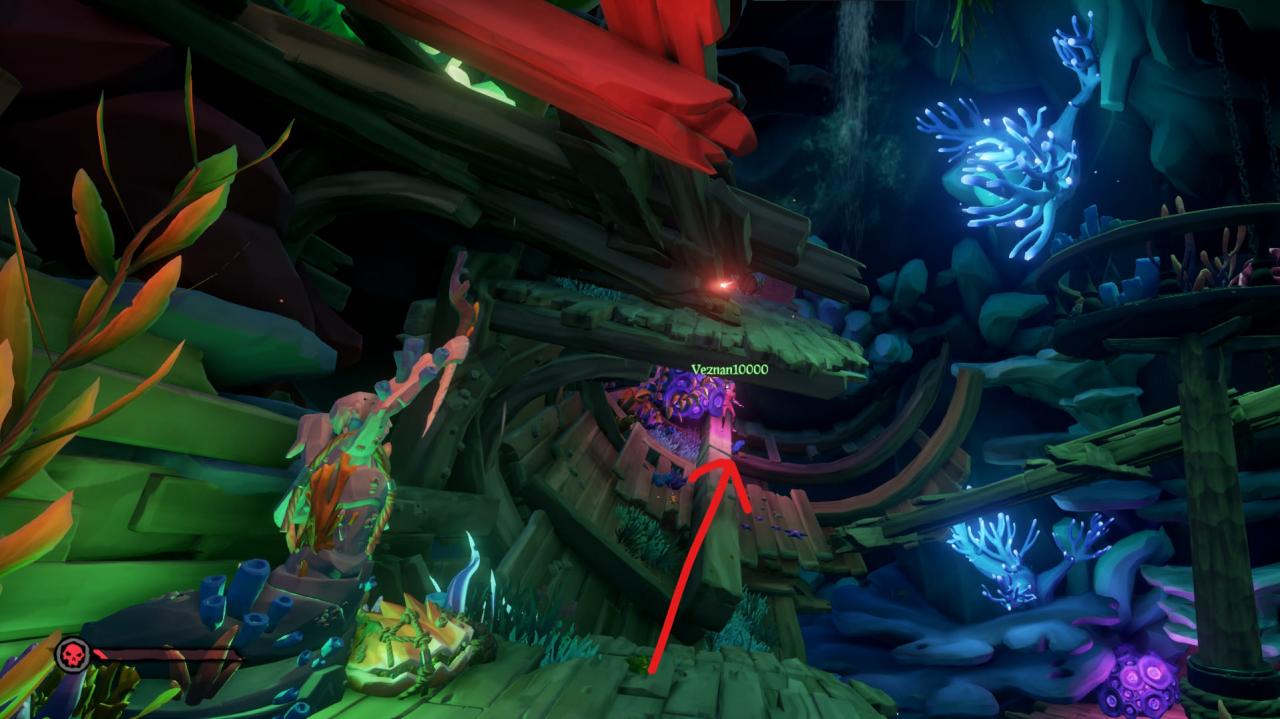
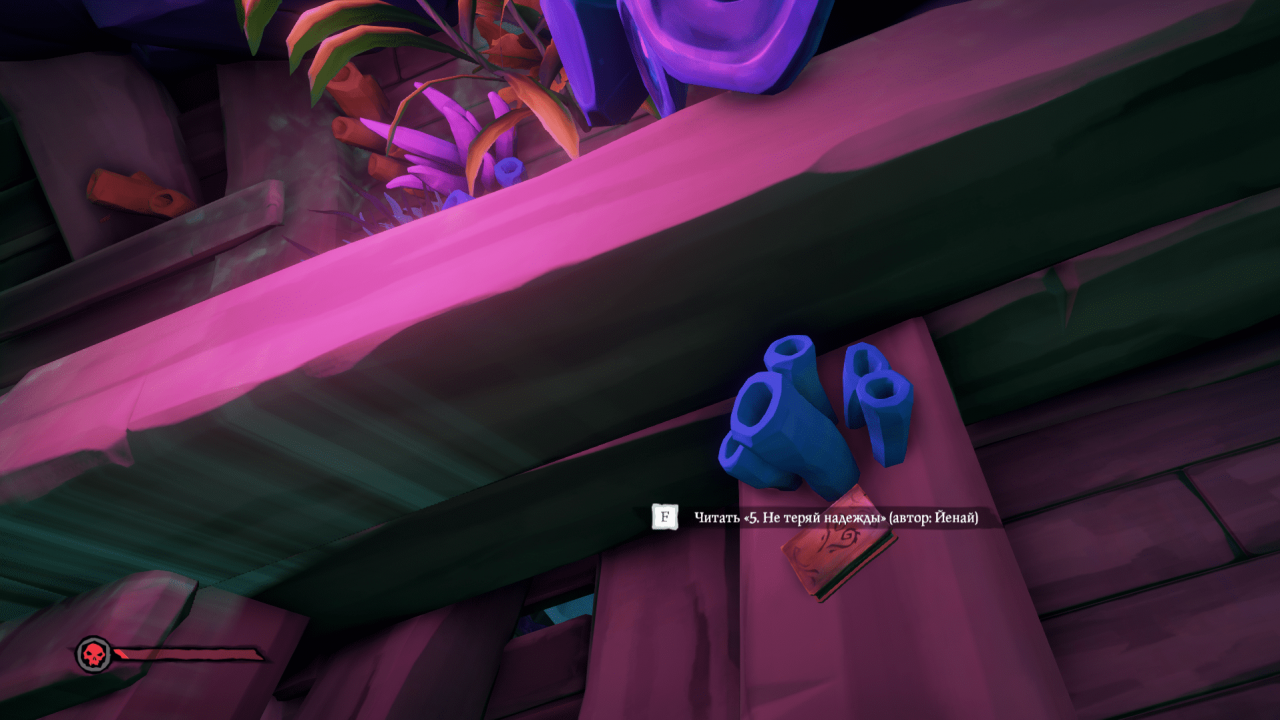
The last diary is almost at the very top of the last zone. You need to climb almost to the very top. There will be a diary among the ruins of the ship..
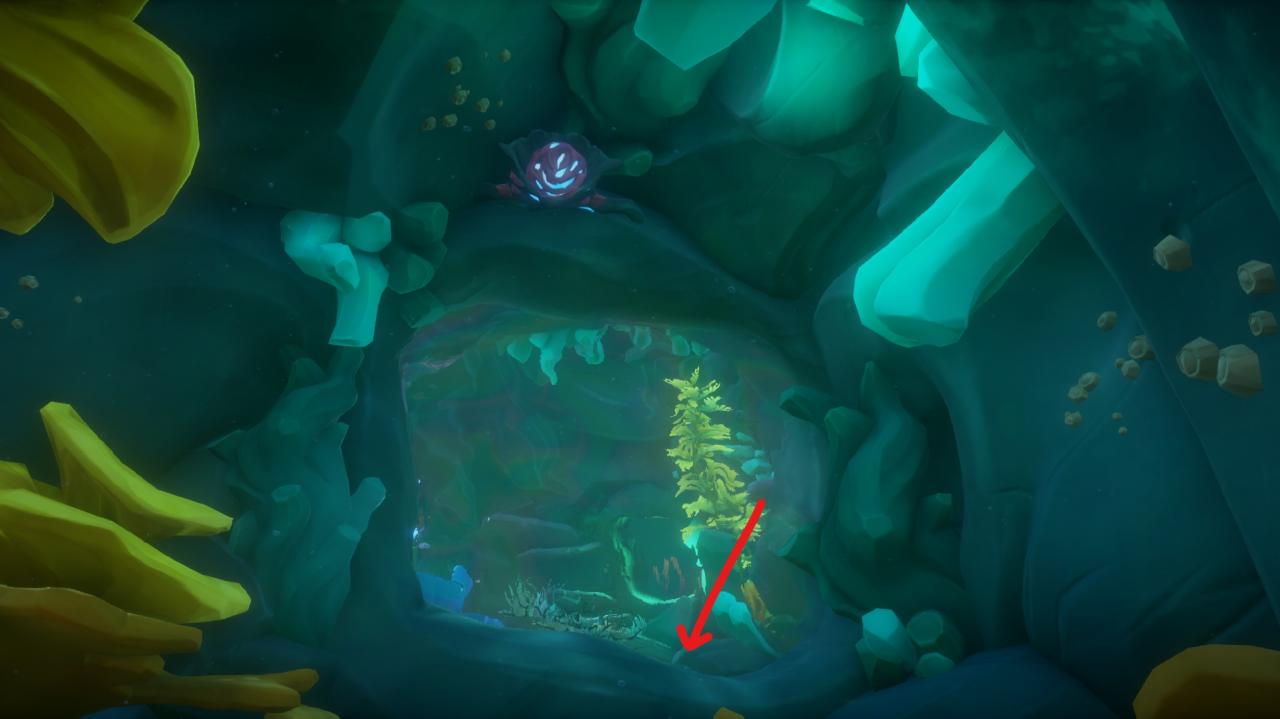
Favorite Shark Sanctuary. Here you will meet a huge number of sharks, who will prevent you from moving around the sanctuary. In the sanctuary you will also find coral skeletons and riddles with statues of mermaids
A task: get to the upper levels of the sanctuary, overcoming sharks.
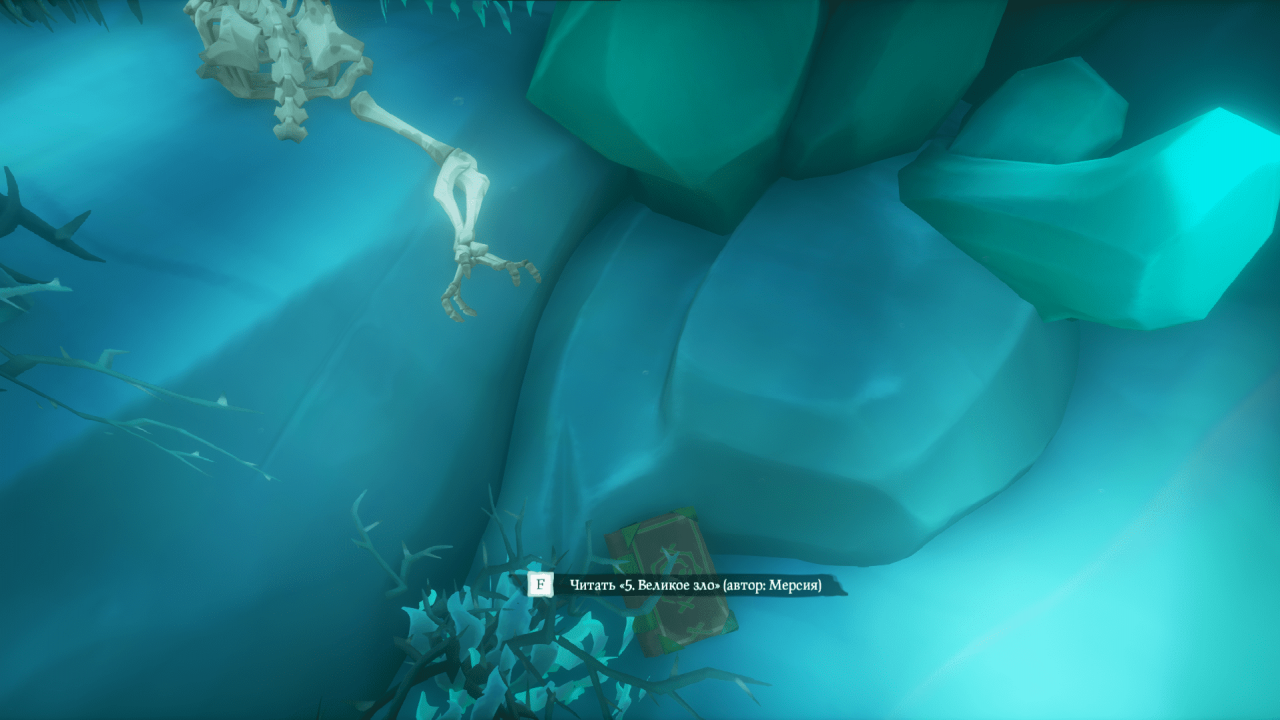
After that, how will you swim to the sanctuary, in the first zone, at the bottom, you will find skeletons, in the right hand of one of them will be the first diary.
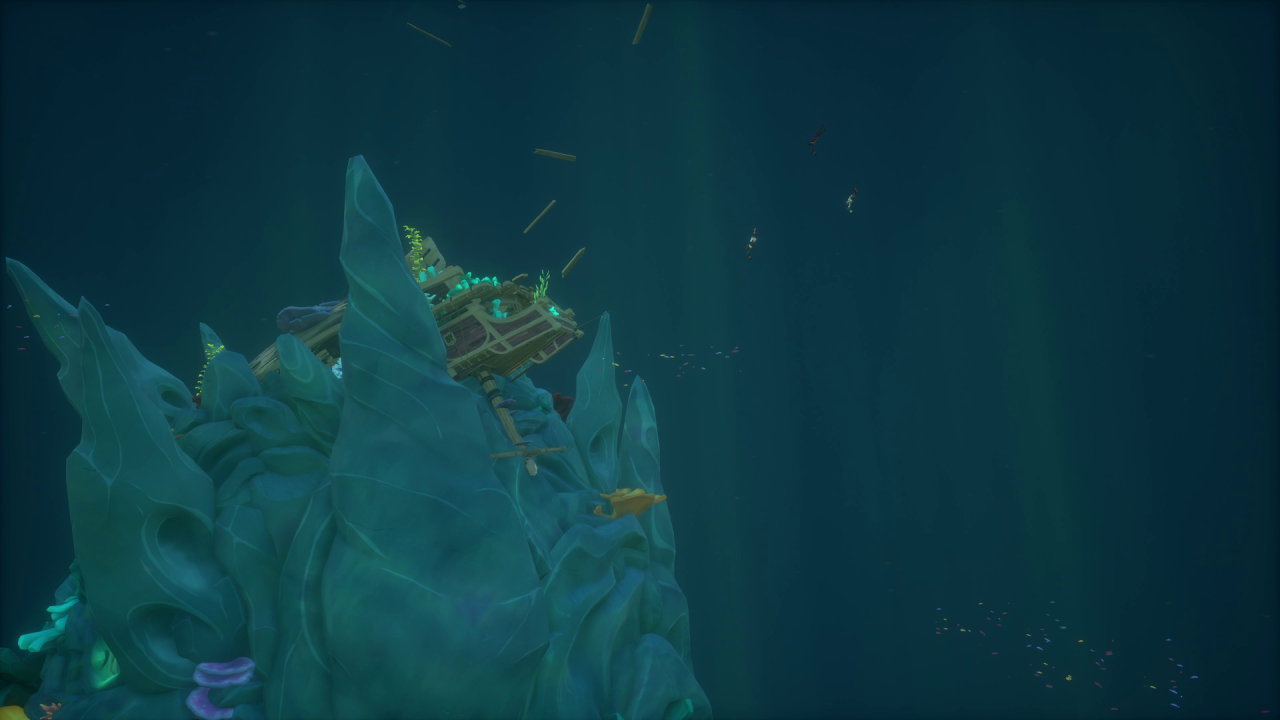
After solving the first riddle of the mermaid statues, climb the geyser. Then find a wrecked rowboat. Diary there.
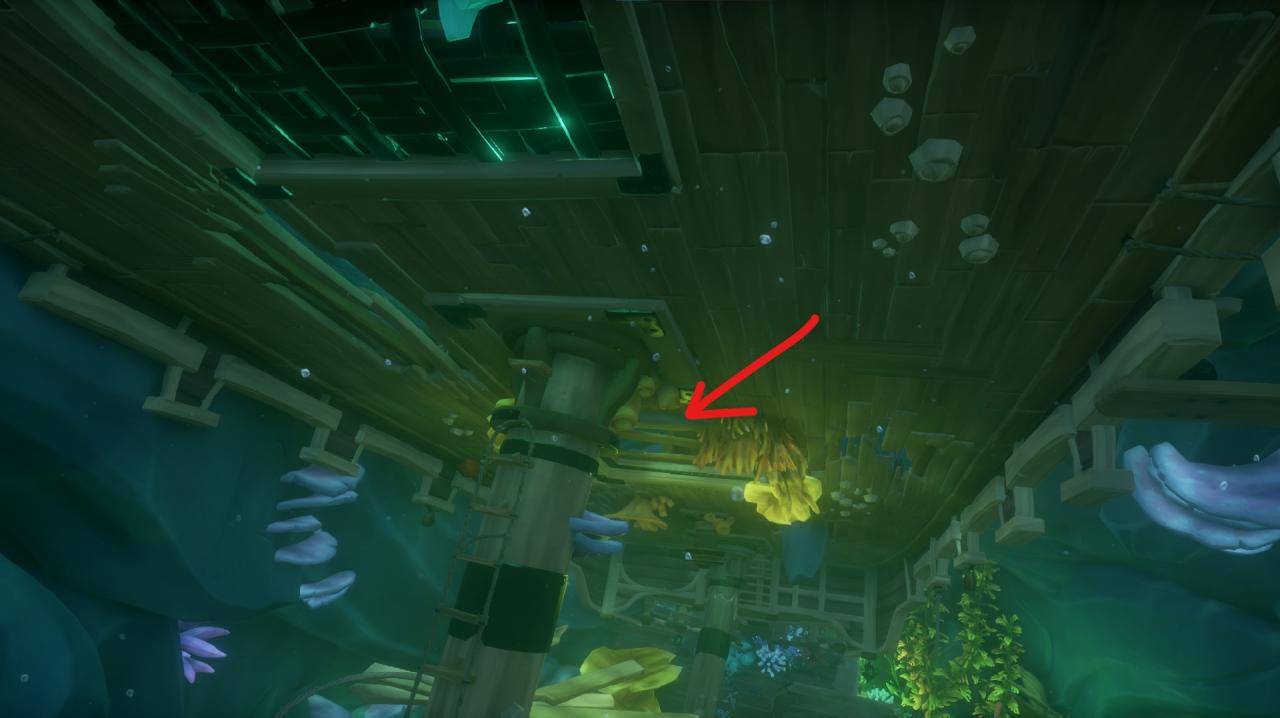
After solving the second riddle of the mermaid statues, you will rise even higher. At a certain point you will run along the mast of the ship, to get to the top level. Between the underwater “windows” there is a diary.

At the same level, as the third diary. It is enough to jump to the mermaid statue. The diary lies near the statue, left.
At the level of the third and fourth diaries, you move on, in “anteroom” last zone. Swim higher and you see the transition to the final zone, where hungry critters are already waiting for you. Diary on the border of the transition to the final zone below.
The entrance to the sanctuary is from above. Frequent siren attacks await you inside. The complexity of this zone is the small number of zones with oxygen. And a slightly tangled structure among the rubble.
After entering the sanctuary through the back of the ship, swim into the hold. The first diary will be there.
Going a little deeper. You should see a metal door above you. Opening it and swimming there, you will find the second diary.
Going deeper. In the oxygen safe area, turn left. There is a third diary.
The fourth diary is located almost under the room with oxygen on the growth., which in turn is on the remains of the ship.
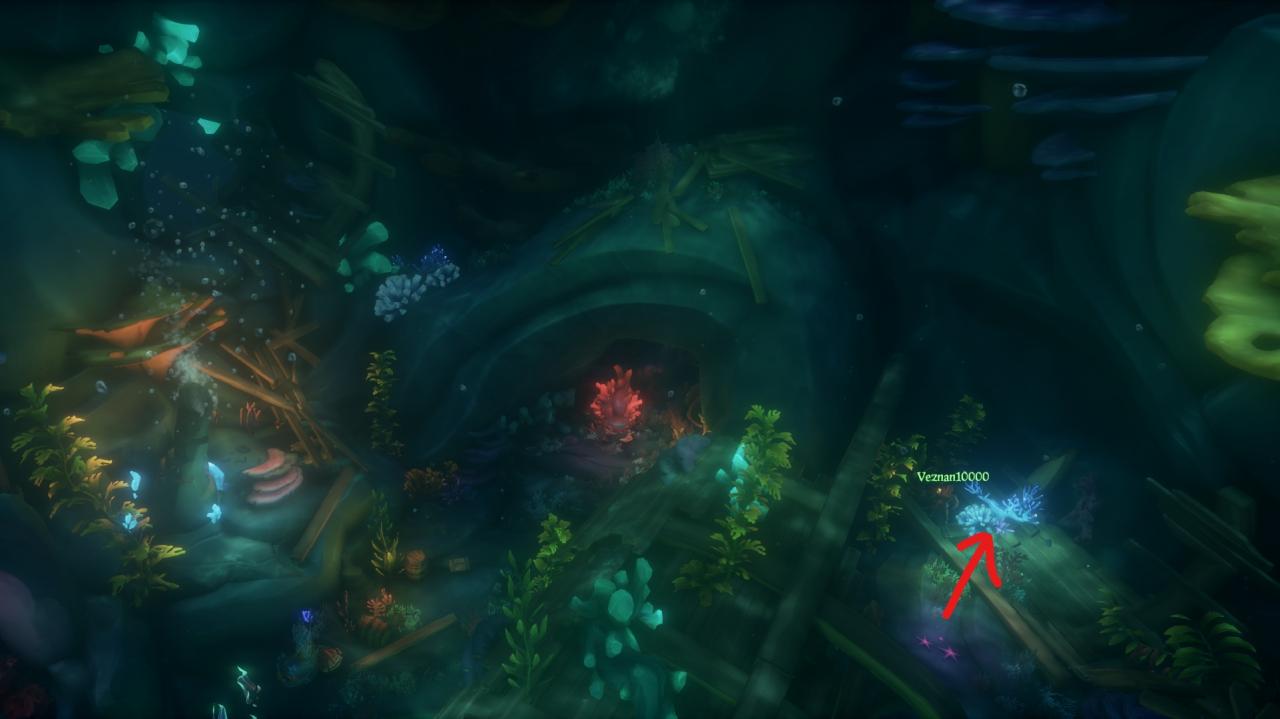
At the very bottom of the sanctuary. Look for glowing blue coral.
In this sanctuary, you will find small puzzles with mechanisms and sirens as opponents. The entrance to the sanctuary can initially be closed by doors. The lever will be to the left of the doors.
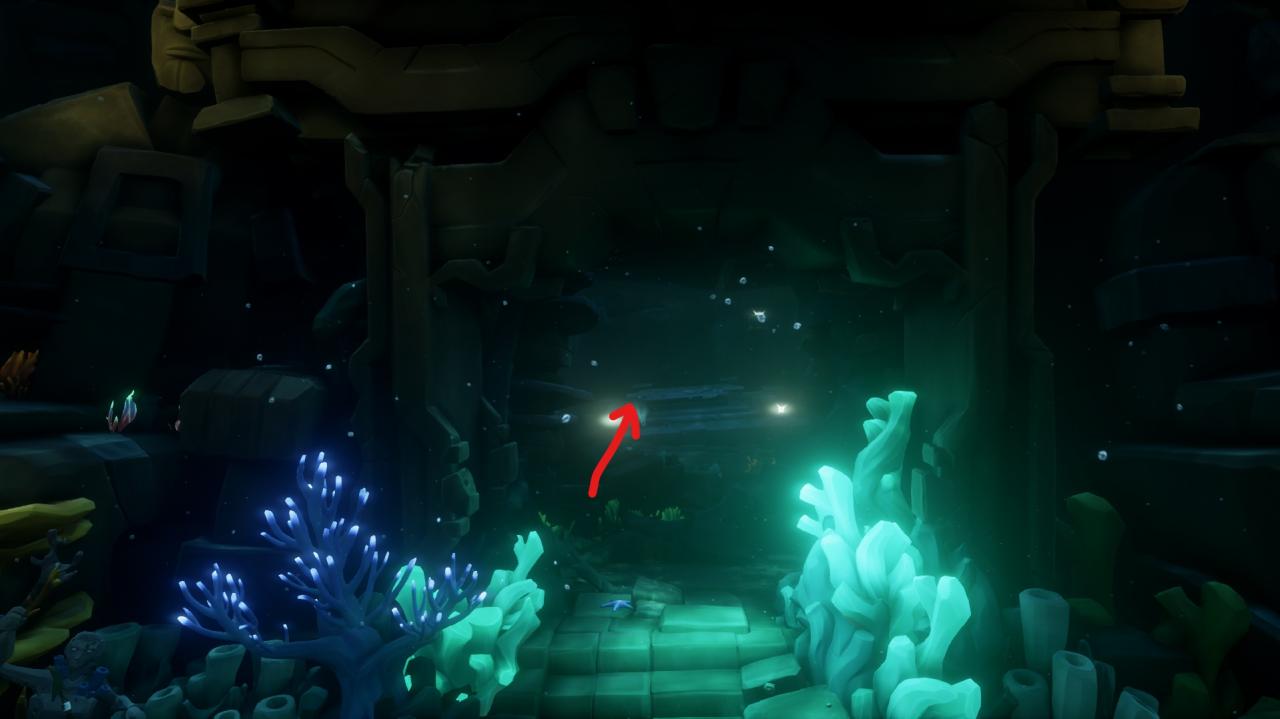
After that, as you find the entrance to the sanctuary and after swimming a short distance you will dive a little deeper. At the very bottom, you will see a fresco with the location of the mermaids and their hands.. Opposite this fresco you will meet the first diary.

Let's swim clockwise from the first diary. There will be a second diary on the floor in the turquoise zone.
From the second diary, we also sail clockwise, at the same time, you do not need to fold anywhere. as soon as you reach the red zone, in it on one of the windows (pedestals or whatever you want) the third diary will be waiting for you.
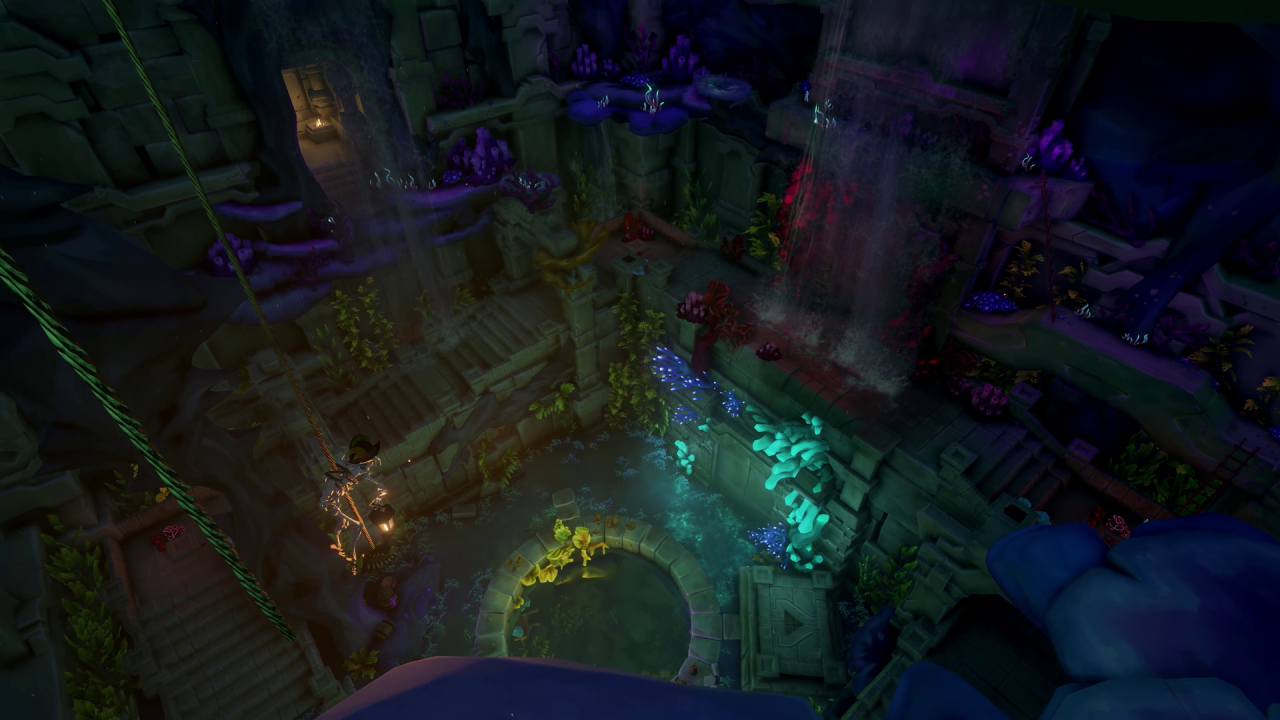
The fourth diary is located on the high levels of the large hall with the statue.. Climbing the stairs, you need to jump over the bumps, then after the statue, and, finally, meet the fourth diary.
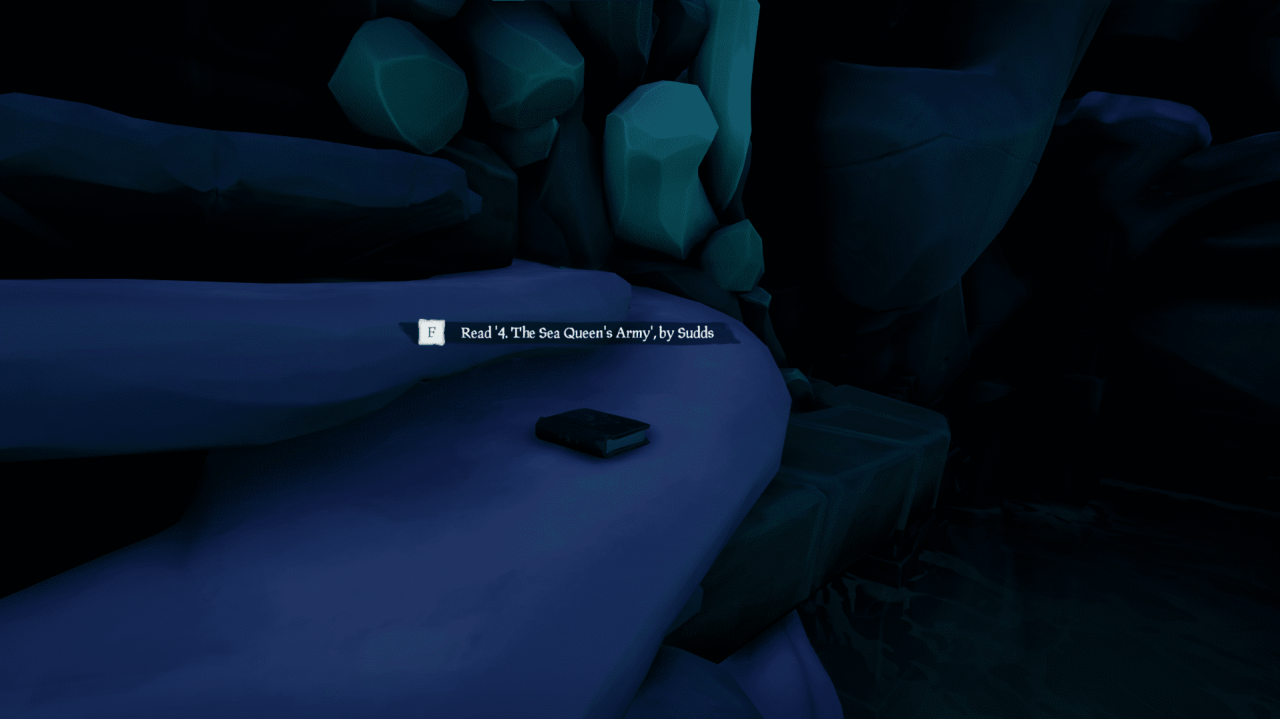
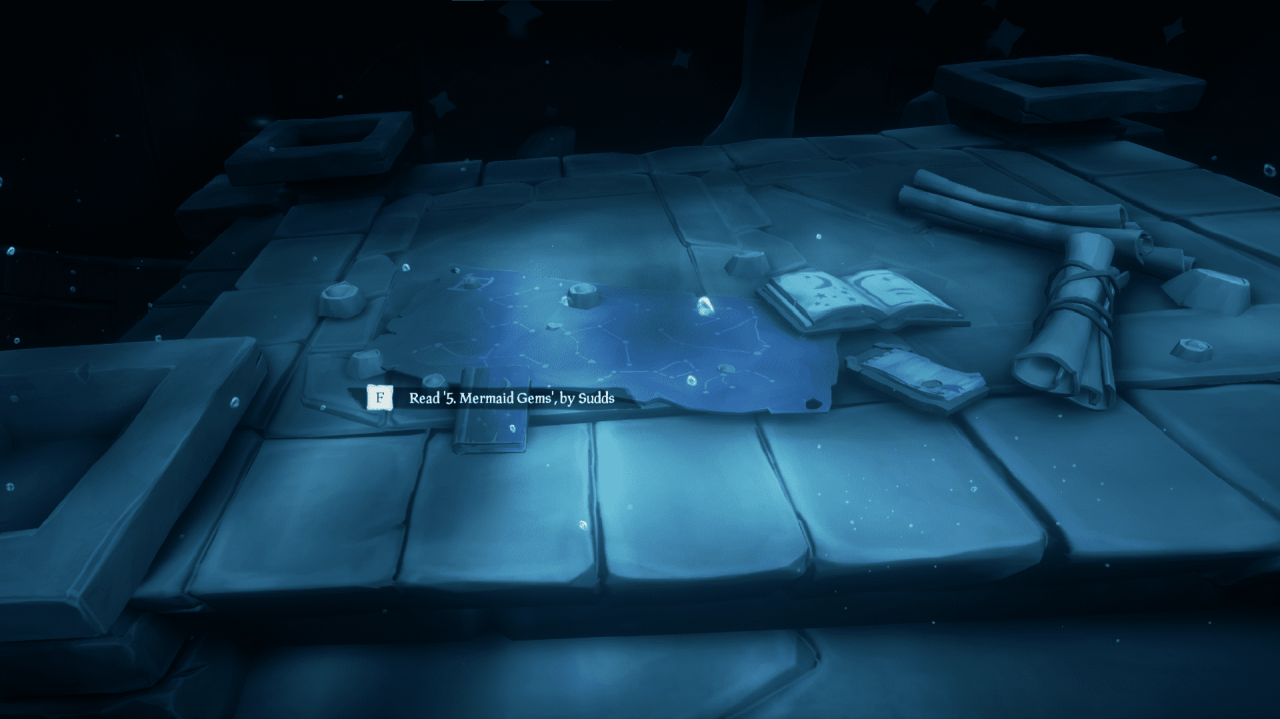
The last diary is in the last room of the sanctuary.. Pushing away the statue, mentioned in the fourth diary, you can swim under it. They are waiting for you under it 2 spacious zones. You need the farthest. The diary will lie on “table” next to the drawings of the constellations Saddza.
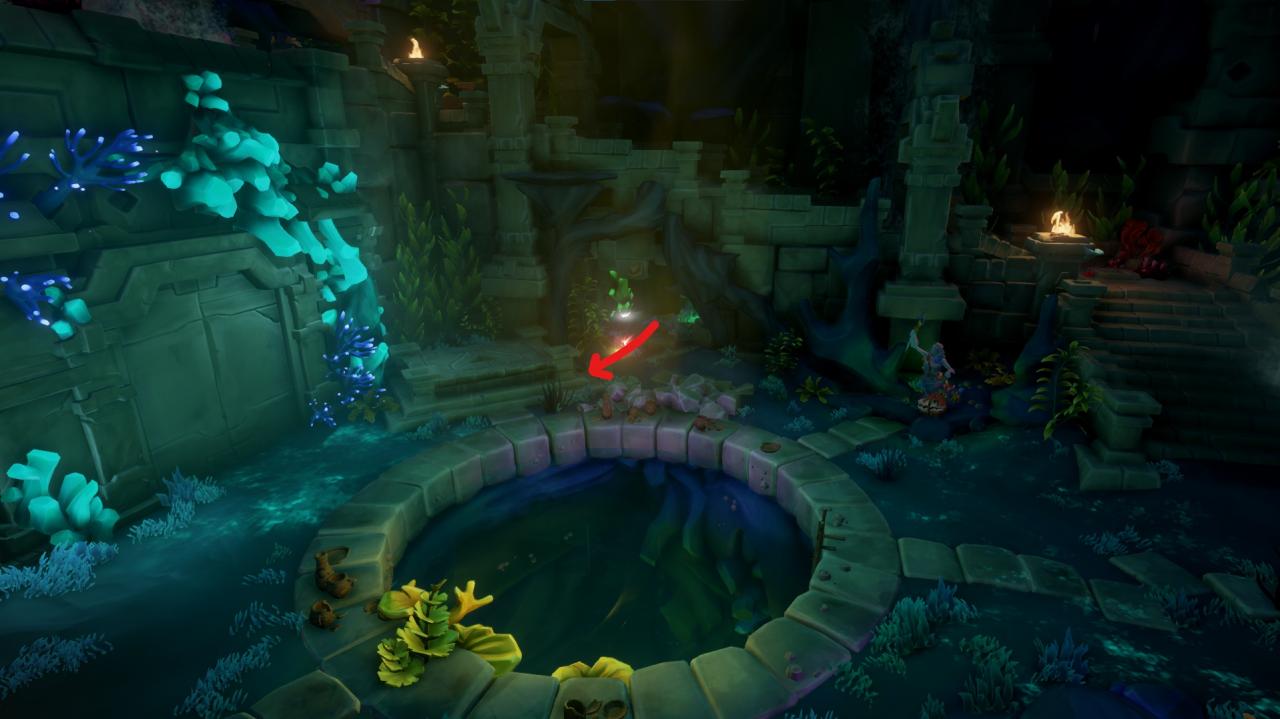
The most mysterious sanctuary. There are a lot of mechanisms inside. Using them, you will unlock new areas of the sanctuary.
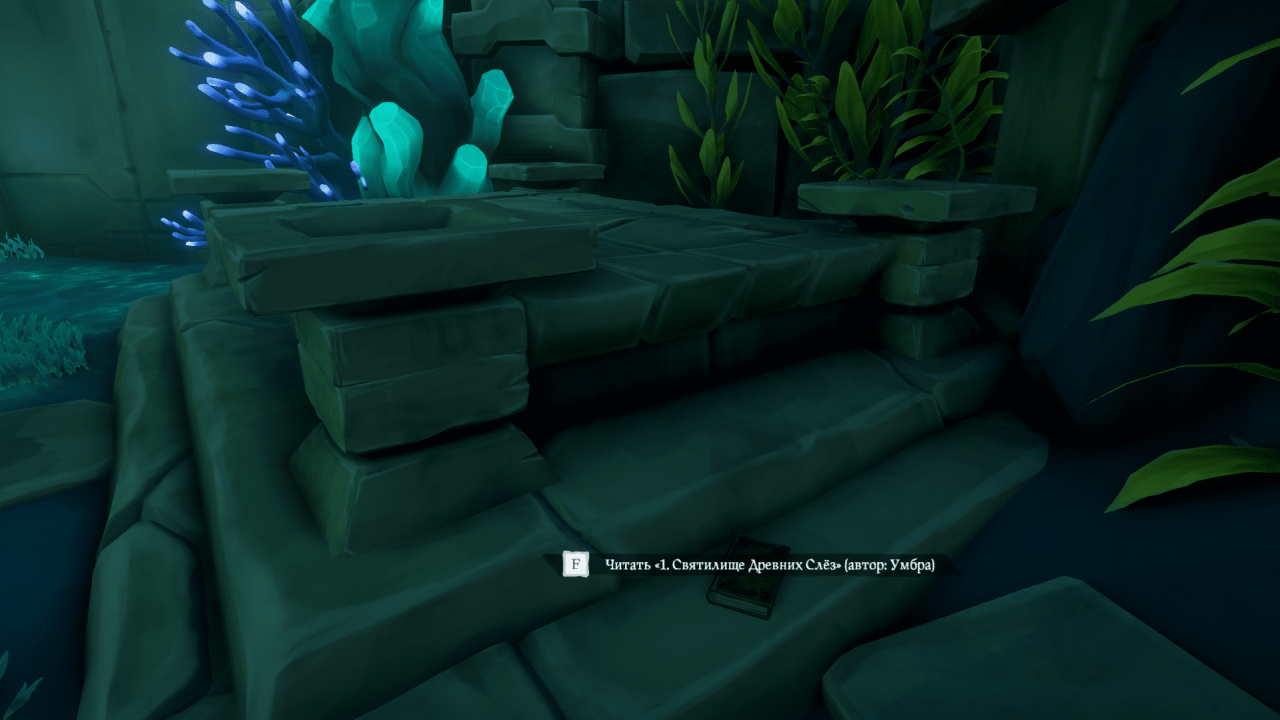
The first diary is in the central hall, near the rock with the Medallion drawing.
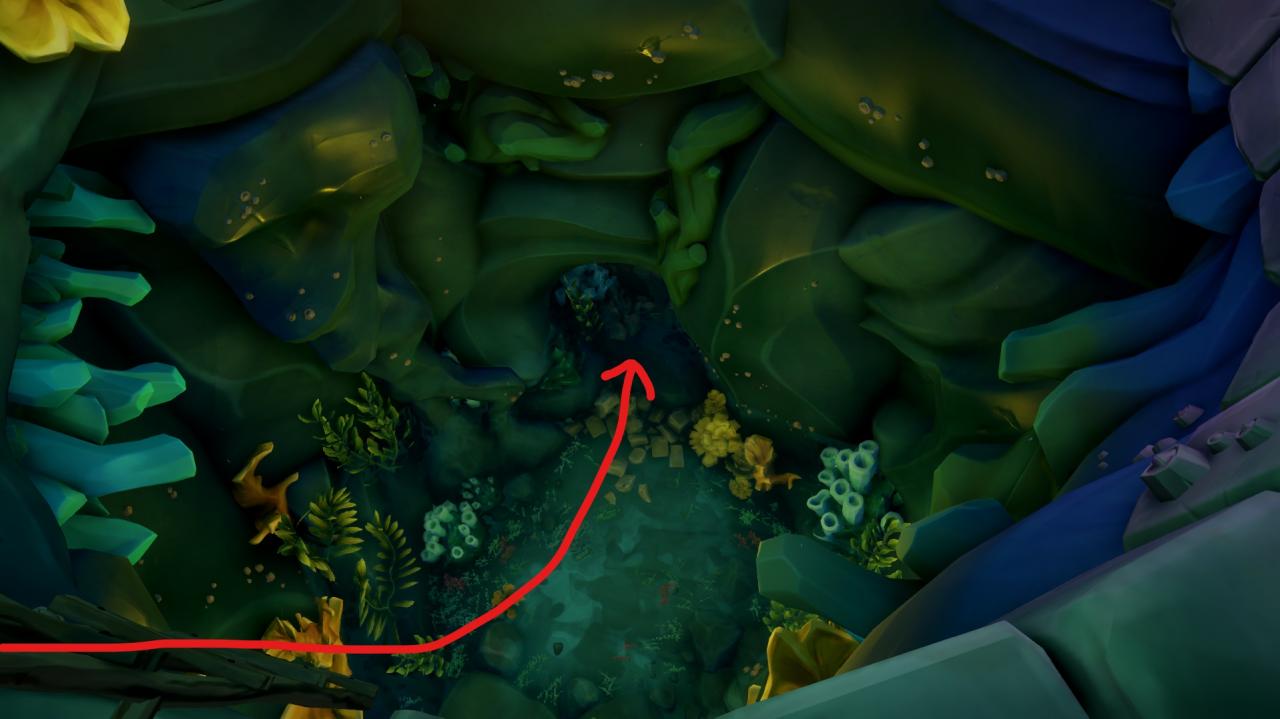
By draining the water using the mechanism, you need to jump down. There is a second diary on the nearest tomb..
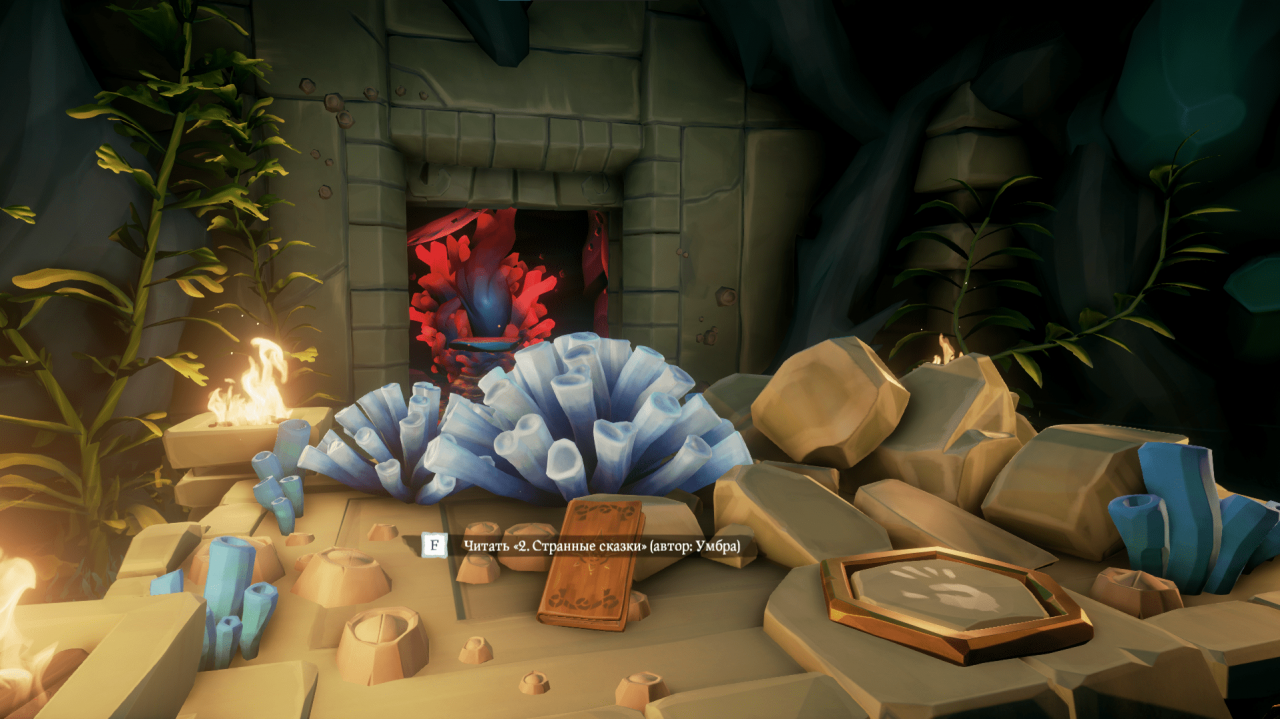
Opening the butterfly wing using mechanisms, need to move on. You will have a right turn. Then another forking. you need to turn right again and reach the end of the passage. The third diary is waiting for you.
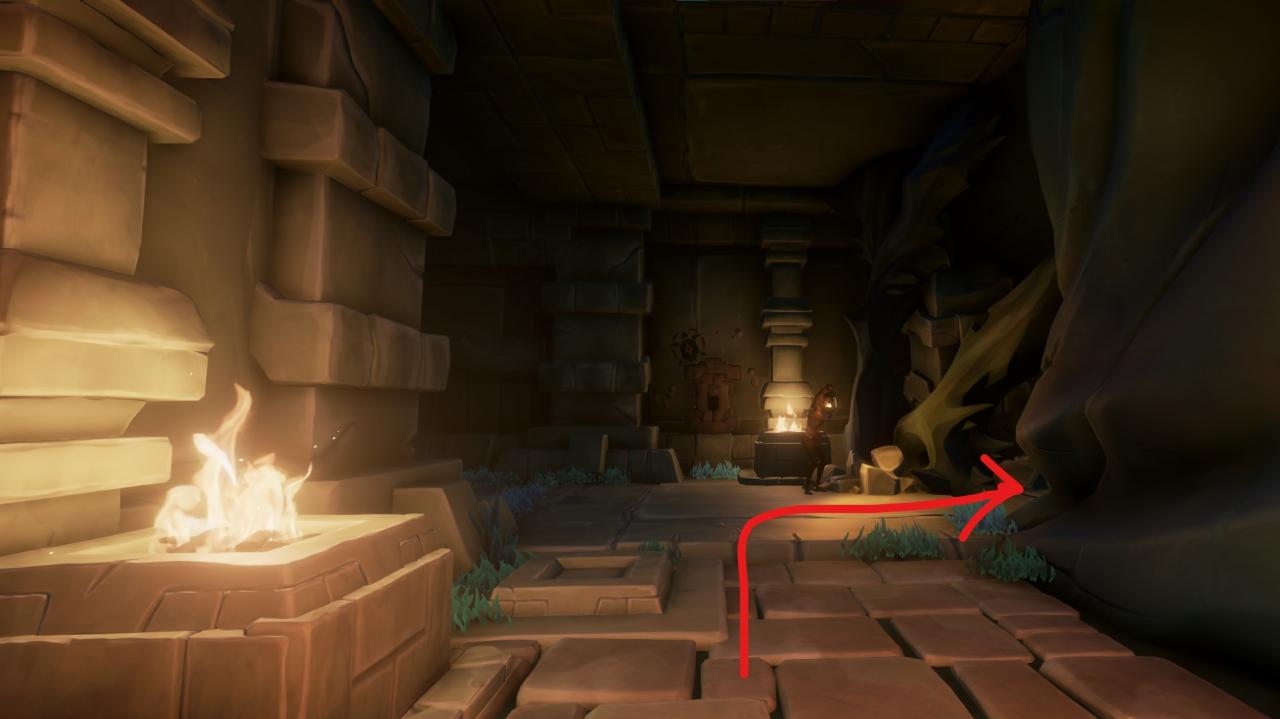
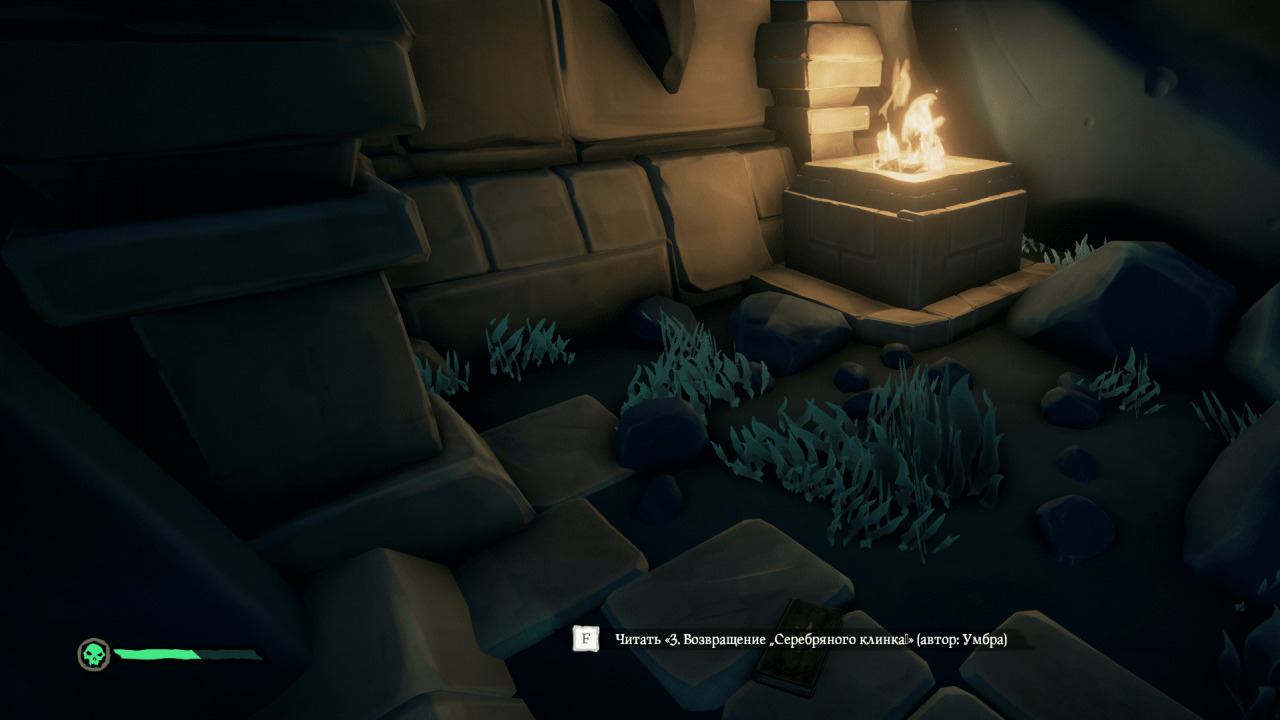
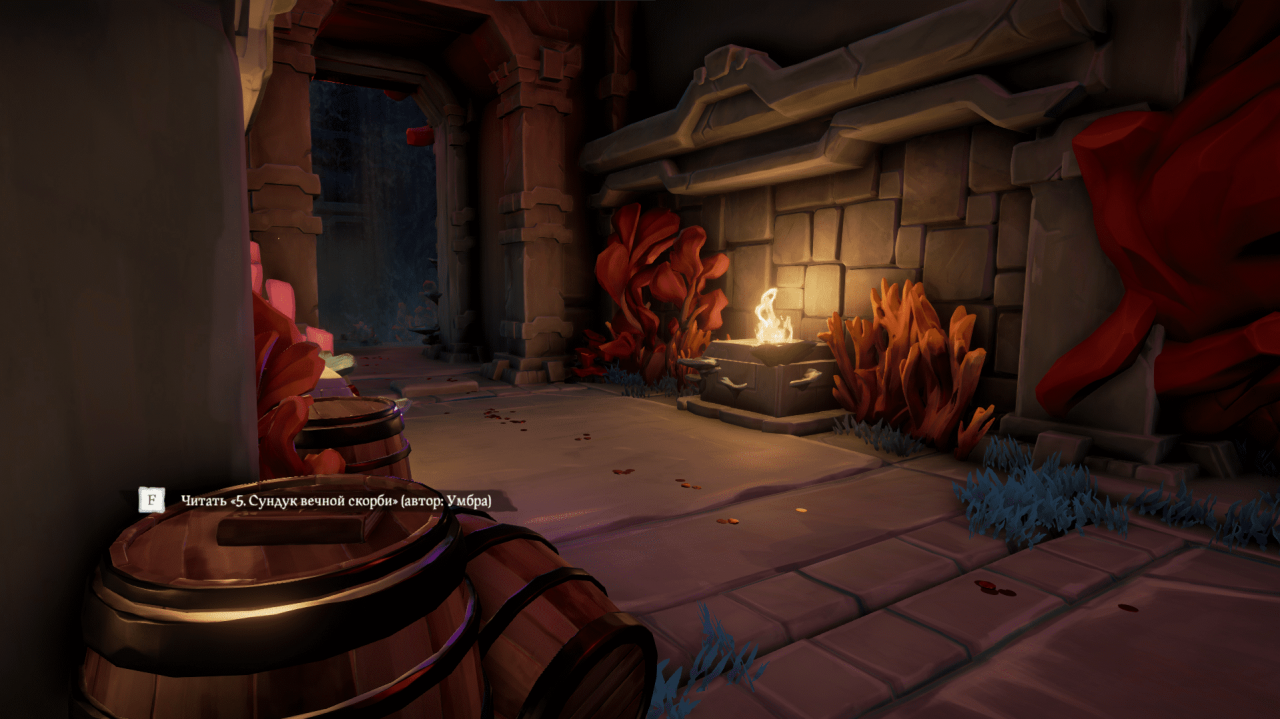
The diary is behind a column of fire “Crab”
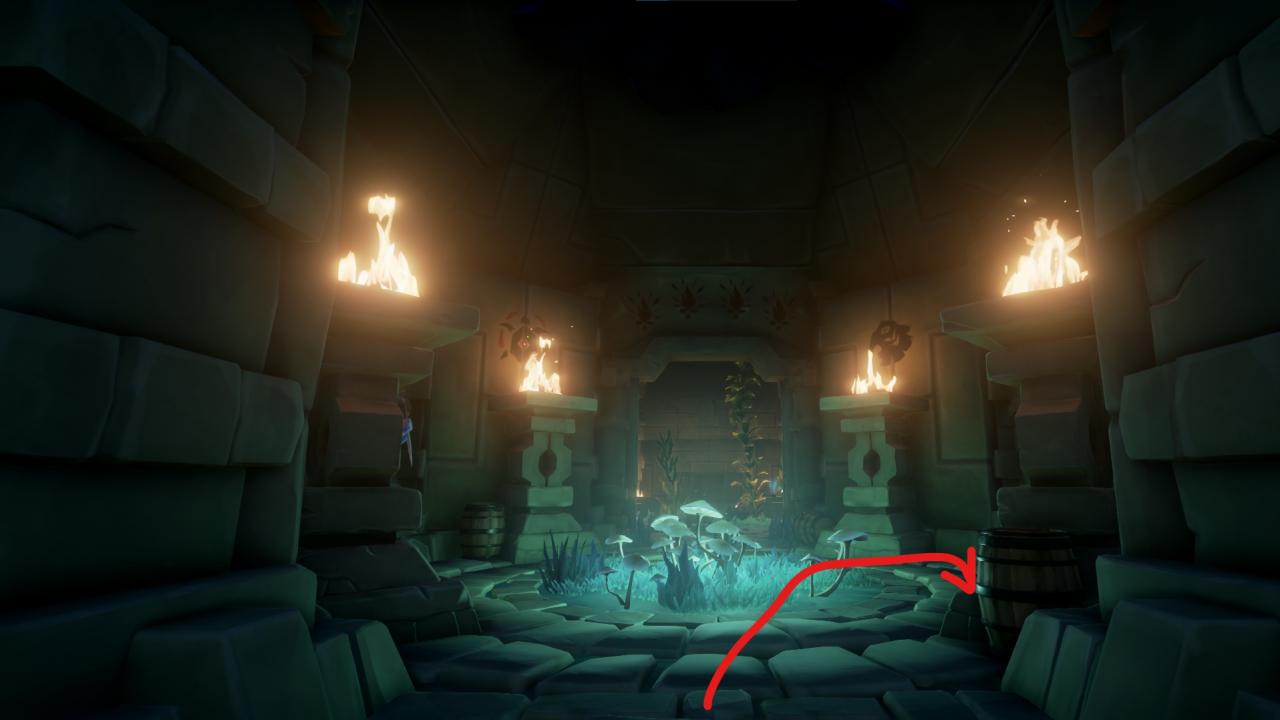
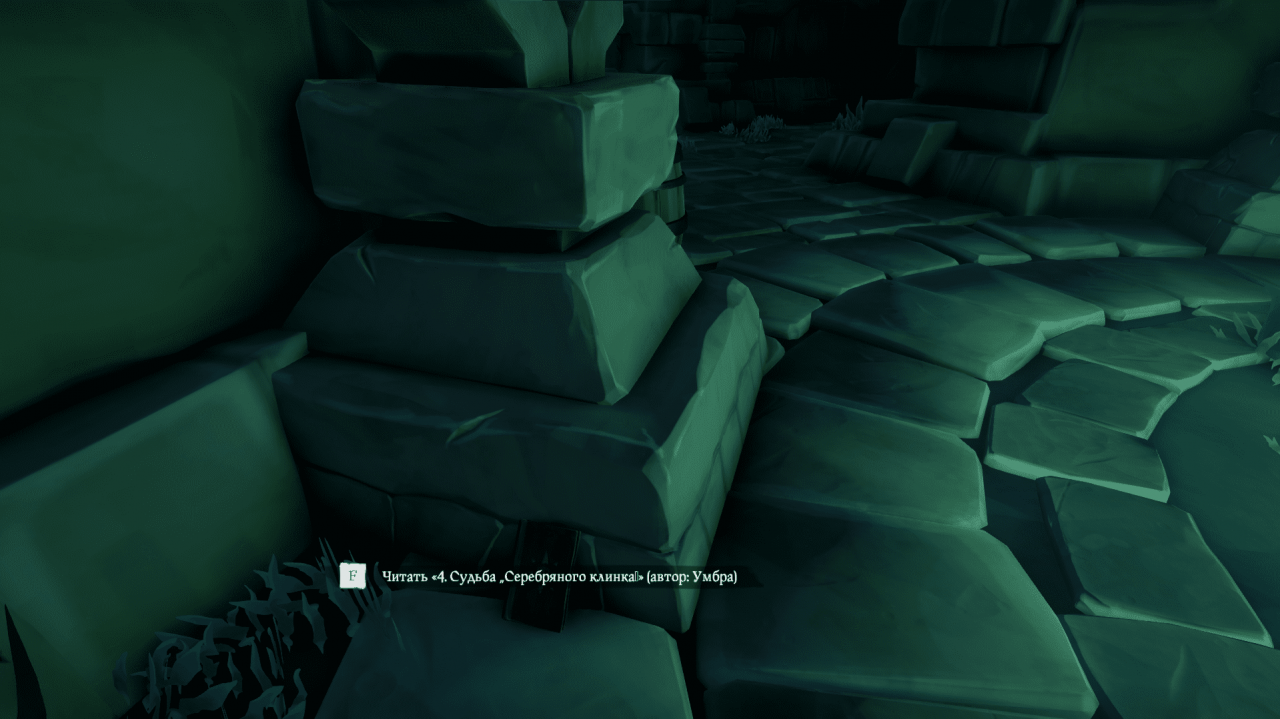
On a barrel, not far from the throne.

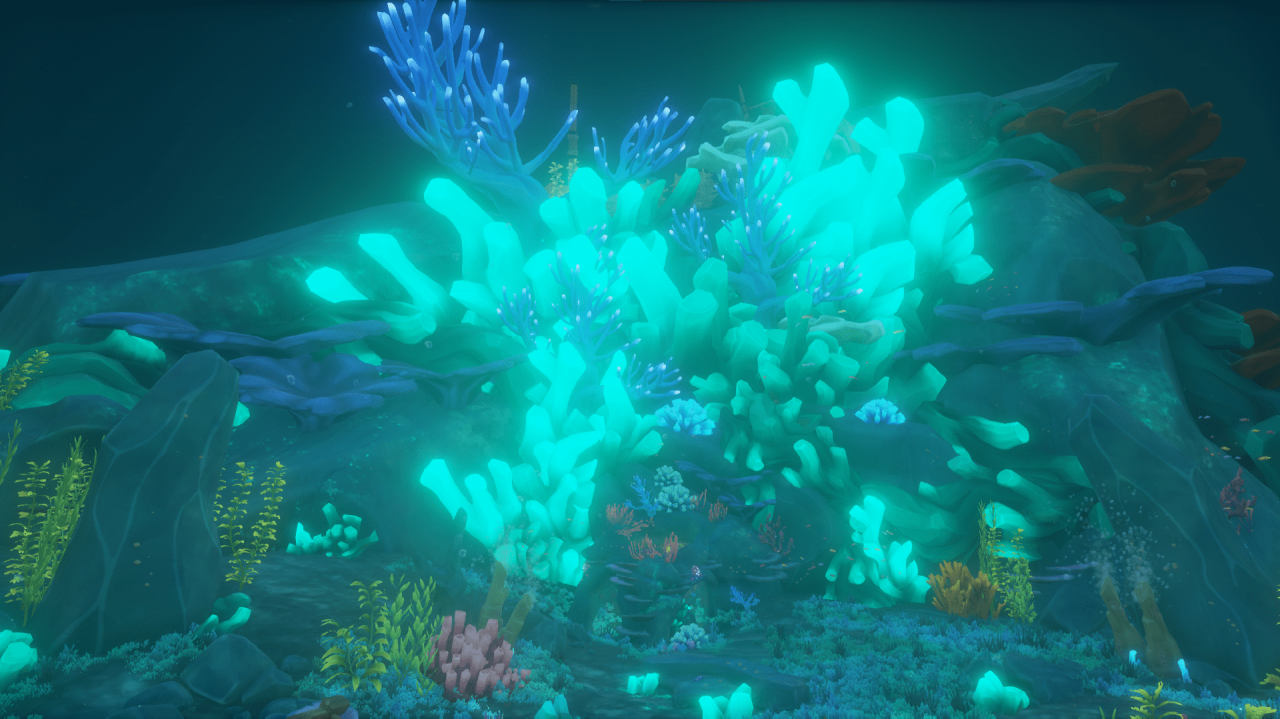
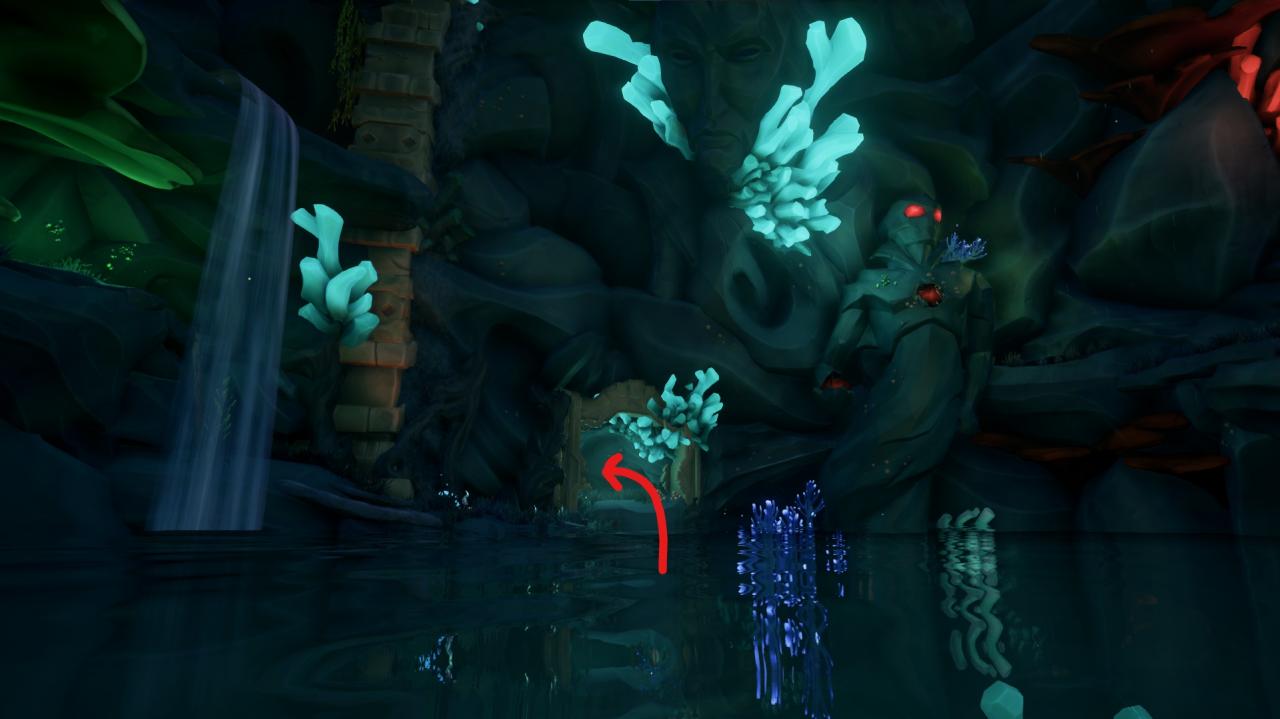
The entrance to the treasury is located on the north side. Or navigate by glowing corals.
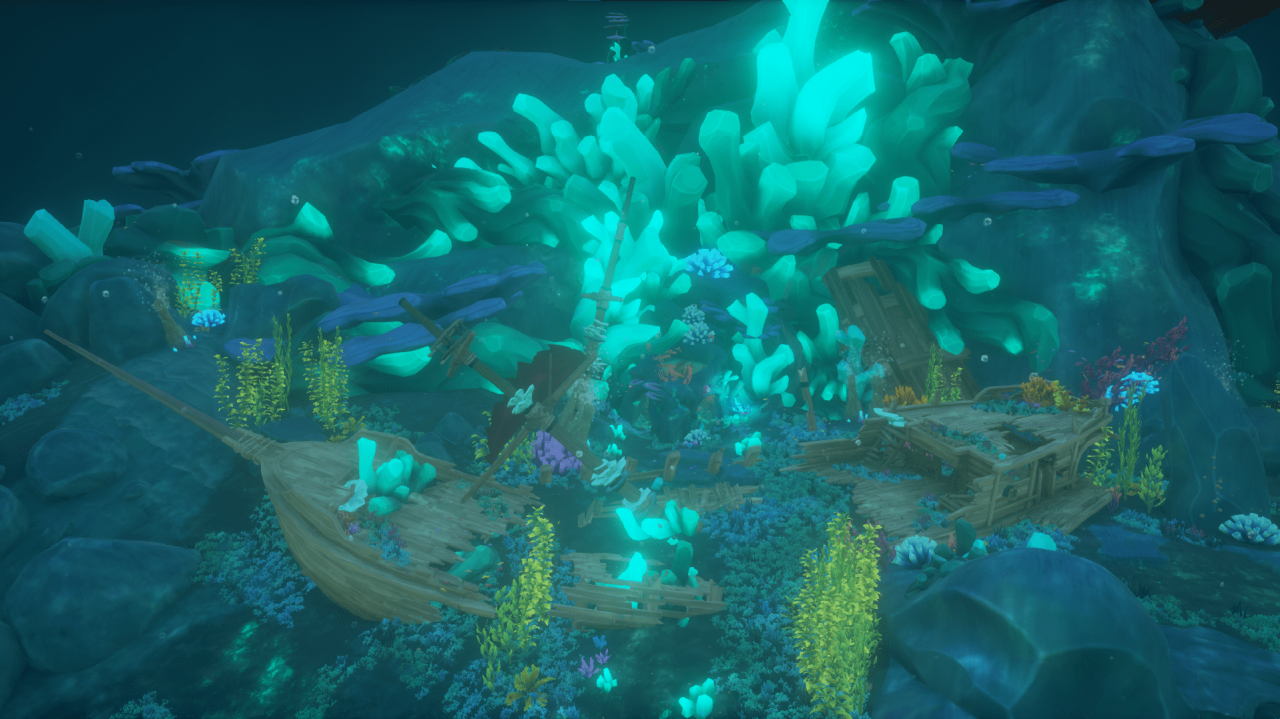
The entrance to the treasury is located on the north side. Or navigate by glowing corals.
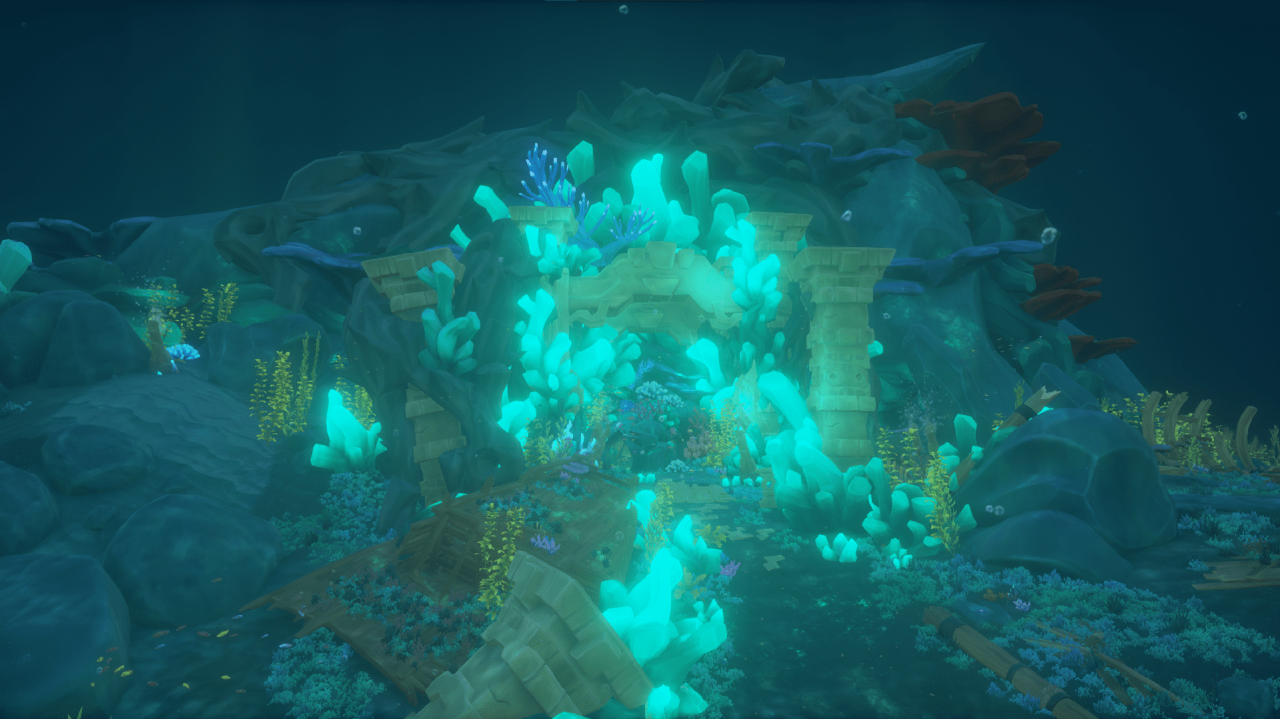
The entrance to the treasury is located on the north side. Or navigate by glowing corals.
A new kind of travel. Looking for “Breath of the sea”
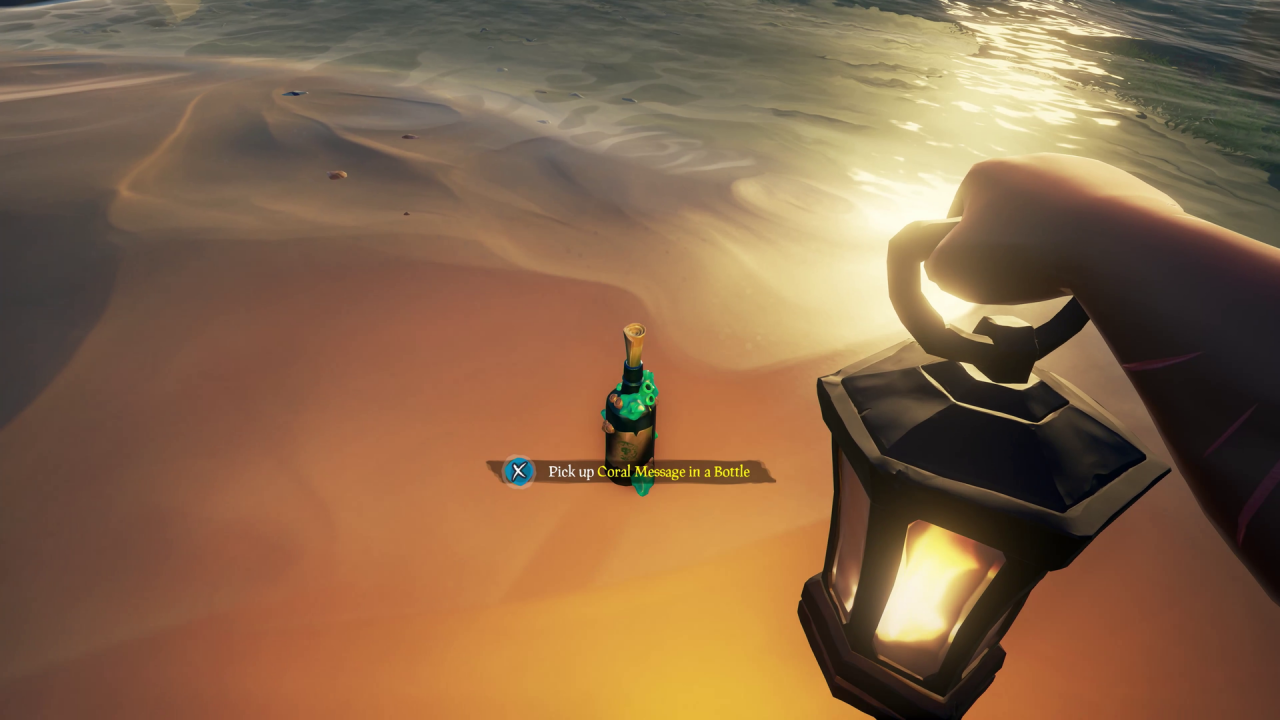
Finding a coral bottle, a note in barrels or a mystery book, you can go to one of nine new locations, to find “Breath of the sea”
From afar, the bottle glows like a sapphire, so it can be easily confused with a gem. Be sure to check what is lit!
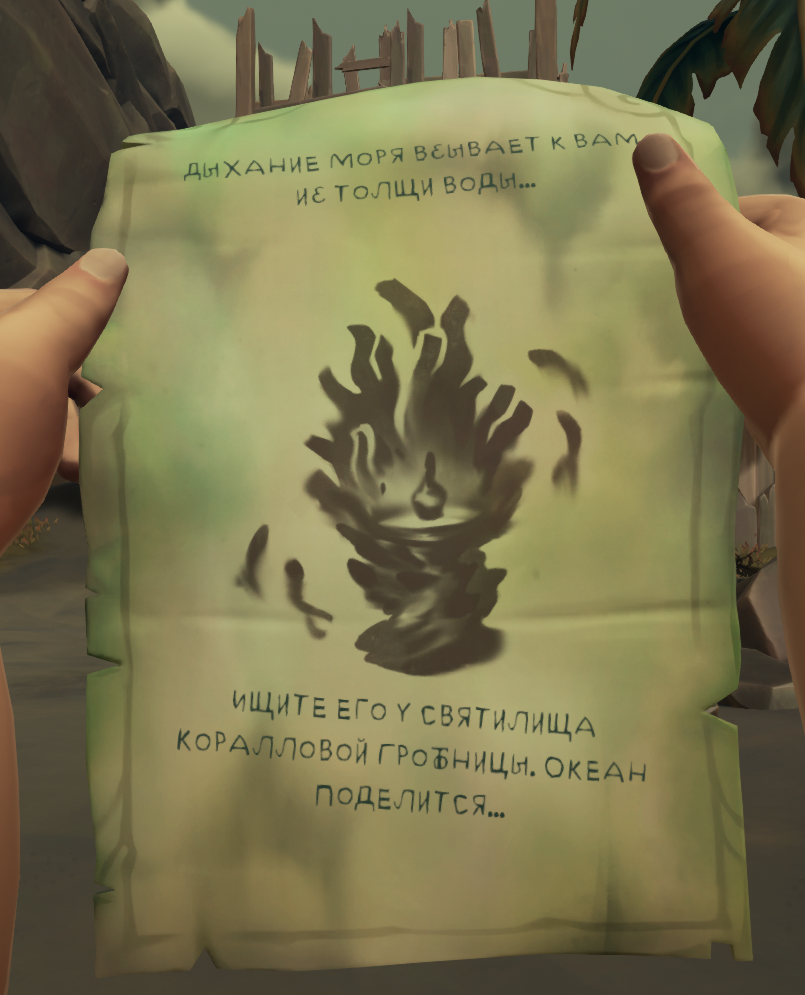
Picking up the task, you, as always, find it in the job selector. The place will be marked on the sheet, where do you need to go.
The breath of the sea is on the coral “throne”, usually at the end of the sanctuary and always in the vault of the underwater treasury.
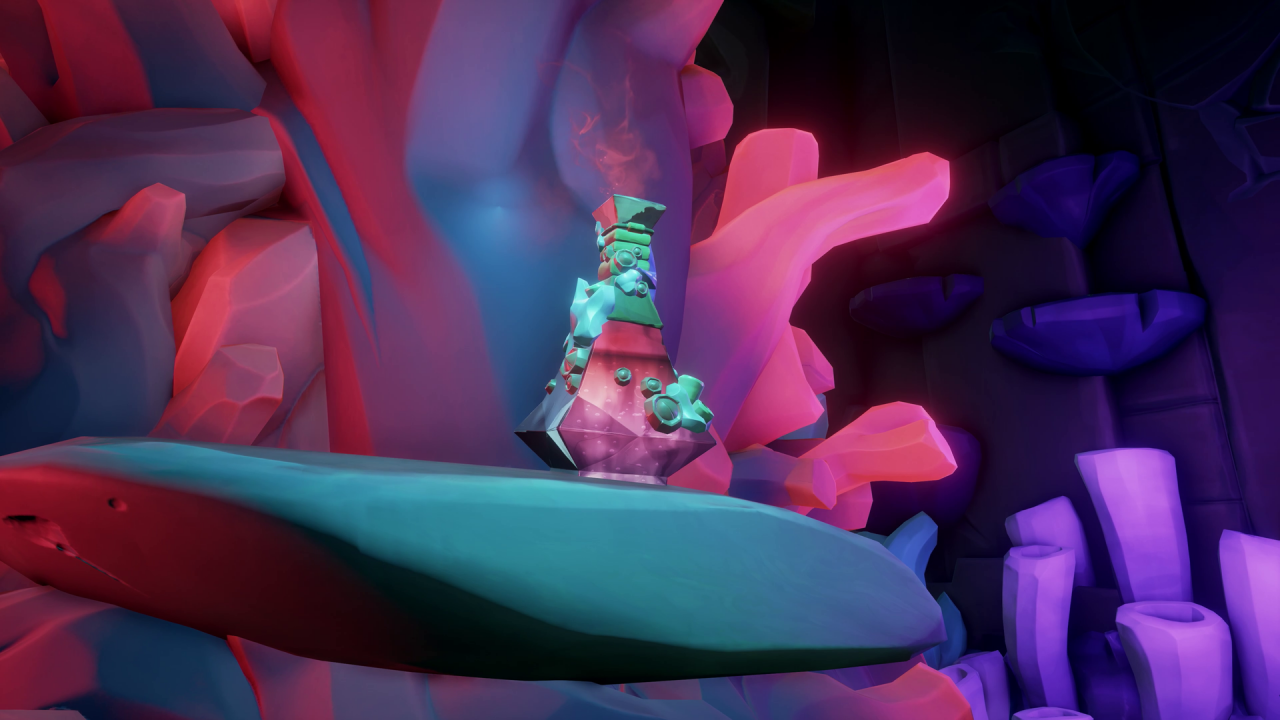
There are three types of:
- Sapphire Breath of the Sea – the cost 4000 gold
- Emerald Breath of the Sea – the cost 6000 gold
- Ruby breath of the sea – the cost 8000 gold
You can sell to any representative of trading companies, except for the Sanctuary of Athena and the Sea Wolves. Breath of the Sea are subject to the emissary sell multiplier for more revenue.

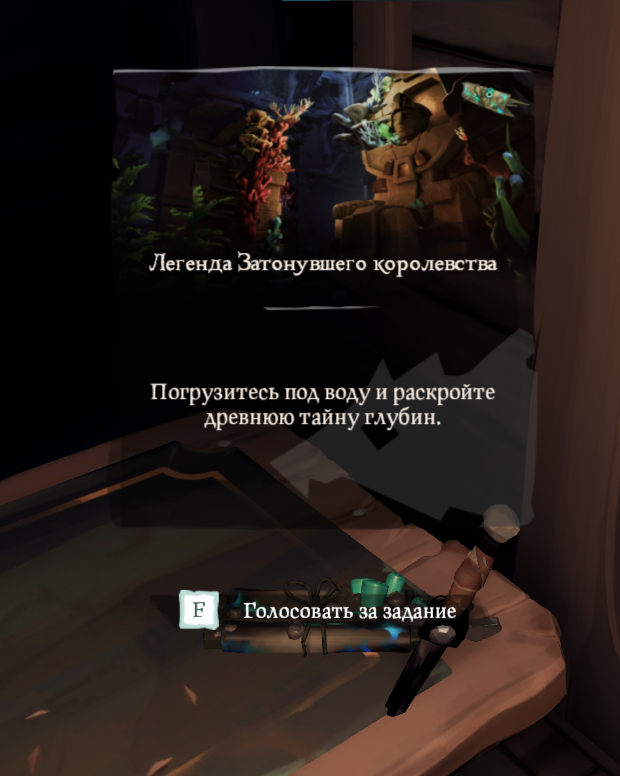 With the update, a new curse has appeared in the game. To unblock it, you need to complete a new task, which can be purchased from Larinna for 50 doubloons.
However, the task itself is initially not available for purchase.. To unblock it, you will need to find ALL diaries from the new update. How to find diaries – read above.
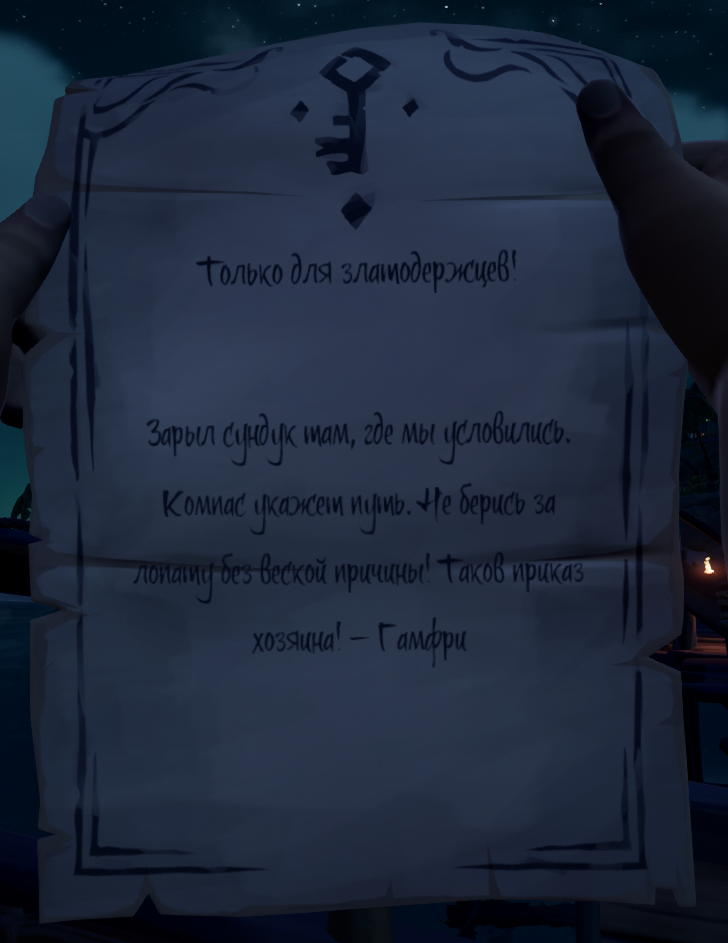
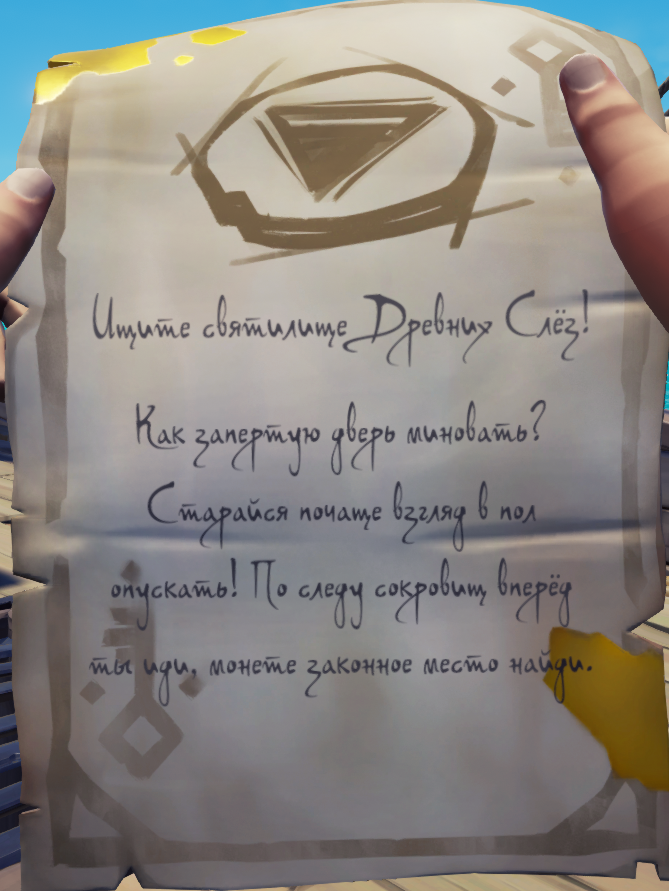
The task is long in time. Starting the task, you will receive a note and a golden compass in your inventory, which indicates the location of the chest. Initially, you will be sent to the next two islands.
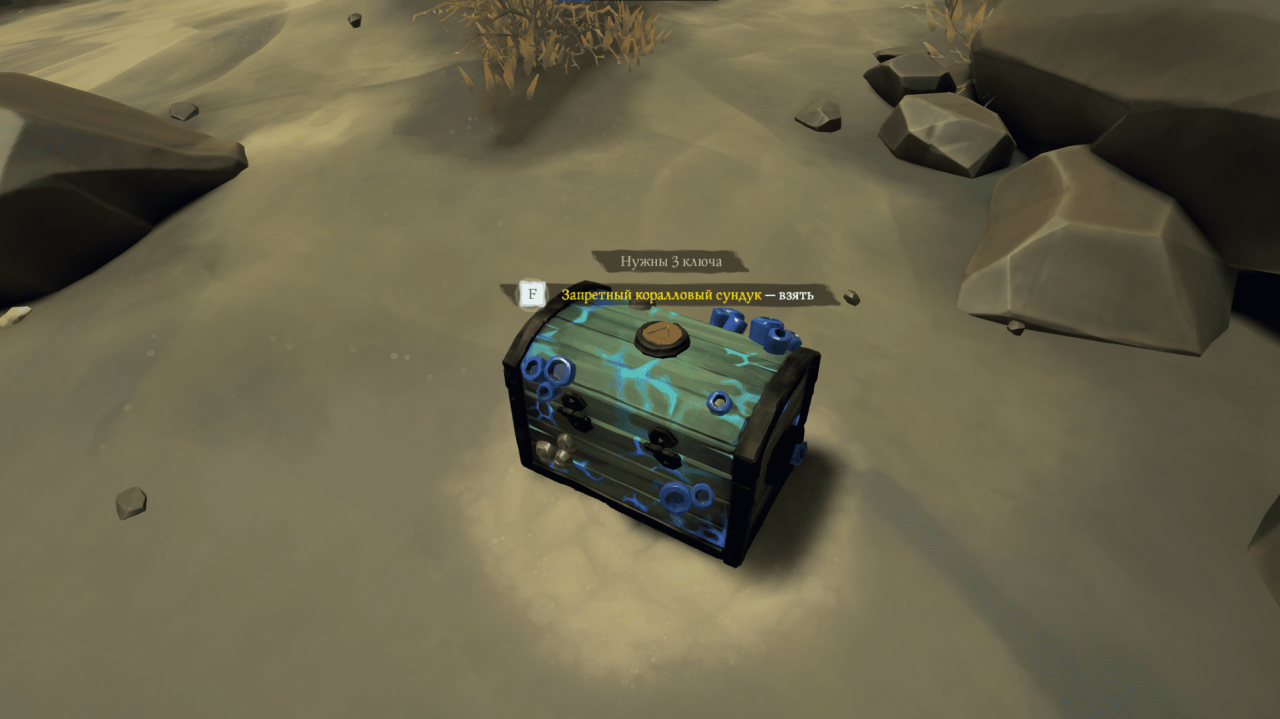
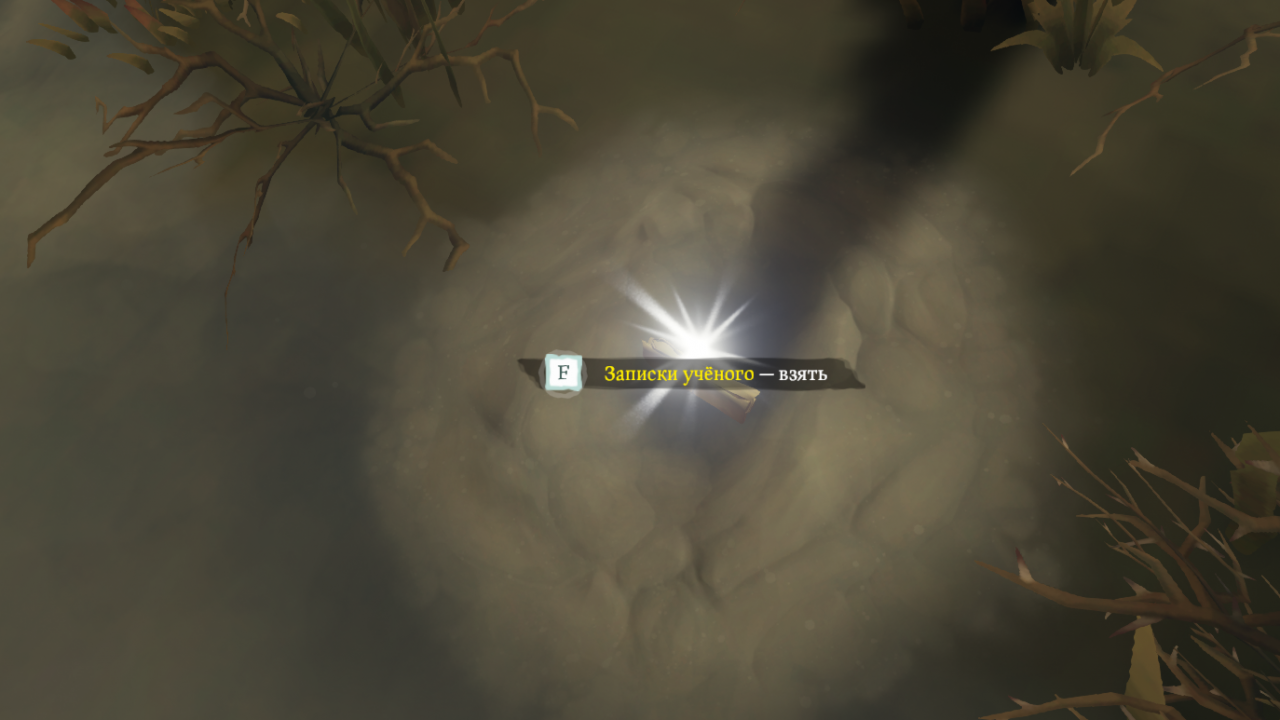
On the first island, you will dig a chest. However, it will be locked. You will need to find the scientist's notes, who knows about the location of the keys. They will be waiting for you on the second island.
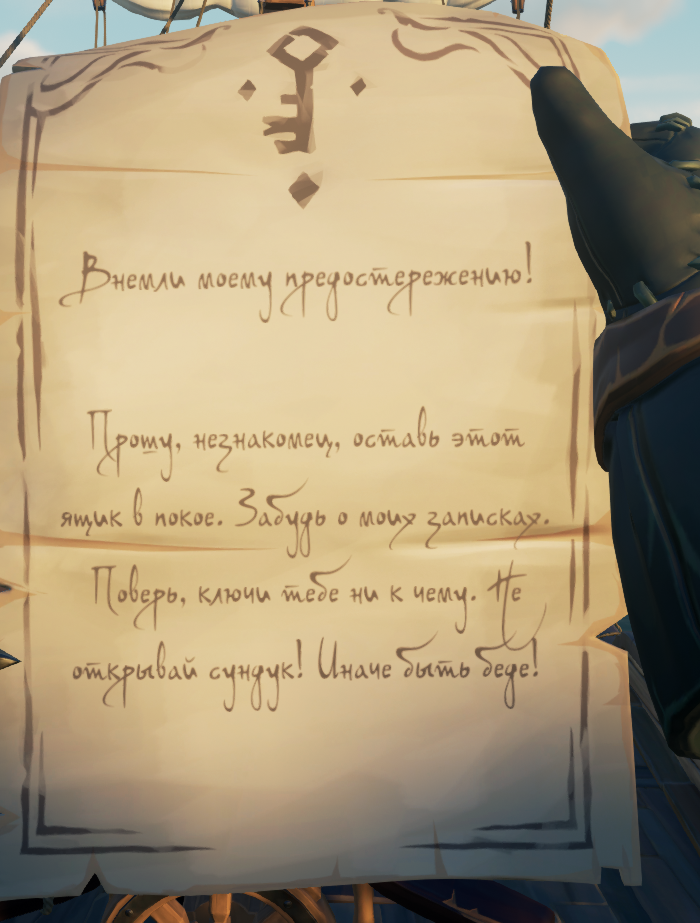 You get two more scraps. One – informational.
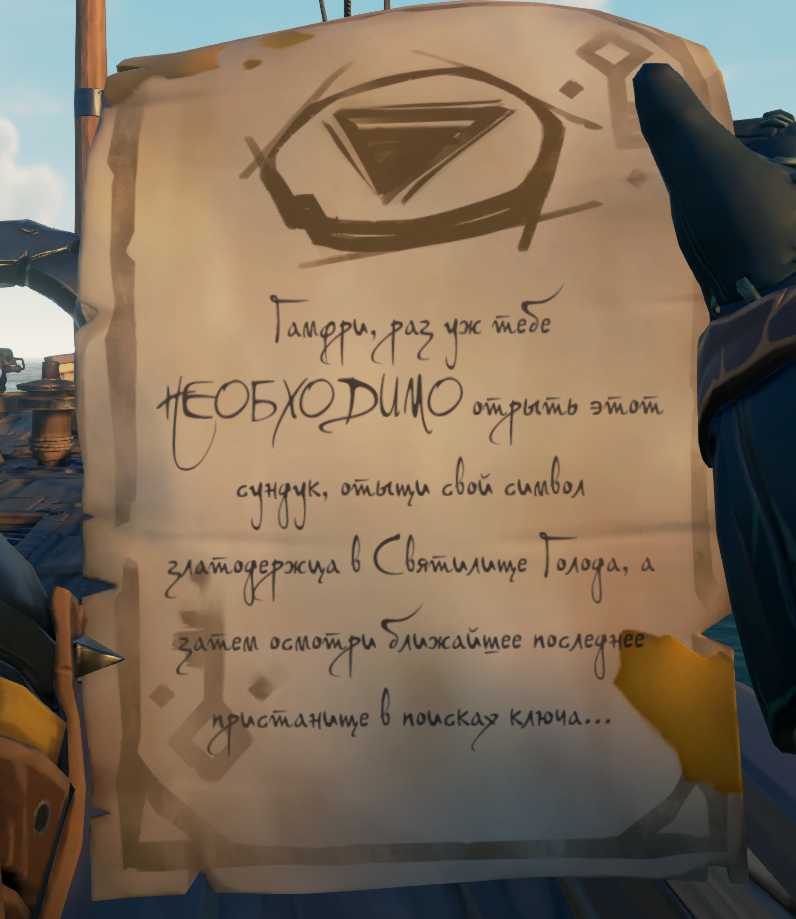
The second – will show you where to sail.
Further travel follows a static scenario.
Sail to the Sanctuary of Hunger and look for the symbol, indicated on the second note. DIVE WITH A CHEST IS NOT NECESSARY!
You need to find the rock with the symbol:
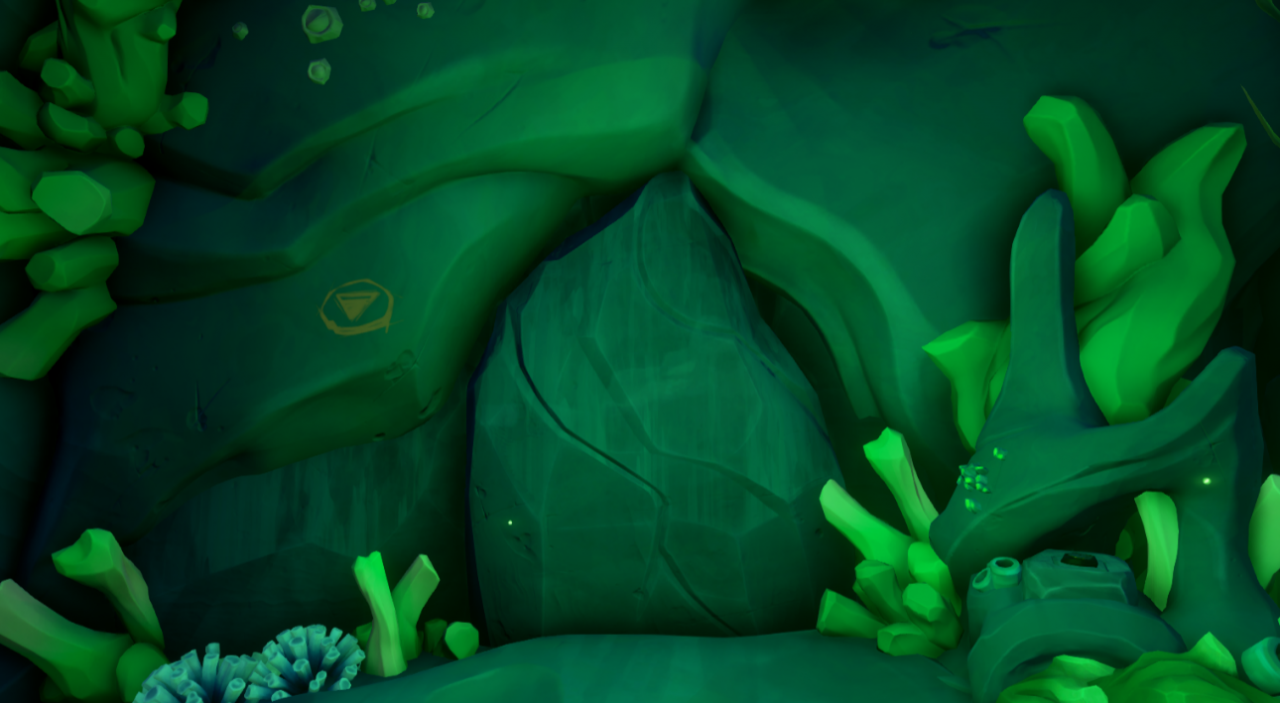
There will be a road of gold coins near the rock. At the end of this path, you will find the Goldkeeper's Medallion., which will need to be used on a pedestal near a rock with a picture. 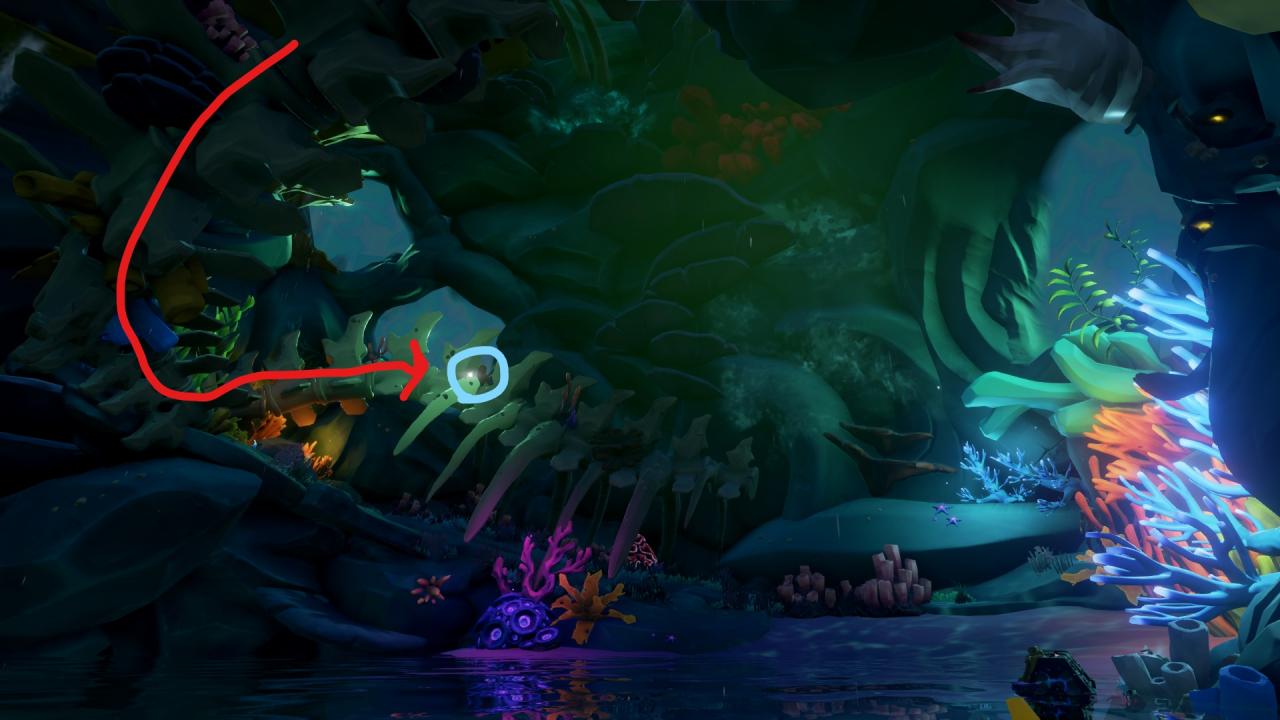
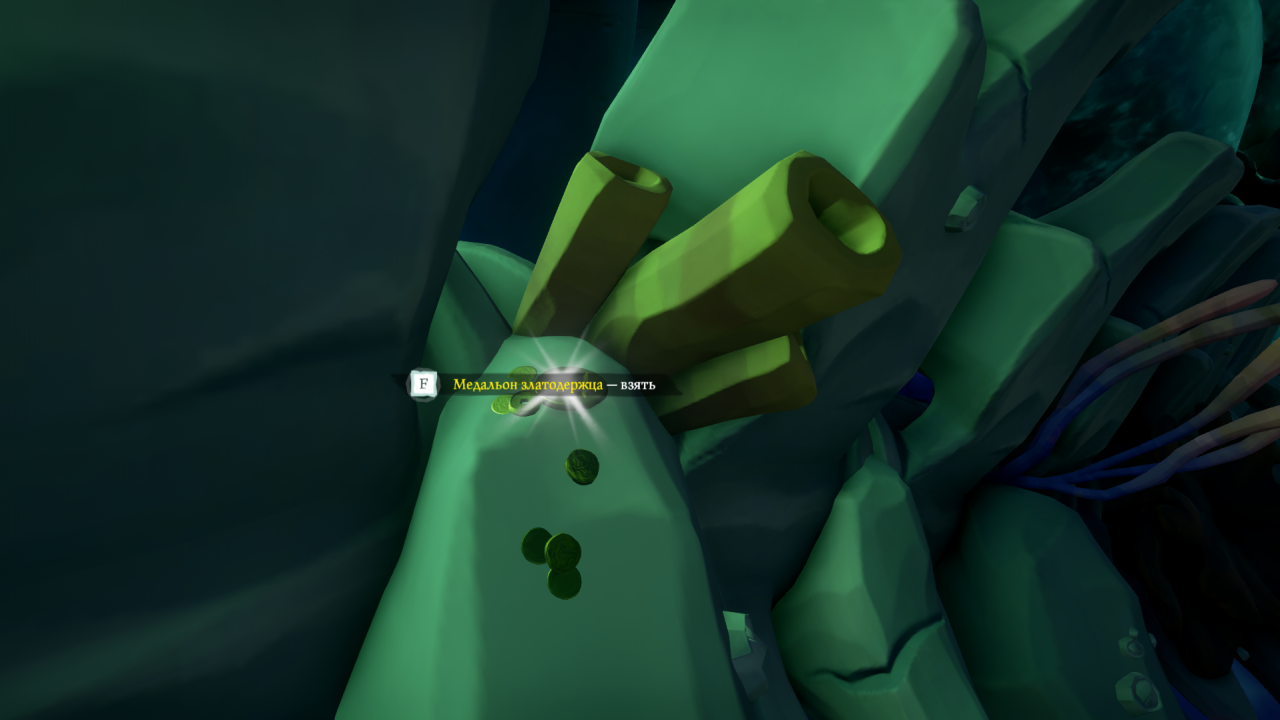
The rock will open, and it will have a key and a new note.
 Further stop: Ocean Destiny Shrine. You will need to climb to the highest point of the sanctuary, which is located after the obstacle course with the steering wheels. There you will find a similar rock with a picture. Walking along the path of coins, you will find a medallion near the fifth diary of this location, on a pale growth.

 You will receive a second clue and a hint, sending you to the third sanctuary: Shrine of Ancient Tears.
ARRIVING AT THE SANCTUARY, SWIM INSIDE WITH THE CHEST! SAVE TIME!
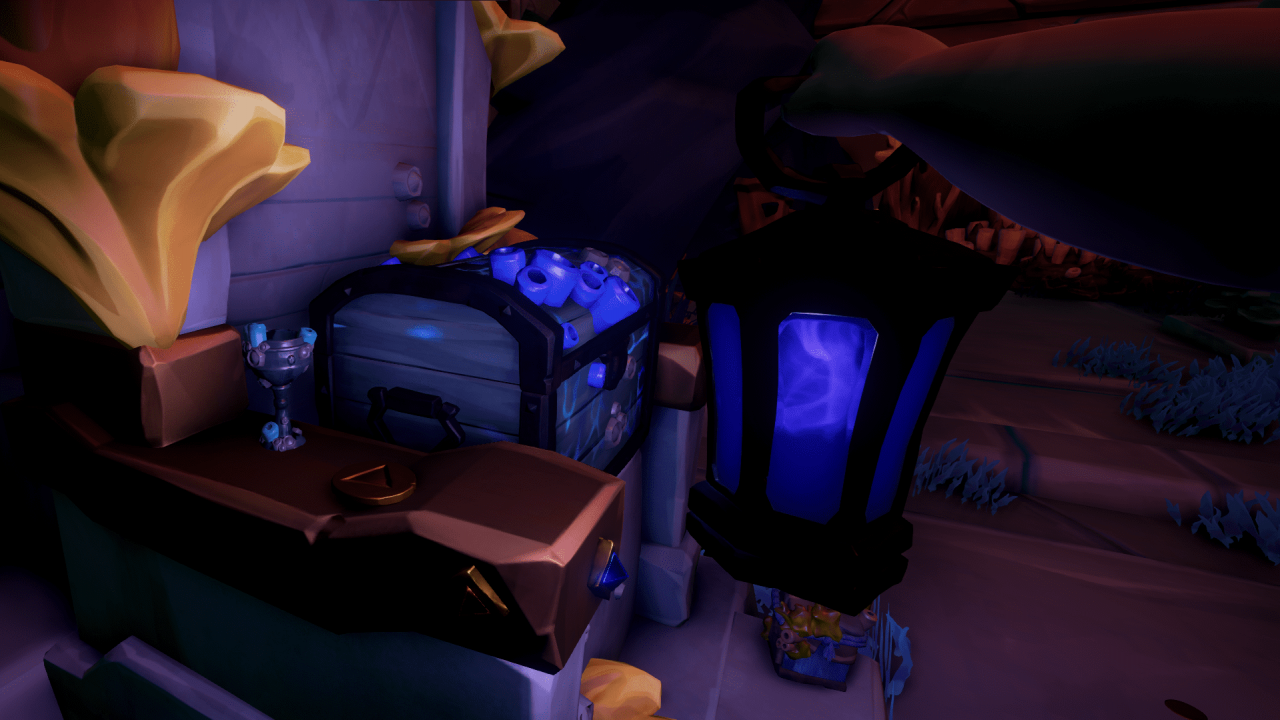
Leave the chest in the central hall. A rock with a medallion pattern is located in the central hall. The medallion is on the arm of the throne, not far from the fifth diary.

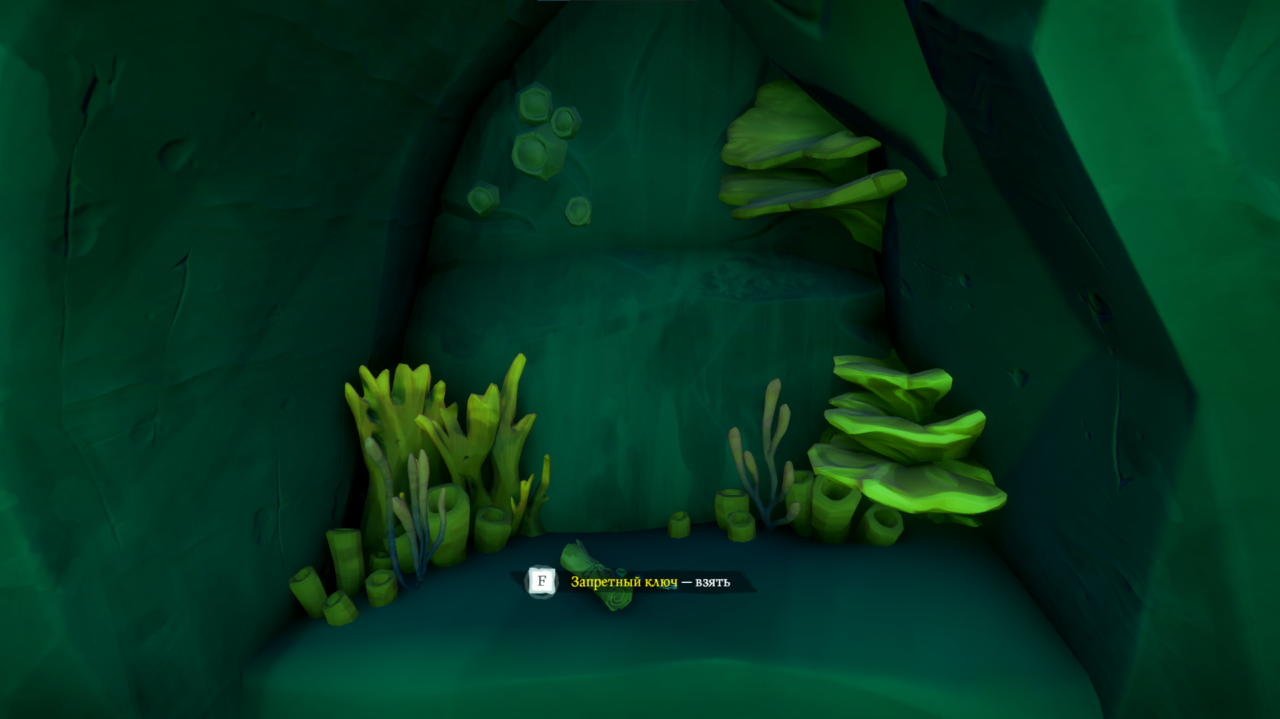
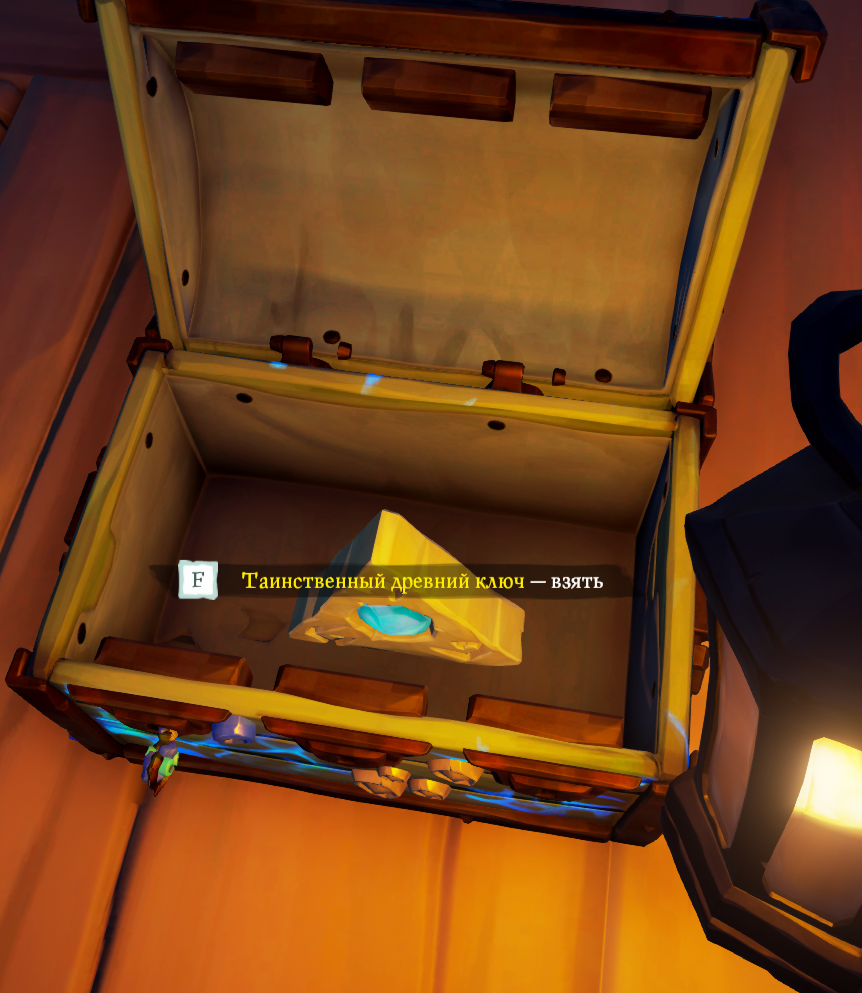 Having obtained the third key, you, finally, will be able to open the chest. In it you will find “Mysterious Ancient Key”
This key must be inserted into the platform, next to the first diary.
The door will open. There is a tomb in the room, as well as a diary revealing lore. After reading the diary to the end, the journey will be considered complete and you will be cursed. You can exit using the lever in the room. You can no longer return to the room, if everyone gets out of it.
Related Posts:
- Sea of Thieves: Guide for beginners, or how to become a storm of the seas
- Pirate wisdom: Sea of Thieves guide and tips
- Sea of Thieves: How to kill a donated skeleton
- Sea of Thieves: A fish. Fishing. Pressing
- Sea of Thieves Crack Guide
Leave a Reply